
Main Courses
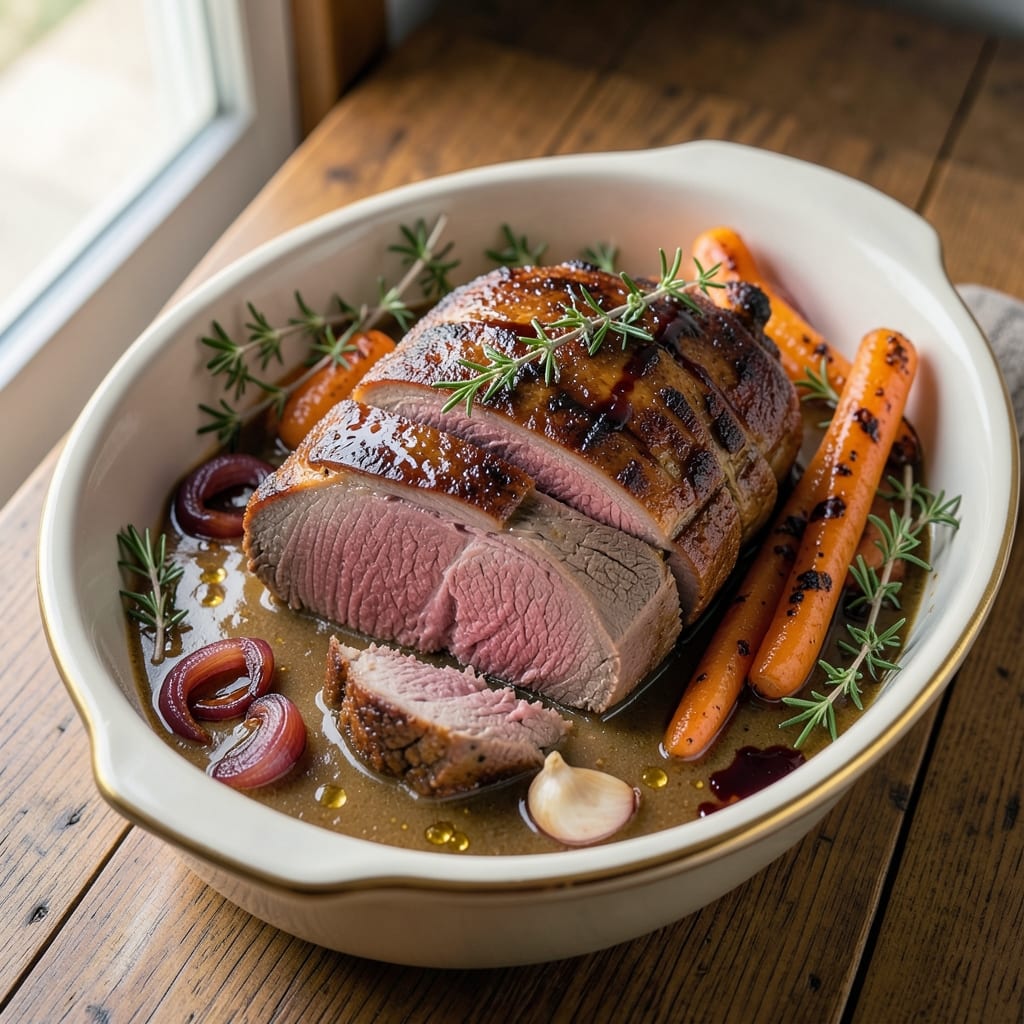
This 5-star beef pot roast recipe transforms tough chuck roast into melt-in-your-mouth perfection through slow braising and precise temperature control. The secret lies in searing the meat first to lock in juices, then letting it braise for hours until it practically falls apart—just like your favorite restaurant. I’ve perfected this method after years of testing, and it consistently delivers a dish so rich and tender, guests will assume you’ve been cooking for decades.
The process begins with a deep, flavorful brown sear that builds a crust on the meat, while aromatic vegetables and herbs infuse the braising liquid with depth. After hours of slow cooking, the beef becomes so tender it shreds easily, and the resulting gravy is thick, velvety, and packed with flavor. This isn’t just a pot roast—it’s a centerpiece-worthy meal that feels like a five-star dining experience at home.
What sets this recipe apart is the attention to detail: from the initial sear to the final resting time, every step ensures maximum tenderness and rich flavor. The result is a dish that’s hearty enough for a Sunday dinner but elegant enough for company, served with creamy mashed potatoes or crusty bread to soak up every last bit of that luxurious gravy. Once you try this, store-bought pot roast will never compare.
This method is designed for confidence—no guesswork, no second thoughts. Follow the steps precisely, and you’ll achieve restaurant-quality results every time. The key is patience and precision, but the reward is a dish that tastes like it’s been simmering all day, even if you’re short on time. Let’s get started on creating a pot roast worthy of five stars.
Ingredients for 5 star beef pot roast
Six ingredients make the base, plus a few pantry staples for that five-star finish.
| Ingredient | Amount | Notes |
|---|---|---|
| Chuck Roast 🥩 | 3 lb | Well-marbled, 2-3 inch thick |
| Yellow Onions 🧅 | 2 whole | Cut into 1-inch chunks |
| Carrots 🥕 | 4 whole | Cut into 2-inch pieces |
| Garlic Cloves 🧄 | 6 cloves | Smashed, not minced |
| Fresh Thyme 🌿 | 2 sprigs | Stems removed |
| Fresh Rosemary 🌿 | 1 sprig | Woody stems removed |
| Beef Broth 💧 | 3 cups | Low-sodium preferred |
| Red Wine 🍷 | 1 cup | Bold, dry variety |
| Tomato Paste 🍅 | 2 tbsp | Smooth, not chunky |
| Olive Oil 🫒 | 2 tbsp | Extra-virgin for searing |
| All-Purpose Flour 🌾 | 2 tbsp | For gravy thickening |
| Salt 🧂 | 1 ½ tsp | Kosher or sea salt |
| Black Pepper 🌶️ | 1 tsp | Freshly ground |
| Bay Leaves 🍃 | 2 whole | Removed before serving |
The chuck roast is non-negotiable here—look for good marbling at the butcher counter, and ask for a 2-3 inch thick cut. Costco or local butchers usually have the best selection. That marbling is what melts into buttery richness during braising. If you can't find chuck, bottom round works too, but it won't be as tender. For the vegetables, organic carrots stay crisp longer, but regular ones work fine. The fresh herbs? Trader Joe's has great bundles, but even the sad grocery store sprigs will do in a pinch—just use twice the amount of dried if you're substituting.
No red wine? Substitute with beef broth and a splash of balsamic vinegar—it's a game-changer for depth. Fresh thyme and rosemary are ideal, but dried works at half the amount. The tomato paste can be the squeeze tube kind from Trader Joe's—no waste, and it keeps forever. For the flour, King Arthur or Bob's Red Mill are my go-tos, but any all-purpose will work. The bay leaves? Remove them before serving—nobody wants to chew on them. And if you're short on time, sear the meat ahead and refrigerate overnight—it makes the final braise even more tender.
This dish tastes better the next day, so plan ahead. The braised beef keeps for 4-5 days in the fridge, and the gravy freezes beautifully for 3 months. I always make extra—portion into containers for easy lunches. The vegetables can be prepped ahead too; just store them in the fridge until you're ready to sear. For serving, warm the mashed potatoes or crusty bread separately—this roast is all about that rich gravy, so don't skimp on the sides.
Why You'll Love This Recipe
- One-Pan Magic: I swear by this recipe because it’s the kind of meal where you dump everything in one pot and walk away. No chopping boards, no separate pans—just chuck roast, onions, carrots, and garlic simmering together until the kitchen smells like Sunday dinner.
- Flavor Bomb: That crispy, caramelized crust on the beef? It’s all thanks to the garlic and thyme working their magic. Between us, the first bite is the moment my kids forget I said “no dessert”—and honestly, that’s a win.
- Budget Hero: Chuck roast is my wallet’s best friend—affordable, forgiving, and packed with flavor. Pair it with onions and carrots (both cheap and versatile), and you’ve got a meal that feels fancy without the grocery bill. Plus, it’s the kind of dish that makes even the simplest weeknight feel special.
Step-by-step instructions for slow-braised pot roast
Here's how to transform tough chuck roast into melt-in-your-mouth perfection with rich, aromatic flavors.
Sear the Chuck Roast for Deep Flavor
Pat the 3 lb chuck roast completely dry with paper towels—this is crucial for that golden crust. Heat 2 tablespoons olive oil in a large Dutch oven over medium-high heat until shimmering. Place the roast in the pot, fat-side down, and sear undisturbed for 5 minutes until deeply browned. Flip and sear the other side for another 5 minutes.
While the roast browns, add 2 whole yellow onions and 4 whole carrots to the pot, turning occasionally, until they begin to soften slightly (about 5 minutes). Remove the vegetables and set aside. The searing step develops the Maillard reaction, creating complex flavors that'll infuse the entire dish. Don't rush this—patience here makes all the difference.
Build the Aromatic Base
Add 6 smashed garlic cloves, 2 sprigs fresh thyme, 1 sprig fresh rosemary, and 2 whole bay leaves to the Dutch oven. Stir for 30 seconds until fragrant. Pour in 1 cup red wine and scrape up all those delicious browned bits from the bottom—this is called deglazing and captures all the flavor you worked so hard to create.
Simmer the wine mixture for 3-4 minutes until reduced by half. Stir in 2 tablespoons tomato paste and cook for 1 minute to deepen the sauce's richness. Here's where the magic happens—the wine's acidity and the tomato paste's intensity form the flavor foundation for the entire roast.
Slow-Braise Until Fork-Tender
Return the roast to the Dutch oven along with the onions and carrots. Pour in 3 cups beef broth, sprinkle with 1.5 teaspoons salt and 1 teaspoon black pepper, then bring to a gentle simmer. Cover tightly with a lid and transfer to a 325°F preheated oven. Braise for 3 hours, then carefully flip the roast and braise another 1 hour.
The key here is low and slow—this long cooking time breaks down the tough connective tissues, transforming the meat into tender, buttery shreds. Check the internal temperature occasionally; it should reach 200-205°F when done. You'll know it's perfect when a fork slides through like butter with no resistance. Real talk: Don't peek at the roast during cooking—every time you open the lid, you lose heat and moisture.
Thicken the Sauce and Rest the Roast
Remove the roast from the pot and transfer it to a cutting board. Strain the cooking liquid through a fine-mesh sieve into a clean saucepan, pressing on the vegetables to extract all their flavor. Return the liquid to the Dutch oven over medium heat and whisk in 2 tablespoons all-purpose flour to thicken the sauce. Simmer for 3-5 minutes until the sauce coats the back of a spoon.
Slice the roast against the grain into ¼-inch thick pieces and return it to the pot, spooning the thickened sauce over the top. Let it rest for 10 minutes before serving—this allows the juices to redistribute throughout the meat, ensuring each bite is moist and flavorful. The roast should have a deep mahogany color and the sauce should be rich and velvety, clinging beautifully to every piece of meat.
Serve with Crisp Vegetables
Transfer the roast and sauce to a serving platter, arranging the sliced meat and vegetables attractively. Garnish with fresh thyme sprigs for a pop of color. Serve immediately with the crisp roasted vegetables on the side—this contrast of textures and temperatures makes every bite even more satisfying.
You've just created a restaurant-quality pot roast that'll have everyone asking for seconds. The secret lies in that perfect sear, the slow braising process, and letting the meat rest before serving. This isn't just dinner; it's an experience that'll make your pot roast the star of the meal.
Pro Tips For Making 5 Star Beef Pot Roast
- SEAR THE CHUCK HARD: I learned this the hard way—skipping the deep sear means flavor gets lost in the slow cook. Use a heavy pot (Dutch oven if you have one) and let the roast sit undisturbed for 4-5 minutes per side until it’s deep brown, almost black in spots. That crust locks in juices and builds the foundation for your 5-star flavor.
- CHOP ONIONS LARGE: Thinly sliced onions turn to mush and disappear. Cut them into ½-inch chunks—they’ll caramelize beautifully and stay intact long enough to tenderize the meat. (Yes, even if you’re impatient like me, resist the urge to dice them smaller.)
- SALT THE MEAT BEFORE SEARING: More salt than you think—about 1½ teaspoons per pound—goes on the roast before it hits the pan. This seasoning penetrates the surface while the crust forms, so it’s not just flavor on top. (Your future self will notice the difference.)
- ADD CARROTS LAST: I skip this when I’m lazy, but the dish is noticeably better when I don’t. Toss carrots in halfway through cooking—they’ll soften just enough to absorb the roast’s juices without turning to mush. (Pro move: Peel them first to save time.)
Best sauces and condiments for this dish
Classic Red Wine Gravy
The rich, velvety gravy from this recipe is the star—it’s built directly from the braising liquid, so every spoonful carries deep, complex flavors. After removing the roast, strain the cooking liquid through a fine-mesh sieve to remove any solids, then return it to the Dutch oven. Whisk in 2 tablespoons all-purpose flour to thicken while simmering over medium heat for 3-5 minutes. The red wine you used earlier adds a subtle acidity that brightens the sauce, while the tomato paste deepens its richness. For extra depth, add 1 teaspoon Worcestershire sauce or a pinch of smoked paprika before serving. This gravy should coat the back of a spoon and cling beautifully to every bite of tender beef. 🍷
Creamy Horseradish Sauce
For a bold twist, serve this pot roast with a tangy horseradish cream sauce that cuts through the richness. Mix ½ cup sour cream, 2 tablespoons prepared horseradish, 1 tablespoon Dijon mustard, 1 tablespoon fresh lemon juice, and 1 teaspoon honey to balance the heat. Adjust the horseradish to taste—start with 1 tablespoon if you’re sensitive to spice. This sauce adds a refreshing contrast to the deep, savory flavors of the pot roast. Drizzle it over the sliced beef or serve it on the side for dipping crusty bread. The creamy texture pairs perfectly with the shredded meat. 🌶️
Brown Butter Mashed Potatoes
Elevate your sides with brown butter mashed potatoes that add a nutty, caramelized depth. Cook 2 lbs Yukon Gold potatoes until tender, then drain and mash with ½ cup brown butter (melted and cooled), ¼ cup whole milk, 2 tablespoons cream cheese, 1 teaspoon salt, and ½ teaspoon black pepper. The brown butter’s richness complements the pot roast beautifully, while the creaminess soaks up every bit of gravy. For extra flair, garnish with crispy fried shallots or a sprinkle of fresh chives. This side transforms a simple potato into a luxurious accompaniment. 🥔
Herbed Butter for Crusty Bread
No pot roast is complete without crusty bread to mop up the sauce. Whip together ½ cup softened butter, 1 tablespoon fresh parsley, 1 teaspoon fresh rosemary, ½ teaspoon garlic powder, and a pinch of salt. Spread this herbed butter generously on a warm baguette or sourdough loaf, then toast in the oven for 5 minutes until golden. The crusty bread provides the perfect textural contrast to the tender beef and velvety gravy. Serve it alongside the roast for a hands-on, saucy experience. 🍞
Spiced Apple Chutney
For a sweet and tangy contrast, prepare a simple apple chutney that balances the richness of the pot roast. Cook 2 cups diced apples, ½ cup apple cider vinegar, ¼ cup brown sugar, 1 teaspoon ground cinnamon, ½ teaspoon ground ginger, and a pinch of cloves in a saucepan over medium heat for 15-20 minutes until thickened. This chutney adds a bright, fruity note that cuts through the savory flavors. Serve it as a topping for the sliced beef or alongside the roast for a refreshing bite. 🍏
Nutrition facts
Frequently asked questions
Can I use a different cut of beef instead of chuck roast?
While chuck roast is ideal for its marbling and tenderness, you can substitute with bottom round or chuck shoulder. These cuts will still become tender through slow braising, though they may require 30-60 extra minutes of cooking time. Avoid lean cuts like sirloin—they won’t achieve the same melt-in-your-mouth texture. If using round, consider adding 1 tablespoon beef gelatin to the braising liquid for extra richness.
How do I know when the pot roast is fully tender?
Use a meat thermometer for precision—the internal temperature should reach 200-205°F. The roast will feel like butter when pierced with a fork, and the juices should run clear (not pink or bloody). For extra assurance, slice a small piece and check the texture—it should shred easily with minimal resistance. If it’s still tough, return it to the oven for 30 more minutes.
Can I make this pot roast in a slow cooker?
Sear the roast as directed, then transfer everything (including the seared vegetables and aromatics) to your slow cooker. Add the beef broth and simmer on low for 8 hours or high for 5-6 hours. The slow cooker’s gentle heat will achieve the same tender results. For gravy, thicken the cooking liquid with a cornstarch slurry instead of flour—it works better in slow cookers.
What’s the best way to reheat leftover pot roast?
Reheat gently to preserve moisture—place the sliced roast in an oven-safe dish, cover with foil, and warm at 300°F for 20-25 minutes. For gravy, reheat in a saucepan over low heat, stirring frequently to prevent scorching. Avoid microwaving—it makes the meat dry and the gravy watery. Leftovers keep well for 4-5 days in the fridge or 3 months in the freezer.
Why did my pot roast turn out dry?
Overcooking or peeking at the roast too often are the most common culprits. Keep the lid tightly sealed and avoid opening the oven during cooking. If the meat seems dry after braising, try this fix: Shred the roast, return it to the pot with a splash of beef broth, and simmer for 10 minutes to reabsorb moisture. Also, ensure you’re using a Dutch oven—it retains heat better than regular pots.