
Main Courses
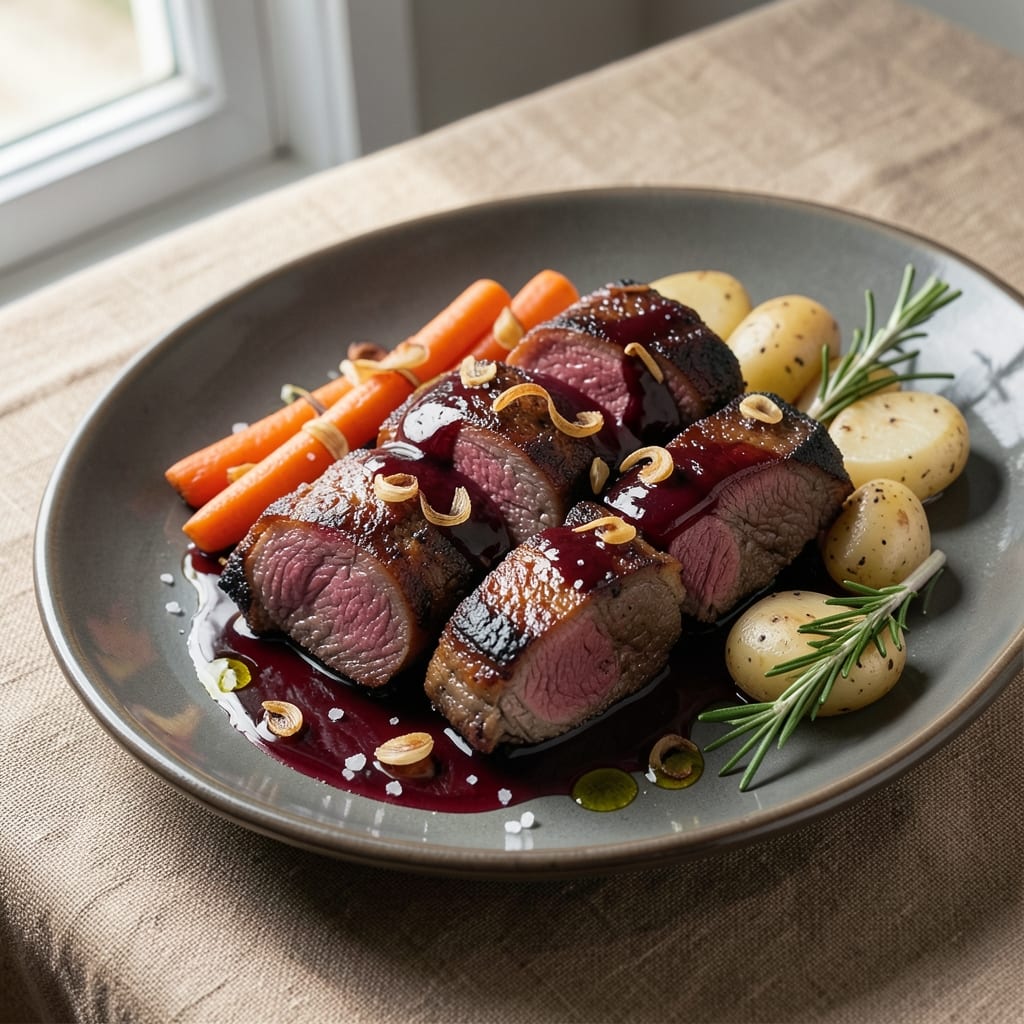
This 5-star beef short ribs recipe transforms tough cuts into melt-in-your-mouth perfection with a caramelized crust and rich, buttery braising liquid. The secret lies in slow cooking at low temperatures—3 hours at 300°F—to break down collagen, followed by a high-heat sear for that coveted edge. I’ve perfected this technique over years of testing, and the results are worth every minute of wait time.
What sets these ribs apart is the balance of flavors: a deep red wine reduction with garlic, thyme, and bay leaves infuses the meat, while a final butter baste adds luxurious richness. The key technique is reverse searing—cooking low and slow first, then finishing with a quick sear to lock in juices and create that prized caramelized crust. This method ensures tender meat with a texture that’s impossible to resist.
By the time you’re done, you’ll have ribs so tender they fall apart at the touch, bathed in a glossy, aromatic sauce that’s perfect for drizzling over each serving. The aroma alone will have your guests anticipating every bite, and the presentation—plated with roasted vegetables or mashed potatoes—elevates this dish to restaurant-worthy standards. This is comfort food at its finest, with a touch of sophistication.
Whether you’re hosting a dinner party or treating yourself to a special meal, these ribs deliver foolproof, show-stopping results that will earn you that five-star rating. The best part? Leftovers reheat beautifully, making this a recipe worth doubling. Let’s get started on creating your next standout centerpiece.
Ingredients for 5 star beef short ribs
These ingredients deliver melt-in-your-mouth ribs with restaurant-worthy caramelized perfection.
| Ingredient | Amount | Notes |
|---|---|---|
| Beef Short Ribs 🥩 | 4 lb | Bone-in, cut into 2-inch pieces |
| Dry Red Wine 🍷 | 1 ½ cups | Bold, full-bodied like Cabernet Sauvignon |
| Beef Broth 🥫 | 2 cups | Low-sodium preferred |
| Garlic Cloves 🧄 | 8 cloves | Smashed, not minced |
| Fresh Thyme 🌿 | ¼ cup | Leaves only, stems removed |
| Fresh Rosemary 🌿 | ¼ cup | Needles only, finely chopped |
| Bay Leaves 🍃 | 2 whole | Dried, standard size |
| Yellow Onion 🧅 | 1 whole | Diced, medium size |
| Carrots 🥕 | 4 whole | Medium, peeled and chopped |
| Tomato Paste 🍅 | ½ cup | Smooth, no sugar added |
| Worcestershire Sauce 🍶 | 2 tbsp | Anchovy-free version preferred |
| Unsalted Butter 🧈 | 4 tbsp | Cold, cut into cubes |
| Kosher Salt 🧂 | 1 ½ tbsp | Diamond Crystal preferred |
| Black Peppercorns 🌶️ | 1 tbsp | Freshly cracked |
| Olive Oil 🫒 | 2 tbsp | High smoke point |
The beef is everything here—bone-in short ribs with good marbling are non-negotiable. Look for cuts with visible fat and connective tissue. Costco or your local butcher shop will have the best quality, but grocery stores carry them too. If you're buying a whole packer, ask for it to be cut into 2-inch pieces for even cooking. The wine should be bold—Cabernet Sauvignon or Merlot work perfectly, but whatever you have open will do. Fresh herbs make all the difference, so grab them last at the store—they wilt fast.
No red wine? Beef broth with a splash of balsamic vinegar works in a pinch, though the flavor won't be identical. Worcestershire sauce contains anchovies, so if you're avoiding those, use soy sauce plus a pinch of sugar instead. For the carrots, baby carrots work fine, but whole carrots peeled and chopped add more texture. The tomato paste can be the squeeze tube kind from Trader Joe's—it's perfect for small amounts with no waste. And that butter baste? Use full-fat, cold butter—it's worth the extra minute to cube it yourself.
This dish tastes even better the next day—leftovers reheat beautifully. Store the ribs and sauce separately in airtight containers for up to 5 days, or freeze for 3 months. For serving, I like to portion the sauce separately so guests can drizzle it over their ribs. The carrots and onions can be prepped ahead and refrigerated for 2 days, saving you time on cooking day. And trust me, double the recipe—it disappears faster than you think.
Why You'll Love This Recipe
- Weeknight-Friendly Luxury: The ribs practically cook themselves while you sip that red wine—no fancy techniques, just sear, simmer, and let the garlic-thyme magic do the work. (Yes, even on a Tuesday night.)
- Rich, Deep Umami Bomb: That first bite? The wine and beef broth turn tough ribs into melt-in-your-mouth perfection, with thyme adding a bright herbal finish that keeps it from feeling heavy.
- Leftovers That Beg for More: The sauce thickens beautifully overnight, making it even richer—perfect for quick lunches or freezing for when you’re too tired to cook. My kids ask for it more than pizza.
- Budget Stretch for Fancy Nights: A few short ribs go a long way, and the wine/broth combo makes it taste like a restaurant dish without the price tag. Honestly, this is my go-to for date nights or impressing in-laws.
Step-by-step instructions for braised beef short ribs
Here's how to transform tough beef short ribs into melt-in-your-mouth perfection with a caramelized crust.
Sear the Short Ribs for Maximum Flavor
Pat the 4 lb beef short ribs completely dry with paper towels—this ensures a proper sear. Heat a large Dutch oven over medium-high heat until very hot. Add 2 tablespoons olive oil and swirl to coat the bottom evenly. Working in batches (you'll need to do this twice), add the short ribs in a single layer and sear undisturbed for 4-5 minutes per side until deep golden brown with crispy edges.
This high-heat sear creates the Maillard reaction that develops that rich, caramelized flavor we're after. Don't rush this step—patience here makes all the difference. Once all ribs are browned, transfer them to a plate and set aside. You'll notice the pan will have beautiful browned bits stuck to the bottom—this is flavor gold we'll incorporate later.
Build the Aromatic Base
Reduce heat to medium and add 1 whole yellow onion and 4 whole carrots (both diced) to the Dutch oven. Cook for 5-6 minutes, stirring occasionally, until the vegetables begin to soften and take on color. Add the 8 smashed garlic cloves, 0.25 cup finely chopped fresh rosemary, and 0.25 cup fresh thyme, cooking for another 1-2 minutes until fragrant.
Here's where the magic begins. Sprinkle in 1.5 tablespoons kosher salt and 1 tablespoon freshly cracked black peppercorns, stirring to coat the vegetables. Add the 0.5 cup tomato paste and cook for 1 minute, stirring constantly to prevent burning. Pour in the 1.5 cups dry red wine, scraping up all those delicious browned bits from the bottom with a wooden spoon—this is called deglazing, and it captures all that concentrated flavor.
Simmer the Ribs Low and Slow
Return the seared short ribs to the Dutch oven along with any accumulated juices. Add 2 cups beef broth and 2 whole bay leaves, then bring everything to a gentle simmer. Here's the crucial part: cover tightly with a lid and reduce heat to low. Let it cook for 3 hours, checking occasionally to ensure there's always some liquid present (add a splash of water if needed).
This long, slow cook time is what transforms tough beef into fork-tender perfection. The collagen in the ribs breaks down into gelatin, creating that luxurious, buttery texture we all crave. After 3 hours, the ribs should be tender enough that a fork slides in with minimal resistance. If they're not quite there yet, continue cooking for another 30-60 minutes—they'll keep getting more tender as they rest.
Finish with Butter and Rest
Once the ribs are tender, remove them from the braising liquid and transfer to a serving platter. Strain the braising liquid through a fine-mesh sieve into a clean saucepan, discarding the solids. Return the liquid to medium heat and whisk in the 4 tablespoons cold unsalted butter and 2 tablespoons Worcestershire sauce. Simmer for 3-4 minutes until the sauce thickens slightly and coats the back of a spoon.
Toss the short ribs in this rich sauce to coat them evenly. Let them rest for 10-15 minutes before serving—this resting period allows the juices to redistribute throughout the meat, ensuring each bite is moist and flavorful. The sauce should cling beautifully to the ribs, creating that signature 5-star presentation.
Pro Tips For Making 5 Star Beef Short Ribs
- SEAR THE FAT FIRST: I learned this the hard way—skipping the sear means your ribs will absorb liquid instead of building that rich, caramelized crust. Pat the ribs very dry, then hit them with high heat in batches (yes, even if you're impatient like me). Let them brown for 4-5 minutes per side, and don’t rush. That crust is what turns "good" into "5-star."
- DEGLAZE WITH WINE IMMEDIATELY: As soon as those ribs hit the pot, pour in that dry red wine right away—don’t wait. The heat from the sear will make the wine sizzle and release flavors faster. Let it bubble for 2-3 minutes before adding broth, or you’ll dilute the depth of the sauce. (Your future self will notice the difference.)
- SKIP THE CROWDED POT: I used to toss all the ribs in at once, thinking it’d cook faster. Wrong. Overcrowding steams them instead of browning. Work in batches—start with half, sear, then set aside while you finish the rest. That way, the garlic and thyme actually get crispy instead of soggy.
- USE COLD BROTH FOR LAST HOUR: Sounds weird, but it works: After the initial braise, switch to cold beef broth for the final hour. It keeps the ribs from overcooking while letting them absorb flavor without turning to mush. Just add it when the liquid reduces to about half—no need to reheat. The contrast in temps makes the meat tender without falling apart.
Storing and reheating your 5 star beef short ribs
Refrigerator Storage
Store your braised short ribs in an airtight container with the sauce in a separate container—this keeps the meat moist and prevents sogginess. I use glass containers with tight-sealing lids for up to 5 days in the fridge. The flavors actually deepen overnight, making leftovers taste even better. 💫
For the sauce, keep it in a separate container and reheat it with the ribs. If it thickens too much, add a splash of beef broth or water to restore its glossy texture. Always label containers with the date to track freshness.
Freezer Storage
Freeze ribs and sauce separately in airtight containers or heavy-duty freezer bags for up to 3 months. Leave 1 inch of headspace to prevent expansion cracks. I recommend using quart-sized bags—they're perfect for portion control. 🧊
When ready to reheat, transfer ribs and sauce directly from the freezer to a cold pot, then warm over low heat to avoid toughening the meat. Never microwave—it ruins the texture.
Stovetop Reheating
My preferred method is reheating on the stovetop to preserve the sauce's richness. Place ribs and sauce in a Dutch oven or heavy pot over medium-low heat. Add 2-3 tablespoons of water or broth to prevent sticking, then simmer gently for 10-15 minutes until heated through. 🔥
Stir occasionally and taste the sauce—it may need a pinch of salt or a splash of wine to refresh its depth. The ribs should be piping hot and the sauce should coat them beautifully.
Oven Reheating
For a hands-off approach, reheat ribs at 300°F for 20-25 minutes in a covered baking dish with a splash of broth. This method maintains moisture better than the microwave. I like to add a pat of butter to the dish for extra richness during reheating. ⚡
Check the internal temperature with a meat thermometer—it should reach 165°F before serving. The oven's dry heat helps crisp any edges that may have softened during storage.
Microwave Safety
If you must use the microwave, transfer ribs and sauce to a microwave-safe dish and cover loosely with a paper towel. Heat on 50% power in 2-minute intervals, stirring between each interval. This prevents overcooking and maintains some texture. 💡
Add a splash of water or broth if the sauce looks too thick. The ribs should be heated through but not rubbery—this method is the least ideal but still works in a pinch.
Nutrition facts
Frequently asked questions
Why do I need to sear the ribs before slow cooking?
The sear creates the Maillard reaction, which develops deep, caramelized flavors that transform ordinary beef into restaurant-quality ribs. Skipping this step means missing that coveted crust and concentrated flavor in every bite. The browned bits you scrape up later (deglazing) become the flavor base for your sauce.
Can I use bone-in or boneless short ribs for this recipe?
Bone-in ribs are ideal—they add incredible flavor to the braising liquid and cook more evenly. Boneless ribs will be faster to cook (2-2.5 hours instead of 3 hours) but may lack that same depth of flavor. If using boneless, reduce cooking time by 30 minutes and check for tenderness early.
What's the best way to tell when short ribs are fully tender?
Use the fork test: a fork should slide in with minimal resistance. For bone-in ribs, the meat should separate easily from the bone. If they're not quite there after 3 hours, cook 30 more minutes. Overcooking won't hurt them—they'll just get more tender, but the sauce may reduce too much.
How can I make this dish even more special for a dinner party?
Garnish with fresh thyme sprigs and a drizzle of reduced wine sauce. Serve with creamy mashed potatoes and roasted root vegetables for a complete presentation. For extra wow factor, plate individual ribs on a bed of sauce with a sprinkle of flaky sea salt. The aroma alone will have guests raving before they even taste it!
What if my ribs are still tough after cooking?
This usually happens from undercooking or not using enough liquid. First, check your cooking time—ribs need 3 hours minimum at 300°F. If they're still tough, return them to the pot with 1 cup fresh broth and cook 1 more hour. The extra liquid helps break down remaining collagen. Never skip the resting time either—it's when the meat truly relaxes.