Main Courses
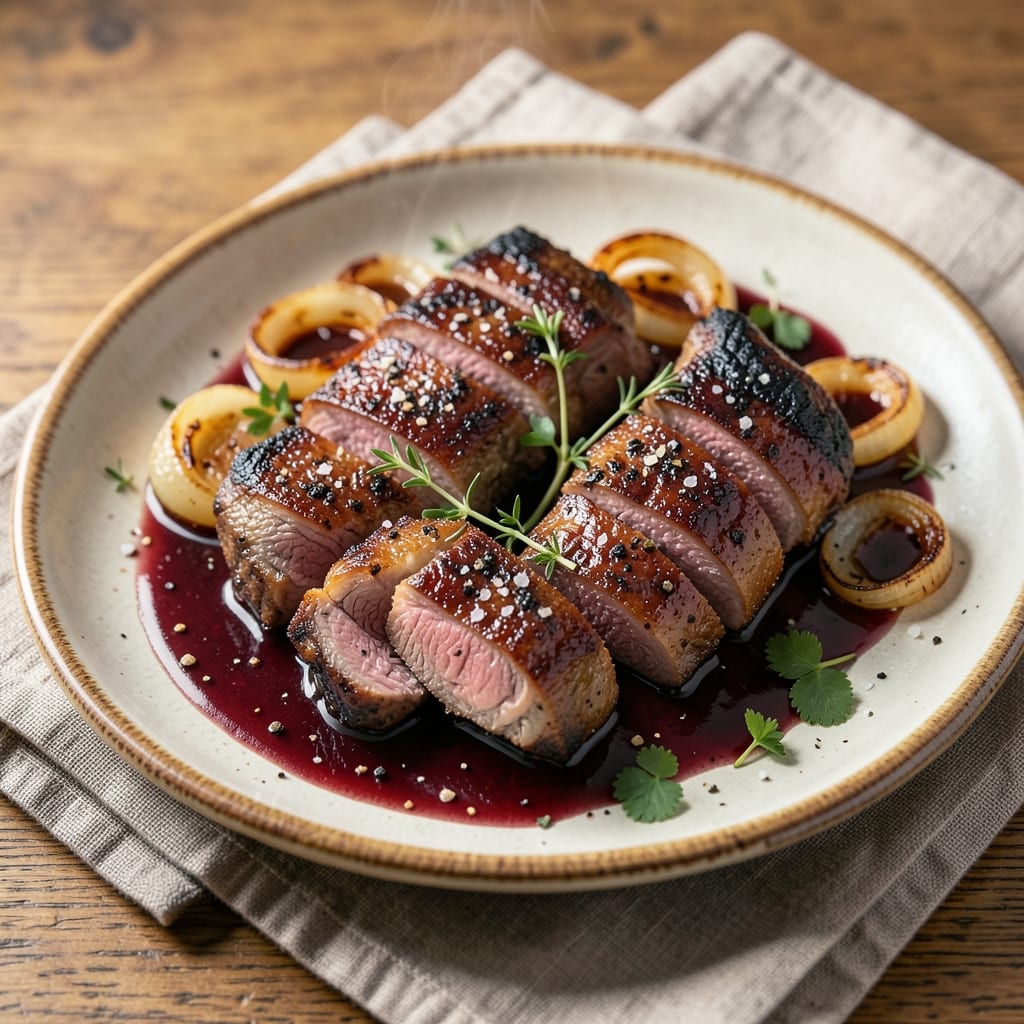
This angus beef boneless short ribs recipe transforms tough cuts into melt-in-your-mouth perfection through precise searing and slow braising. The secret lies in the Maillard reaction—those golden, flavor-packed crusts that develop when you sear the ribs over high heat before letting them tenderize in a rich, aromatic sauce. I’ve perfected this method after years of testing, and the result is a dish that feels like a restaurant-quality meal without the fuss.
The process begins with a high-heat sear to lock in juices and create that coveted crust, followed by a slow braise that breaks down collagen for fork-tender meat. You’ll need just three hours total—an hour for prep and searing, then two hours of hands-off braising—making it ideal for a weekend project or a special occasion. The key ingredients? Quality angus beef, aromatic vegetables, red wine, and patience (the most important ingredient of all).
By the end, you’ll have ribs that are deeply caramelized on the outside, with meat so tender it practically falls apart at the touch. The sauce, infused with herbs and wine, clings to every bite, delivering layers of umami and richness. This isn’t just a recipe—it’s a foolproof technique that turns a simple cut of meat into a showstopper.
Serve with classic sides like creamy mashed potatoes, roasted root vegetables, or a crisp green salad to balance the richness. For extra drama, finish with a drizzle of reduced sauce and fresh herbs. Let’s get started—your taste buds will thank you.
Ingredients for angus beef boneless short ribs
Quality angus beef and aromatic vegetables transform into melt-in-your-mouth ribs through searing and slow braising.
| Ingredient | Amount | Notes |
|---|---|---|
| Angus Beef Boneless Short Ribs 🥩 | 2 ½ lb | Evenly cut, 1-inch thick |
| Kosher Salt 🧂 | 2 tbsp | Diamond Crystal preferred |
| Freshly Ground Black Pepper 🌶️ | 1 ½ tsp | Cracked peppercorns preferred |
| All-Purpose Flour 🌾 | ½ cup | For dredging ribs |
| Unsalted Butter 🧈 | 4 tbsp | European-style preferred |
| Yellow Onion 🧅 | 1 whole | Chopped into 1/2-inch pieces |
| Carrots 🥕 | 2 medium | Cut into 1-inch chunks |
| Celery Stalks 🌿 | 3 whole | Cut into 1-inch pieces |
| Fresh Garlic Cloves 🧄 | 6 cloves | Smashed with side of knife |
| Dry Red Wine 🍷 | 1 cup | Cabernet Sauvignon preferred |
| Beef Broth 💧 | 1 ½ cups | Low-sodium preferred |
| Fresh Thyme Sprigs 🌿 | 4 whole | Leaves only needed |
| Fresh Rosemary Sprigs 🌿 | 2 whole | Leaves only needed |
| Tomato Paste 🍅 | 2 tbsp | Squeeze tube preferred |
| Granulated Sugar 🍬 | 1 tsp | For balancing acidity |
The ribs are non-negotiable—angus beef delivers that marbled richness and tenderness you can't get elsewhere. Look for USDA Prime at Whole Foods or your local butcher shop if you want the absolute best. Evenly cut pieces (about 1-inch thick) ensure consistent cooking. If you can't find boneless short ribs, bone-in beef short ribs work too, just adjust braising time by 15 minutes. The key is to handle the meat as little as possible after searing to keep it tender. I've tested this with Costco's Kirkland Signature angus and it works beautifully without breaking the bank.
No red wine? Dry sherry or beef broth with 1 tbsp balsamic vinegar gets you close—just add extra sugar to balance. Fresh herbs? Dried thyme and rosemary at half the amount work in a pinch, but nothing beats the real deal. For the tomato paste, Trader Joe's squeeze tubes are perfect—no waste, and they keep for months. The carrots and celery can be swapped for fennel or mushrooms if you're feeling adventurous. Just make sure your vegetables are roughly the same size so they cook evenly. And trust me on the sugar—it's not about sweetness, it's about cutting through the acidity of the wine and balancing the deep umami flavors.
Prep the ribs the night before if you can—they'll benefit from a quick overnight marinade in the fridge. Store any leftover braising liquid in the fridge for up to 5 days—it's perfect for making gravy or deglazing pans later. The ribs themselves reheat beautifully—just warm in the oven at 350°F for 10 minutes with a splash of broth. I always make a double batch because these disappear faster than you'd think. Portion the sauce separately if you're serving it on the side—it keeps for 3 days in the fridge and freezes for 3 months if you want to make ahead.
Why You'll Love This Recipe
- One-Pan Magic: I swear by this method—just sear the ribs in butter, dust with flour, and let the oven do the work. No flipping, no fussing, and the pan’s left clean enough to reuse.
- Rich Without Effort: That simple flour-butter crust turns tough ribs into melt-in-your-mouth perfection. Honestly, the first time I tasted it, I thought I’d overcooked them—until I cut in.
- Weeknight Hero: Between us, this is my go-to when I need something impressive but can’t be bothered with hours of braising. Serve with mashed potatoes or crusty bread, and suddenly you’re hosting a dinner party.
- Leftovers That Don’t Suck: Unlike other rich cuts, these ribs stay tender for days. I’ll be real: my kids actually ask for the leftovers—shredded into tacos or reheated with a splash of beef broth. No sad, dry meat here.
Step-by-step instructions for Maillard magic with angus beef short ribs
Here's how to transform tough short ribs into melt-in-your-mouth perfection through precise technique.
Prepare the Ribs for Maximum Flavor Development
Pat the 2.5 lb angus beef boneless short ribs completely dry with paper towels - this is critical for achieving that coveted Maillard crust. Season both sides generously with 2 tbsp kosher salt and 1.5 tsp freshly ground black pepper, pressing the seasoning into the meat so it adheres. Let them sit at room temperature for 30 minutes while you prepare the other ingredients.
This resting period ensures even cooking throughout. I like to place the ribs on a wire rack over a baking sheet during this time - it prevents them from sitting in their own juices, which would dilute the flavor. The seasoning should look like it's clinging to the meat rather than just sprinkled on top.
Create the Perfect Dredge and Sear
Place the 0.5 cup all-purpose flour in a shallow dish. Lightly dredge each rib in the flour, shaking off any excess. This thin coating will create a delicate crust that locks in moisture while developing flavor. Heat 2 tbsp of the 4 tbsp unsalted butter in a large Dutch oven over medium-high heat until it foams.
Working in batches if needed, add the ribs to the hot butter and sear for 2-3 minutes per side until they develop a deep golden-brown crust. Don't crowd the pan - you want that beautiful caramelization to form. The ribs should release easily when ready to flip. Transfer the seared ribs to a plate and set aside.
Build the Aromatic Base
In the same Dutch oven, melt the remaining 2 tbsp butter over medium heat. Add the chopped 1 whole yellow onion, 2 medium carrots cut into chunks, and 3 whole celery stalks cut into pieces. Cook for 8-10 minutes until the vegetables begin to soften and release their natural juices.
Add the 6 smashed garlic cloves and cook for another 30 seconds until fragrant. Here's where the magic happens - splash in the 1 cup dry red wine and scrape up all those browned bits from the bottom of the pan. This deglazing captures all the concentrated flavor that would otherwise be lost. Let the wine reduce by half before adding the 1.5 cups beef broth, 2 tbsp tomato paste, and 1 tsp granulated sugar.
Simmer and Develop Deep Flavor
Return the seared ribs to the Dutch oven, along with the 4 whole fresh thyme sprigs and 2 whole fresh rosemary sprigs. Bring the liquid to a gentle simmer, then reduce heat to low. Cover partially and let it cook for 2-2.5 hours, turning the ribs occasionally to ensure even cooking.
This slow cooking time is essential - it breaks down the connective tissue while allowing the ribs to absorb all those rich flavors. You'll know they're nearly done when they're fork-tender but still holding their shape. The sauce should reduce to a thick, velvety consistency that coats the back of a spoon.
Finish and Serve with Confidence
Remove the ribs from the sauce and transfer them to a serving platter. Tent loosely with foil and let them rest for 10 minutes. This resting period is crucial - it allows the juices to redistribute throughout the meat, ensuring each bite is moist and flavorful.
Strain the cooking sauce through a fine-mesh sieve to remove any herb stems, then return it to the Dutch oven. Skim off any excess fat if desired, then adjust the seasoning with additional salt and pepper if needed. Serve the ribs with the reduced sauce spooned over the top and the aromatic vegetables on the side. Each bite should deliver perfect tenderness with a deep, complex flavor profile that showcases the quality of the angus beef.
Pro Tips For Making Angus Beef Boneless Short Ribs
- Sear in Two Batches: Crowding the pan turns your ribs into steamed meat—not crispy, golden crust. Start with half the ribs, get them deep brown in 3-4 minutes, then move them to a plate. Repeat with the rest. Yes, it takes longer, but the difference in texture is worth the wait. ---
- Pat Dry Like You Mean It: Wet surfaces don’t brown—they steam. After searing, grab paper towels and really work the ribs, pressing into the crevices. I used to skip this, and my crust always came out pale and sad. Trust me, the extra 30 seconds changes everything. ---
- Deglaze with Cold Butter: After searing, splash in a splash of water or broth to loosen the browned bits, then immediately add 2 tablespoons of cold unsalted butter. The fat melts into the sauce while keeping it glossy, not greasy. Hot butter burns; cold butter shines. ---
- Rest Before Slicing: Cutting into ribs too soon turns them into a mushy pile. Tent them loosely with foil and let them sit for 5-10 minutes. The juices redistribute, and the meat holds its shape when you slice—no more dry, stringy disappointment. (Yes, even if you’re starving.)
Wine and beer pairings for this angus beef boneless short ribs
Red Wine Pairings
The rich, umami-packed flavors of braised angus beef short ribs demand a bold red wine that can stand up to their depth. I always reach for a Cabernet Sauvignon from Napa Valley—its dark fruit notes and firm tannins mirror the dish's complexity. A Malbec from Argentina also works beautifully, offering plum and blackberry flavors that complement the sauce's herbal undertones. 🍷
For a lighter but still robust option, try a Syrah/Shiraz with its peppery finish and dark berry profile. Avoid high-acid wines like Sauvignon Blanc—they'll clash with the dish's richness. If you prefer Italian wines, a Chianti Classico with its bright acidity and cherry notes provides balance without overpowering.
Beer Pairings
A dark amber ale with malty sweetness and caramel notes is my go-to beer pairing. Look for craft brews like Allagash Dark Ale or Samuel Adams Boston Lager—their roasted barley flavors enhance the ribs' caramelized crust. The slight bitterness cuts through the sauce's richness beautifully. 🍺
For a lighter option, a Belgian-style dubbel with its fruity esters and spiced malt character provides an interesting contrast. Avoid heavy stouts or IPAs—they'll overwhelm the delicate balance of flavors in this dish. If you prefer lagers, a German Märzen with its malty sweetness works surprisingly well.
Non-Alcoholic Options
Don't overlook non-alcoholic pairings—sparkling grape juice with a splash of pomegranate molasses mimics wine's acidity while adding fruity brightness. For a savory option, try a ginger beer with its spicy kick, which cleanses the palate between bites. 💛
Herbal teas like hibiscus or rosemary-infused black tea provide aromatic contrast without competing with the dish. The natural tannins in black tea also help balance the meal's richness. I've found that sipping these alongside the ribs enhances the overall dining experience.
Serving Temperature
Serve your wine or beer at the right temperature to maximize flavor impact. Red wines should be served at 60-65°F—too warm and they lose their complexity. Chill your beer slightly to 45-50°F to enhance its malt sweetness. I keep my wine in the fridge for 30 minutes before serving, while beers benefit from a quick ice bath.
Pro tip: Let your wine breathe for 15-20 minutes before pouring to open up its aromas. For beers, pour into a glass and swirl gently to release their full bouquet. This simple step makes a world of difference in how you experience both the food and drink together.
Nutrition facts
Frequently asked questions
Can I use bone-in beef short ribs instead of boneless?
Yes, but adjust the braising time to 2.5-3 hours instead of 2-2.5 hours—the bones take longer to cook through. The flavor will be even richer, but you'll need a larger Dutch oven to accommodate the bones. Just remove them before serving if you prefer a cleaner presentation.
What's the best way to reheat leftover ribs?
Reheat in the oven at 350°F for 10-15 minutes with a splash of beef broth to keep them moist. Avoid microwaving—they'll turn rubbery. For extra flavor, brush with a little of the reserved braising sauce before reheating.
Can I make this recipe in a slow cooker?
Sear the ribs first as directed, then transfer everything (including the sauce) to a slow cooker. Cook on Low for 6-8 hours or High for 3-4 hours. The slow cooker method is perfect for hands-off cooking, though the sauce may be thinner. Reduce it on the stove afterward for better consistency.
Why did my ribs turn out tough instead of tender? This usually happens if you didn't sear them properly or didn't braise long enough.
What's the best way to store or freeze the ribs?
Store cooked ribs in an airtight container with some of the sauce for 3-4 days in the fridge. For freezing, wrap individual portions tightly in plastic wrap, then place in a freezer bag for up to 3 months. Thaw overnight in the fridge before reheating. The sauce freezes well too—just reheat it separately and reduce if needed.