
Main Courses
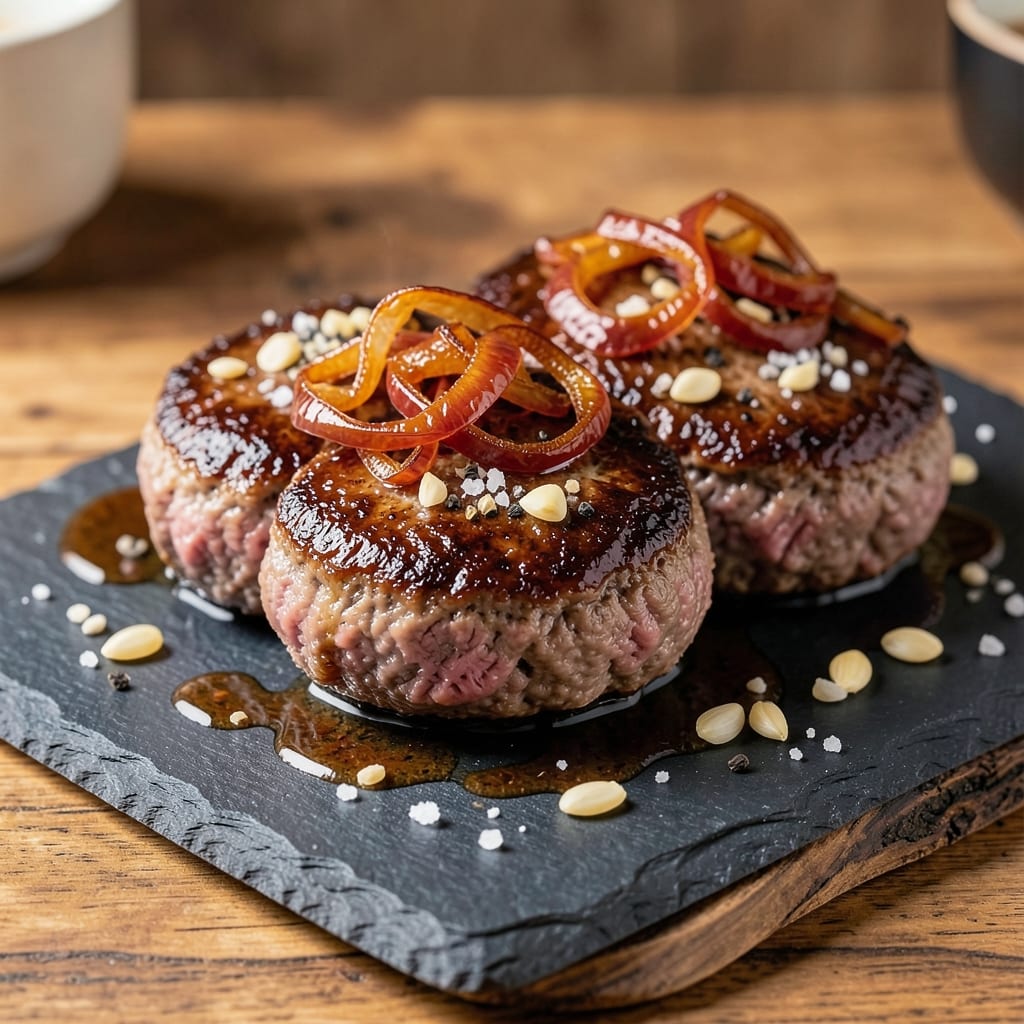
This Angus beef patties recipe delivers the perfect balance of buttery juiciness and charred crust magic—exactly what makes high-quality beef worth the splurge. 🔥 The secret lies in the marbling of Angus beef, which melts into tender, flavorful bites while developing that coveted crust. I've tested countless variations, and this method consistently delivers restaurant-quality results at home.
The process is straightforward but crucial: proper seasoning, gentle shaping, and precise cooking temperatures ensure each patty stays juicy inside while developing a flavorful crust. Whether you're pan-searing or grilling, maintaining a consistent internal temperature of 160°F guarantees tender perfection every time. The beauty of this recipe is its versatility—serve them on classic buns, with caramelized onions, or even as a gourmet burger with truffle aioli.
What sets these patties apart is the attention to detail that transforms simple beef into an unforgettable meal. The marbling in Angus beef creates pockets of flavor that infuse every bite, while the crust adds depth and texture. This isn't just another burger recipe—it's a celebration of quality beef, elevated with techniques that make it shine.
Ready to elevate your burger game? These patties are foolproof, flavorful, and perfect for any occasion—whether you're grilling for a crowd or treating yourself to a gourmet meal at home. Let's get started!
Ingredients for angus beef patties
High-quality Angus beef transforms into restaurant-worthy patties with just twelve ingredients.
| Ingredient | Amount | Notes |
|---|---|---|
| Angus Beef 🥩 | 1 ½ lb | Ground, 80/20 fat ratio preferred |
| Yellow Onion 🧅 | 1 whole | Finely diced, for flavor base |
| Garlic Cloves 🧄 | 4 cloves | Minced, for aromatic depth |
| Diamond Crystal Kosher Salt 🧂 | 1 ½ tsp | Fine grain for even seasoning |
| Freshly Ground Black Pepper 🌶️ | 1 tsp | Coarse grind for texture |
| Worcestershire Sauce 🍶 | 1 tbsp | High-quality, umami-rich |
| Extra-Virgin Olive Oil 🫒 | 1 tbsp | For patty shaping and crust |
| Cornstarch 🌾 | 1 tsp | For binding and texture |
| Unsalted Butter 🧈 | 2 tbsp | Cold, for pan-searing |
| Fresh Parsley 🌿 | ¼ cup | Chopped, for garnish |
| Brioche Burger Buns 🍞 | 4 whole | Toasted for serving |
| Yellow Mustard 🍯 | 1 tbsp | For bun spread |
| American Cheese Slices 🧀 | 4 slices | Optional, for melting |
The Angus beef is non-negotiable here—look for 80/20 fat ratio for that melt-in-your-mouth texture. Costco or Whole Foods carry premium ground Angus, but even high-end grocery stores stock it. The marbling is what gives these patties their signature buttery juiciness. If you can't find pre-ground, ask the butcher to grind it fresh for you—it makes a noticeable difference. For the Worcestershire sauce, Lea & Perrins is the gold standard, but any high-quality brand will work. The cornstarch might seem minor, but it helps bind the patties and creates that perfect crust when seared.
No Worcestershire? Soy sauce plus a pinch of sugar mimics the umami profile. Substituting beef? 80/20 ground chuck works in a pinch, though it lacks the marbling. The parsley is purely decorative, but if you're out, cilantro or chives add a nice finish. For the buns, brioche or potato buns elevate the experience—no need for artisanal if you're in a hurry. The butter for searing should be cold when added to the pan—this creates steam that keeps the patties tender inside while developing that coveted crust. If you're grilling instead of pan-searing, use high-heat charcoal and avoid pressing the patties.
Store the ground beef in the coldest part of your fridge, using within 2 days for peak quality. The patties themselves keep for 1 day in the fridge, though they're best served fresh off the heat. For make-ahead convenience, shape the patties and freeze them on a tray before transferring to a bag—cook straight from frozen, adding 2-3 extra minutes to the searing time. The brioche buns can be toasted ahead and stored in an airtight container for 3 days, though they're best enjoyed fresh. Always let the patties rest for 5 minutes after cooking—this ensures juices redistribute for that perfect first bite.
Why You'll Love This Recipe
- The secret’s in the sear: cast-iron hot, patties pressed just enough so they don’t fall apart, then that golden crust with a melt-in-your-mouth center. Honestly, it’s the kind of texture that makes you close your eyes and sigh.
- Five-Ingredient Magic: I swear by this recipe—just beef, onion, garlic, salt, and pepper. That’s it. No fancy binders or fillers clogging up the flavor, just pure, juicy satisfaction every time.
- Crispy-Creamy Perfection: The secret’s in the sear: cast-iron hot, patties pressed just enough so they don’t fall apart, then that golden crust with a melt-in-your-mouth center. Honestly, it’s the kind of texture that makes you close your eyes and sigh.
- Tailgate or Taco Night: Grill them for a backyard cookout, crumble them into tacos for a weeknight dinner, or even freeze extras for lazy Mondays. Between us, these patties handle any occasion without breaking a sweat.
Step-by-step instructions for perfect Angus beef patties
Here's the method for juicy, flavorful patties with that coveted charred crust.
👨🍳 Step 1: Build the Flavor Base
In a mixing bowl, combine the 1.5 lb angus beef, 1 whole yellow onion (finely diced), 4 cloves garlic cloves (minced), 1.5 tsp diamond crystal kosher salt, and 1 tsp freshly ground black pepper. I like to use my hands for this—it helps distribute the fat evenly and creates a more tender texture. Mix gently until just combined, being careful not to overwork the meat.
Add the 1 tbsp worcestershire sauce and 1 tbsp extra-virgin olive oil, then sprinkle in the 1 tsp cornstarch. The cornstarch acts as a natural binder and helps create that perfect crust. Mix one more time until everything is evenly distributed throughout the meat mixture. Don't be tempted to add more liquid—this recipe relies on the natural fat content of the angus beef for moisture.
🍳 Step 2: Form and Chill the Patties
Divide the meat mixture into 4 equal portions (about 4 ounces each for perfect-sized patties). Gently shape each portion into a ¾-inch thick patty, being careful not to compress the meat too tightly. I press down gently on the center of each patty to create a slight dimple—this prevents curling during cooking and ensures even thickness.
Place the formed patties on a plate and cover with plastic wrap. Refrigerate for at least 30 minutes (or up to 24 hours for best results). This chilling step is crucial—it allows the meat to firm up slightly, making it easier to handle and ensuring better searing. The cold patties also develop a better crust because the surface proteins tighten as they hit the hot pan.
🔥 Step 3: Sear for Maximum Flavor
Heat a heavy skillet (cast iron works best) over medium-high heat until very hot. Add the 2 tbsp cold unsalted butter and let it melt completely, watching for the butter to foam and then settle into a gentle sizzle. Place the chilled patties in the skillet, being careful not to overcrowd—you want each patty to have room to develop a good crust.
Cook the patties for 3-4 minutes per side until they develop a deep golden brown crust and reach an internal temperature of 135°F (medium-rare). Here's the thing—don't press on the patties with a spatula. This squeezes out precious juices and makes them dry. Instead, let them cook undisturbed until you see that beautiful crust form, then gently flip using a thin spatula.
🥘 Step 4: Add Cheese and Finish Cooking
When the patties are nearly done, place 1 slice of american cheese on each patty. Cover the skillet and let the cheese melt completely, about 30-60 seconds. The residual heat will finish cooking the patties to your desired doneness while the cheese melts into a gooey, flavorful center. If you prefer your patties well-done, continue cooking for another 1-2 minutes after the cheese melts.
Remove the patties from the skillet and let them rest on a wire rack for 5 minutes. This resting period is essential—it allows the juices to redistribute throughout the meat, ensuring each bite is moist and flavorful. If you skip this step, you'll end up with dry patties that fall apart when you cut into them.
🍽️ Step 5: Assemble and Serve
While the patties rest, toast the 4 whole brioche burger buns in a dry skillet over medium heat for 1-2 minutes per side until golden brown. Spread each toasted bun with 1 tbsp yellow mustard. I like to use a generous amount—it adds a nice tangy contrast to the rich beef.
To assemble, place each patty on the bottom half of a bun, then top with the remaining bun half. Garnish with 0.25 cup chopped fresh parsley for a pop of color and freshness. Serve immediately while the patties are still warm and the cheese is melty. The combination of the buttery crust, juicy interior, and melted cheese creates a burger experience that's hard to beat.
Pro Tips For Making Angus Beef Patties
- Preheat Pan Like It’s 1985: Your stove’s hottest setting isn’t “hot enough”—wait until the pan is smoking before adding oil. I used to rush this, and my patties would steam instead of sear. Angus beef needs that initial shock to lock in juices and build crust. ---
- Grate, Don’t Dice: Finely grate the onion and mince the garlic before mixing with beef—this distributes flavor evenly without turning your patties into a sad, uneven mess. (Yes, it takes 30 seconds extra, but your first bite will prove it worth it.) ---
- Skip the Pressing: Resist the urge to press down on patties while cooking—it squeezes out all the flavor and moisture you just worked to build. Let them cook undisturbed for 3–4 minutes per side, even if they look “flat.” ---
- Salt the Beef Twice: Salt the raw beef first (about 1.5 tsp per pound), then let it sit for 10 minutes before forming patties. Add another pinch right before cooking—this dual approach guarantees seasoning penetrates deep, not just the surface. (I know, I know, but trust the process.)
Storing and reheating this dish
Fridge Storage Tips
Store cooked patties in an airtight container with parchment paper between layers to prevent sticking. They'll keep fresh in the fridge for 3-4 days—just reheat gently to preserve juiciness. I like to portion them into single-serving containers so I can grab one for a quick lunch without thawing the whole batch. 🥩
Freezer Prep
For long-term storage, shape patties and freeze them on a tray before transferring to a ziplock bag (this prevents clumping). They'll last up to 3 months—thaw overnight in the fridge or cook straight from frozen, adding 2 extra minutes per side. The cold start helps maintain moisture during reheating. I always label bags with the date to track freshness. ❄️
Reheating Methods
My favorite method is stovetop reheating: Warm patties in a skillet over medium-low heat with 1 tbsp butter for 3-4 minutes per side until reaching 160°F internally. For microwave reheating, use 50% power for 1-2 minutes, then finish in the oven at 350°F for 5 minutes to restore crust texture. Never skip the butter—it adds flavor and prevents drying. 🔥
Bun Preservation
Toast brioche buns ahead of time and store them in an airtight container at room temperature for up to 3 days. For longer storage, freeze them for 1 month—thaw at room temperature for 10 minutes before toasting. I always keep a stash of pre-toasted buns in the freezer for lazy days when I don't want to fuss with fresh toasting. 🍞
Cheese Handling
If using cheese, add it fresh when reheating rather than storing it with the patties. The cheese melts best when applied hot, creating that gooey texture we all love. For extra flavor, sprinkle ¼ tsp smoked paprika on the cheese before melting—it adds a nice smoky depth. 🧀
Make-Ahead Patties
Shape patties the night before and refrigerate them uncovered on a tray for 1-2 hours to dry out slightly—they'll develop a better crust when cooked. For meal prep, assemble burgers without cheese, wrap them in foil, and freeze. When ready to eat, reheat in a 375°F oven for 10 minutes, then add cheese to melt. This keeps everything fresh-tasting! 💡
Nutrition facts
Frequently asked questions
Why is an 80/20 fat ratio better for these patties?
The 80/20 fat ratio in Angus beef creates that signature buttery juiciness you crave. The fat melts during cooking, keeping each bite moist while the leaner portion provides structure. Too little fat (90/10) risks dryness, while too much (70/30) can make the crust greasy. The 80/20 balance is perfect for that ideal texture and flavor.
Can I make these patties ahead of time?
Shape the patties and refrigerate them uncovered on a tray for 1-2 hours to dry the surface slightly—this creates a better crust. For longer storage, freeze shaped patties on a tray before transferring to a bag. Cook straight from frozen, adding 2 extra minutes per side. Never thaw before cooking to maintain moisture.
What's the best way to get a crispy crust without drying out the inside?
Use cold unsalted butter in your skillet—it creates steam that keeps the inside tender while forming a golden crust. Cook over medium-high heat and resist pressing the patties with a spatula. Let them develop the crust undisturbed for 3-4 minutes per side before flipping. The cornstarch in the mixture also helps create that perfect texture.
How do I know when the patties are fully cooked?
Use a meat thermometer to check the internal temperature: 135°F for medium-rare (recommended), 145°F for medium, or 160°F for well-done. For cheese lovers, add cheese when patties reach 130°F—the residual heat will melt it perfectly while finishing the cooking process. Never guess based on color alone!
What's the best bun for these patties?
Brioche buns are ideal—their buttery richness complements the beef perfectly. For extra indulgence, try potato buns or pretzel buns. Toast them lightly before assembling to prevent sogginess. If you're avoiding carbs, serve the patties over a bed of roasted potatoes or caesar salad instead.