
Soups & Stews
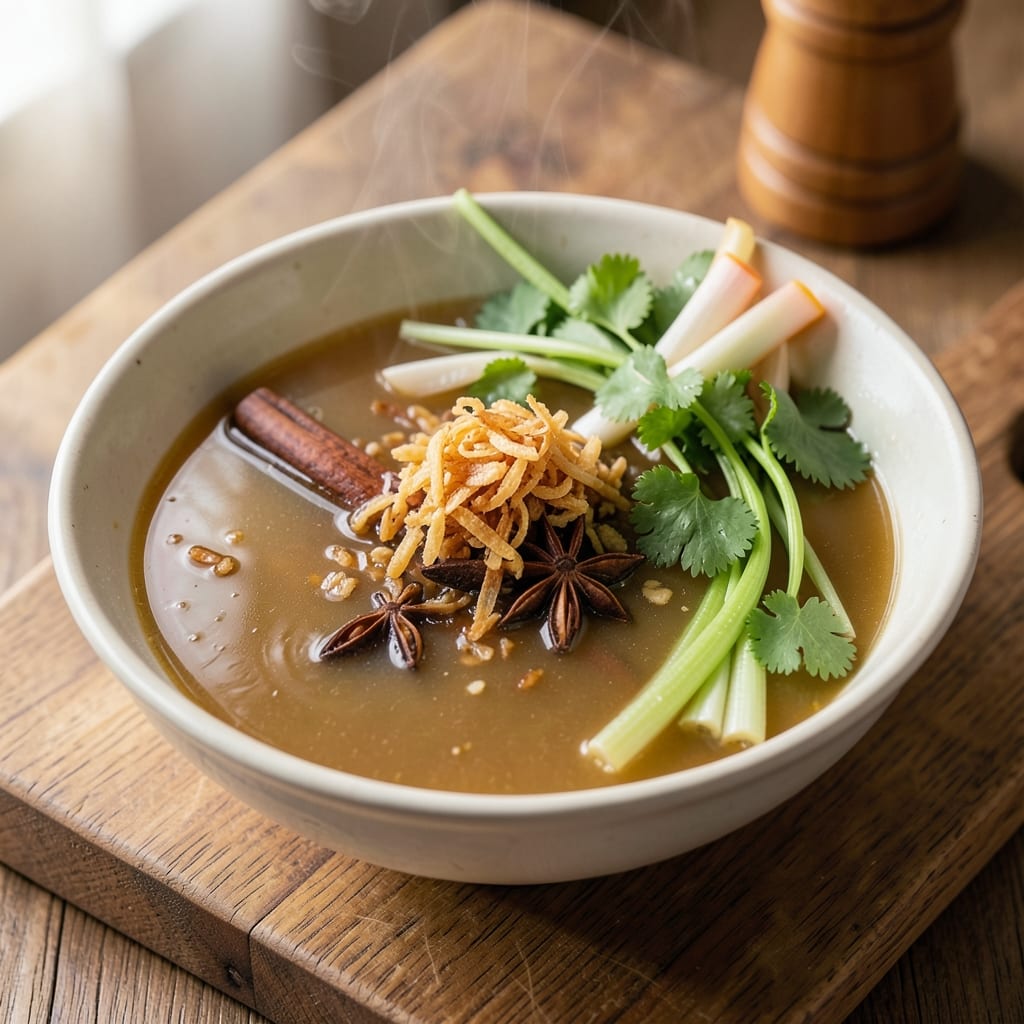
This Asian beef bone broth recipe transforms simple pantry ingredients into a deeply flavorful foundation for any meal. The secret lies in low-and-slow simmering—extracting rich umami from beef bones while infusing aromatic spices and herbs that build complexity over hours. Unlike quick stock, this method develops layers of depth that elevate soups, stews, and sauces to restaurant-quality levels.
The process is straightforward but requires patience: beef bones, ginger, garlic, and star anise simmer for 12-24 hours, releasing collagen that turns the broth into a velvety, nutrient-packed liquid. No fancy equipment is needed—just a large pot, basic aromatics, and time. The result? A golden, aromatic broth with a perfect balance of savory and slightly sweet notes that pairs beautifully with rice, noodles, or braised dishes.
What sets this broth apart is its versatility—use it as-is for a comforting bowl of pho or ramen, or reduce it into a glaze for meats. The long simmering process breaks down connective tissue, creating a silky texture that's impossible to achieve quickly. Store leftovers in the fridge for up to a week or freeze for months, ensuring you always have a flavorful base on hand.
For those short on time, a pressure cooker cuts the process to 3-4 hours without sacrificing depth. The key is maintaining a gentle simmer—never a rolling boil—to preserve the delicate flavors. Whether you're a home cook or a seasoned chef, this broth will become your kitchen's most valuable secret weapon.
Ingredients for asian beef bone broth
Pantry staples meet aromatic essentials for a broth that builds umami through slow alchemy.
| Ingredient | Amount | Notes |
|---|---|---|
| Beef Bones 🦴 | 3 lb | Knuckle or marrow bones preferred |
| Yellow Onion 🧅 | 1 whole | Quartered, charred for depth |
| Fresh Ginger Root 🌿 | 3 oz | Peeled, sliced into thick coins |
| Garlic Cloves 🧄 | 8 cloves | Smashed, skins left on |
| Star Anise Pods 🌟 | 4 whole | Lightly crushed for aroma |
| Cinnamon Sticks 🌳 | 2 whole | 2-inch pieces for balance |
| Bay Leaves 🍃 | 4 whole | Dried, standard size |
| Black Peppercorns 🌶️ | 1 tbsp | Whole, lightly crushed |
| Fish Sauce 🍶 | 1 tbsp | Red Boat preferred for quality |
| Soy Sauce 🥢 | 2 tbsp | Kikkoman or similar |
| Water 💧 | 12 cups | Filtered preferred |
| Diamond Crystal Kosher Salt 🧂 | 1 ½ tsp | For seasoning, not salting |
The bones are non-negotiable—knuckle or marrow bones deliver the richest collagen and marrow for depth. Costco or local butchers often carry them pre-packaged, but if you're buying whole, look for bones with visible marrow channels. Fresh ginger loses potency quickly, so buy it organic from the produce section—it should smell sharp and citrusy. The star anise and cinnamon sticks can be found in the spice aisle alongside whole spices; Penzeys carries high-quality whole pods if you want to invest. For the fish sauce, Red Boat is the gold standard—avoid the generic brands, as their quality varies wildly.
No fish sauce? Soy sauce plus a splash of coconut aminos gets you 80% there. Running out of star anise? Cardamom pods or fennel seeds add a similar aromatic complexity. The ginger can be substituted with galangal if you're feeling adventurous—it has a peppery kick that pairs beautifully. For the onions, char them in a dry pan before adding to the broth—this caramelization adds a smoky sweetness that's essential. The water should be cold when added to prevent immediate protein coagulation, which would cloud the broth. If you're using a pressure cooker, add an extra cup of water to account for steam loss during the process.
This broth rewards patience—12-24 hours at a gentle simmer is ideal, but the pressure cooker method delivers results in 3-4 hours. Strain through a fine-mesh sieve or cheesecloth-lined colander for the smoothest texture. Store in glass jars in the fridge for up to 1 week or freeze in ice cube trays for single-portion use. The flavor actually improves after 24 hours in the fridge as the umami compounds continue to develop. For long-term storage, vacuum-seal portions to preserve freshness for up to 6 months in the freezer.
Why You'll Love This Recipe
- No-Fuss Setup: I swear, this broth takes less effort than boiling water for pasta. Toss in the bones, roughly chop the onion and ginger (no peeling required), smash those garlic cloves, and let the star anise do its magic—no measuring cups, no fancy techniques.
- Umami Bomb: That first sip? Pure comfort. The beef bones melt into rich depth, while the ginger and star anise add warmth without overpowering. Honestly, the garlic gets all the love, but it’s the onion’s slow caramelization that steals the show—like a secret sauce you didn’t know you needed.
- Weeknight Workhorse: Use it as-is for ramen or pho, or freeze it for future soups, braises, or even marinades. Between us, I’ve drizzled this stuff over rice bowls, tossed it into stir-fries, and even used it to deglaze pans—it’s my pantry’s unsung hero.
- Pantry Goldmine: A big batch costs less than takeout for two. The bones render down to nothing, leaving you with gallons of flavor, and the spices stretch across meals. I’ll be real: I make this when I spot beef bones on sale, then live off it for weeks—zero waste, maximum flavor.
Step-by-step instructions for Asian beef bone broth
Transform simple ingredients into a rich, aromatic broth with layers of umami and depth.
Prepare the Bones and Aromatics
Begin by rinsing the 3 lb beef bones thoroughly under cold water to remove any surface impurities. Pat them dry with paper towels and place them in a large stockpot. The bones should fit snugly but not crowd the pot—this allows for even heat distribution and prevents uneven cooking.
In a separate bowl, combine the 1 whole yellow onion (quartered), 3 oz fresh ginger root (peeled and sliced into thick coins), 8 cloves garlic (smashed with skins on), 4 whole star anise pods (lightly crushed), 2 whole cinnamon sticks (broken into 2-inch pieces), 4 whole bay leaves, and 1 tbsp black peppercorns. This aromatic bundle forms the flavor foundation of your broth, so take your time to ensure everything is evenly distributed.
Char the Onion and Toast the Spices
Heat a dry skillet over medium-high heat and add the quartered onion. Let it char for 5-7 minutes, turning occasionally, until deeply browned with blackened patches. The charring adds a smoky depth that elevates the broth’s complexity. Transfer the charred onion to the stockpot.
In the same skillet, toast the remaining aromatics—ginger, garlic, star anise, cinnamon, bay leaves, and peppercorns—over medium heat for 2-3 minutes until fragrant. You’ll smell the garlic soften, the cinnamon release its warmth, and the peppercorns crackle slightly. Add these to the stockpot with the charred onion and bones. This step unlocks the full potential of the spices, ensuring their flavors infuse the broth.
Simmer the Broth Low and Slow
Add the 12 cups water to the stockpot, ensuring the bones and aromatics are fully submerged. Bring the mixture to a gentle boil over medium-high heat, then immediately reduce to a low simmer. Skim off any foam or impurities that rise to the surface during the first 15-20 minutes—this ensures clarity in the final broth.
Cover the pot and maintain a low simmer for 3-4 hours. The broth should never boil vigorously, as this can cause the collagen to break down too quickly, resulting in a thinner, less gelatinous finish. Check the water level periodically and add hot water as needed to keep the bones submerged. The longer it simmers, the richer and more flavorful the broth becomes.
Season and Strain for Clarity
After 3-4 hours, stir in the 1 tbsp fish sauce and 2 tbsp soy sauce, along with the 1.5 tsp Diamond Crystal kosher salt. These ingredients balance the broth’s depth with a touch of saltiness and umami, rounding out the flavors. Let the broth simmer uncovered for an additional 30 minutes to allow the seasonings to meld.
Remove the pot from heat and let the broth sit for 10 minutes to settle. Strain it through a fine-mesh sieve or cheesecloth-lined colander into a clean container, pressing gently on the solids to extract every drop of flavor. Discard the bones and aromatics. The result should be a deep amber broth with a rich, velvety texture and a aroma that hints at garlic, ginger, and the subtle warmth of star anise.
Cool and Store for Maximum Freshness
Allow the broth to cool to room temperature before refrigerating. It will thicken slightly as it chills, forming a layer of fat on top. This fat is pure flavor—save it for future use or skim it off before reheating. The broth will keep in the refrigerator for up to 5 days or can be frozen for up to 3 months for later use.
For the best results, reheat the broth gently over low heat, stirring occasionally. Avoid boiling, as this can break down the collagen and make the broth cloudy. Use it as a base for ramen, stir-fries, or sipping straight from a bowl with a sprinkle of fresh herbs. The depth of flavor will make every dish unforgettable.
Pro Tips For Making Asian Beef Bone Broth
- CHAR THE BONES FIRST: I learned this the hard way—skipping the char step means you’re missing out on the deep, smoky depth that defines good bone broth. Use a blowtorch or broiler to blacken the bones before simmering; just 30 seconds per side adds a caramelized richness that no slow cooker can replicate.
- PEEL AND SLICE GINGER THIN: Thick ginger chunks sink to the bottom and turn to mush, wasting flavor. Instead, peel and slice it paper-thin (about 1/8-inch) so it infuses evenly without disappearing. Pro move: Toss the slices in a pinch of salt before adding them to the pot—they’ll release their oils faster.
- SKIP THE BOILING STAGE: Boiling burns off collagen and makes your broth cloudy. Once the liquid reaches a gentle simmer (tiny bubbles, not rolling), turn the heat low enough to keep it at a bare simmer. I know, it takes patience, but rushing this step turns rich broth into weak tea.
- USE WHOLE STAR ANISE: Crushed or ground star anise overpowers the broth with bitterness. Keep the pods whole so they infuse gradually without dominating. Remove them after 2 hours of simmering—they’ll still add aroma without lingering harshness. (Yes, even if you’re impatient like me.)
Make-ahead tips for this dish
Pressure Cooker Shortcut
If you're short on time, a 6-quart pressure cooker like the Instant Pot cuts the process to just 3-4 hours without sacrificing depth. Add all ingredients to the pot, seal it, and cook on high pressure for 2 hours, then natural release for 30 minutes. The high heat extracts collagen faster, but the flavor remains rich and complex. Just
Freezer Storage Hacks
For long-term storage, freeze broth in ice cube trays—perfect for single-portion use in soups or sauces. Once frozen, transfer cubes to a ziplock bag and label with the date. Alternatively, use glass mason jars (leave 1-inch headspace for expansion) and stack them vertically in the freezer. The fat will solidify on top, making it easy to skim off later. Vacuum-sealing extends freshness to 6 months while preserving flavor intensity. ❄️
Fridge Flavor Boost
The broth actually improves after 24 hours in the fridge as the umami compounds deepen. Skim off any congealed fat before reheating—this preserves clarity and prevents a greasy texture. For extra richness, add a splash of fish sauce or a pinch of white pepper when reheating. Store in glass containers (avoid plastic, which absorbs odors) and keep it submerged under water in the fridge to prevent surface scum. 💡
Batch Prep Strategy
Double the recipe and make two batches at once—this is my go-to for meal prep Sundays. Use one pot for immediate use and freeze the second for later. Label containers with the date and store them in the coldest part of your freezer (usually the back of the bottom shelf). Thaw overnight in the fridge before reheating. This ensures you always have a flavorful base ready for quick meals like pho or stir-fries. 📅
Reheating Without Ruin
Never microwave broth directly—it creates a skin and ruins the texture. Instead, reheat on the stovetop over low heat, stirring occasionally. For cloudy broth, add a splash of cold water and simmer gently to restore clarity. If using frozen cubes, drop them directly into hot water or broth-based dishes—they’ll melt seamlessly. The gentle heat preserves the collagen, keeping the broth velvety and rich. 🔥
Flavor Preservation Tips
To maintain freshness, store broth in airtight glass containers and press plastic wrap directly onto the surface to minimize oxidation. Avoid partial thawing and refreezing, as this degrades texture. For restaurant-quality results, let the broth sit at room temperature for 10 minutes before refrigerating—this prevents condensation that can dilute flavors. A small amount of vinegar (just ½ tsp) can also help preserve clarity during storage. 💛
Nutrition facts
Frequently asked questions
Can I use chicken bones instead of beef for this broth?
While chicken bones work for lighter broths, they won't deliver the same rich, gelatinous texture that beef bones provide. Beef bones contain more collagen and marrow, which create that signature velvety mouthfeel. For a beef-like flavor with chicken, try adding a splash of fish sauce or a pinch of beef bouillon powder at the end.
How do I know when the broth is done?
Look for a deep amber color and a rich aroma from the aromatics. The bones should be soft enough to crumble between your fingers after 12-24 hours of simmering. For pressure cooker versions, check after 2 hours—the broth should be fully infused, though slightly less gelatinous than stovetop methods.
What's the best way to remove the cloudiness from my broth?
Cloudiness usually means impurities weren't skimmed early enough. For immediate fixes, strain through a cheesecloth-lined colander or use a fine-mesh sieve. For future batches, skim vigorously during the first 15-20 minutes of simmering. A splash of cold water added to hot broth can also help clarify it temporarily.
Can I make this broth in a slow cooker?
Use the same ingredients but cook on low heat for 12-14 hours. The slow cooker's gentle heat mimics the stovetop method perfectly. Just ensure the bones stay submerged and skim impurities during the first hour. The result will be just as rich, though slightly less gelatinous than a 24-hour stovetop simmer.
Why does my broth smell so strong?
That's normal! The intense aroma comes from the ginger, garlic, and star anise breaking down during long simmering. If it smells overly pungent, reduce the ginger slightly next time or add a bay leaf to mellow the flavors. The smell should mellow as it cools, leaving behind a complex, savory aroma rather than a harsh one.