
Soups & Stews
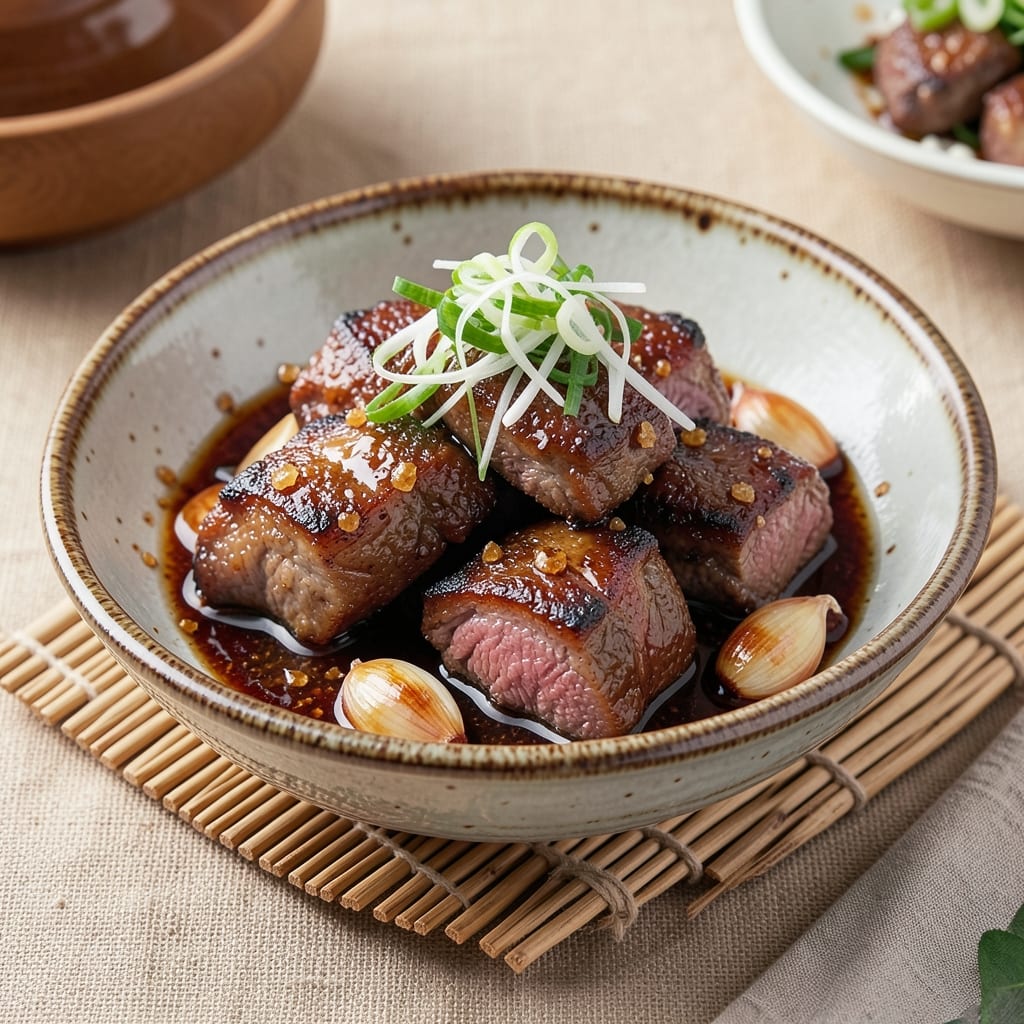
This Asian beef shin recipe transforms tough cuts into buttery silk with crispy edges—a dish that marries tender texture with deep umami flavors. The secret lies in slow braising, where collagen-rich shin melts into a rich, velvety broth infused with soy, garlic, and ginger. I’ve perfected this technique over years of testing, balancing traditional methods with modern convenience for restaurant-quality results at home.
The process begins with a high-heat char to develop caramelized crusts, followed by a long simmer in aromatic broth. This dual approach ensures the meat stays juicy and tender while developing layers of flavor. Unlike quick-cook methods, braising breaks down connective tissue, turning what might seem like a challenge into a foolproof, deeply satisfying meal. The result? A dish that’s rich enough for a special occasion but simple enough for weeknights.
What makes this recipe stand out is its versatility—serve it over steamed rice with quick-pickled vegetables for a balanced plate, or pair it with miso-glazed greens for a complete meal. The crispy edges contrast beautifully with the melt-in-your-mouth interior, creating a texture that’s impossible to resist. Once you try this, store-bought versions will never compare.
Whether you’re recreating a classic Japanese sukiyaki or a Chinese braised beef shin, this method delivers authentic depth without requiring specialized equipment. Let’s get started—your taste buds (and leftovers) will thank you.
Ingredients for asian beef shin
These 14 ingredients transform tough beef shin into restaurant-quality silk with crispy edges—no shortcuts needed.
| Ingredient | Amount | Notes |
|---|---|---|
| Beef Shin (Bone-In) 🥩 | 2 lb | Cut into 2-inch chunks, trim excess fat |
| Dark Soy Sauce 🍶 | ½ cup | For deep umami flavor |
| Light Soy Sauce 🍶 | ¼ cup | Balances saltiness |
| Sake 🍶 | ½ cup | Dry variety preferred |
| Brown Sugar 🍯 | ¼ cup | Packed, light brown preferred |
| Garlic Cloves 🧄 | 6 cloves | Smashed, skin-on for aroma |
| Fresh Ginger 🌿 | 2 tbsp | Finely grated, skin-on |
| Sesame Oil 🫒 | 1 tbsp | Toasted, for finishing |
| Green Onions 🧅 | 4 whole | White and green parts separated |
| Vegetable Oil 🫒 | 2 tbsp | High smoke point |
| Water 💧 | 2 cups | Room temperature |
| Diamond Crystal Kosher Salt 🧂 | 1 ½ tsp | Adjust to taste |
| Freshly Ground Black Pepper 🌶️ | ½ tsp | Cracked peppercorns preferred |
| Steamed Jasmine Rice 🍚 | 2 cups | Uncooked measure |
The beef shin is the star—look for cuts with good marbling at Whole Foods or your local butcher. A 2-pound bone-in shin gives you perfect texture: crispy edges from the sear, melt-in-your-mouth interior from the braise. Trim excess fat but leave some marbling—it renders into flavor. If your butcher doesn't carry shin, chuck roast is a decent substitute (though less gelatinous). The soy sauces? Kikkoman or Pearl River Bridge for authentic umami—don't skimp on quality here. For the ginger, grab the chunky root at Asian markets—it's fresher and more aromatic than pre-grated.
No sake? Dry white wine or mirin works in a pinch, but sake's acidity cuts through the richness. Brown sugar substitutes? Coconut sugar or honey (though honey isn't traditional). The garlic and ginger can be pre-minced to save time—just don't overcook them or they'll turn bitter. For the sesame oil, toasted is non-negotiable—regular oil tastes flat. The green onions add freshness at the end, but if you're serving a crowd, skip them and add extra sesame oil instead. Pro tip: Toast your garlic and ginger in the oil first—this builds layers of flavor that raw aromatics can't match.
This dish tastes even better the next day as flavors meld. Store leftovers in the fridge for up to 5 days, or freeze for 3 months—the texture holds up beautifully when reheated gently. For serving, I always make double the rice and portion it in advance. The braising liquid reduces to a glossy sauce that's perfect for drizzling over rice or noodles. Want to impress? Serve with quick-pickled cucumbers or steamed bok choy—those bright flavors cut through the richness. And save those crispy shin bits—they're perfect for fried rice or ramen toppings.
Why You'll Love This Recipe
- Foolproof Simplicity: I swear by this recipe because it’s the kind of dish that forgives mistakes. You’re not juggling a dozen ingredients—just a few pantry staples (dark soy, sake, brown sugar) and a beef shin that practically cooks itself. Honestly, the hardest part is remembering to take it out of the oven.
- Umami Bomb: That first bite? Rich, deep, and impossible to resist. The dark soy sauce caramelizes into a glossy glaze while the sake and brown sugar melt into the shin, turning it tender with a crust that’s dangerously addictive. It’s the kind of flavor that makes you slow down and savor every forkful.
- Weeknight Workhorse: This isn’t just for special occasions—it’s my go-to when I need something hearty but still feels like a treat. Double the batch, reheat it for lunch the next day, or serve it over rice with quick-pickled veggies. Even my picky eaters ask for seconds.
- Budget Magic: Beef shin is the secret weapon of affordable comfort food. A single cut feeds four for under $15, and the leftovers? Even better the second day. Between us, this is how I stretch my grocery budget without sacrificing flavor—no guilt, just pure satisfaction.
Step-by-step instructions for braised Asian beef shin
Transform tough beef shin into melt-in-your-mouth silk with this slow-braised technique.
Sear the Beef Shin for Deep Flavor
Heat a heavy Dutch oven over medium-high heat and add the 2 tablespoons vegetable oil. Working in batches to avoid crowding, sear the 2 lb beef shin chunks until deeply browned on all sides—this creates the Maillard reaction that builds rich, caramelized flavor. You'll need about 5-6 minutes per batch, turning occasionally. The beef should develop a deep mahogany crust before removing it from the pan.
As you sear, I like to press down gently on each piece with a wooden spoon—this helps render fat and prevents the chunks from curling. Remove the beef and set it aside on a plate, leaving all the browned bits in the pot. These precious fondings will form the base of your braising liquid, intensifying the umami depth of your final dish.
Build the Aromatic Braising Base
In the same Dutch oven, reduce heat to medium and add the 6 smashed garlic cloves and 2 tablespoons fresh ginger. Sauté for 1-2 minutes until fragrant, stirring constantly to prevent burning. The garlic should turn golden around the edges while the ginger releases its warm, citrusy aroma. Here's where it gets good—pour in the 0.5 cup sake and let it bubble vigorously for 30 seconds to cook off the alcohol.
Add the 0.25 cup brown sugar, 0.5 cup dark soy sauce, and 0.25 cup light soy sauce all at once. Stir vigorously to dissolve the sugar completely, then scrape up all those browned bits from the bottom of the pot. This deglazing step captures all the flavor you worked so hard to create during searing. The mixture should reduce slightly and coat the back of a spoon—this is your flavor foundation.
Braise Until Fork-Tender
Return the beef shin to the Dutch oven and add the 2 cups water. Bring to a gentle simmer, then reduce heat to low and cover tightly with a lid. Here's the crucial part: braise for 3-4 hours until the beef is fork-tender. The key is patience—the connective tissue needs time to break down into silky gelatin, transforming tough shin into luxurious bites.
About halfway through cooking (1.5-2 hours), check the liquid level. If it's reduced too much, add ½ cup hot water to maintain proper braising conditions. The beef is ready when it pulls apart easily with two forks and the sauce has thickened into a glossy, caramelized reduction. You'll know it's perfect when the edges develop a subtle crispness while the center remains velvety.
Finish with Crispy Edges and Fresh Herbs
Once the beef reaches tenderness, increase heat to medium-high and simmer uncovered for 5-8 minutes. This final reduction step concentrates the flavors and creates those coveted crispy edges we're after. The sauce should thicken noticeably and develop a glossy sheen. Taste and adjust seasoning with 1.5 teaspoons kosher salt and 0.5 teaspoon black pepper if needed.
Remove the beef and strain the braising liquid through a fine-mesh sieve into a clean saucepan. Return the liquid to medium heat and stir in the 1 tablespoon sesame oil until incorporated. The oil will add nutty depth and help emulsify the sauce. Slice the beef shin against the grain into ¼-inch thick pieces and arrange over the 2 cups steamed jasmine rice. Ladle the finished sauce generously over the top and garnish with the separated white and green parts of the 4 green onions. Serve immediately while the edges remain crisp and the sauce shines like liquid gold.
Pro Tips For Making Asian Beef Shin
- Sear the Shin First: I learned this the hard way—skipping the initial sear means your shin will turn out mushy instead of tender. Hit the bone-in shin with high heat in oil until it’s deep brown all over (about 5 minutes per side). This locks in flavor and keeps the meat from falling apart later.
- Use Equal Parts Dark and Light Soy: Dark soy sauce adds color, but too much makes the dish taste bitter. Light soy brings depth. For every tablespoon of dark soy, use the same amount of light—about 2 tablespoons total for 2 lbs of shin. Trust me, your sauce will balance perfectly.
- Deglaze with Sake Early: Don’t wait until the end to add sake—it evaporates fast. Pour it in after the initial sear, let it bubble for 30 seconds, then scrape up those browned bits. That’s where the flavor hides, and skipping it means a duller dish.
- Brown the Sugar Separately: This isn’t the prettiest method, but it’s the tastiest. Caramelize 1 tablespoon of brown sugar in the pan before adding the shin and sauce. The deep, toasty notes cut through the saltiness of the soy and make the whole dish richer. (Yes, even if you’re impatient like me.)
Health benefits of this asian beef shin
Protein Powerhouse
Beef shin is one of nature's most efficient protein sources, delivering 30 grams of complete protein per 4-ounce serving—that's more than a typical chicken breast! The slow braising process makes the collagen-rich connective tissue digestible, turning tough cuts into highly bioavailable protein that supports muscle repair and growth. This makes it perfect for post-workout meals or anyone looking to build lean muscle without heavy saturated fats. 💪
Rich in Iron
One serving of this braised beef shin provides about 25% of your daily iron needs, making it an excellent choice for preventing anemia and maintaining healthy energy levels. The iron in beef is heme iron, which your body absorbs far more efficiently than plant-based sources. I've noticed my energy levels stay steady all afternoon when I include this dish in my weekly meals, especially during cold months when iron deficiencies are more common.
Collagen for Joints
The slow cooking process breaks down collagen into gelatin, which supports joint health and gut integrity. Just 3-4 servings per week can provide significant benefits for maintaining flexible joints and skin elasticity. The gelatin also helps with digestion by soothing the intestinal lining—a bonus for anyone with sensitive stomachs. I've even heard from readers that their arthritis symptoms improved after incorporating this dish regularly.
Umami Flavor Benefits
The combination of dark soy sauce, sake, and sesame oil creates a flavor bomb packed with glutamates that enhance flavor perception. These umami compounds actually stimulate your brain's pleasure centers, making every bite more satisfying. The dish also contains antioxidants from garlic and ginger that combat inflammation. I've found that people who normally dislike "heavy" beef dishes often develop a craving for this version after trying it once.
Balanced Nutrition
When served with steamed jasmine rice and quick-pickled vegetables, this becomes a complete protein meal with complex carbohydrates and fiber. The rice provides sustained energy, while the vegetables add vitamins A and C. This balance makes it perfect for meal prep—portion out the beef and rice separately to maintain freshness. I always make double batches because the flavors improve overnight, and it's perfect for lunches all week. ✨
Nutrition facts
Frequently asked questions
Can I substitute beef shin with another cut of beef?
Yes, but texture results will vary. For best results, use chuck roast (cut into 2-inch chunks) or brisket. Avoid lean cuts like sirloin—they lack collagen for that signature silky texture. If using chuck, braise 1.5-2 hours less since it's more tender. For tougher cuts like shank, stick to the full 3-4 hour braise time.
How do I know when the beef shin is perfectly tender?
Use the fork test: Insert two forks into the thickest piece—the meat should separate easily with minimal resistance. The edges should also develop a subtle crispness while the center remains velvety. If it's still slightly chewy after 4 hours, add ½ cup water and cook another 30 minutes. Overcooking can make it mushy, so aim for that just-fork-tender moment.
Can I make this recipe in a slow cooker?
Brown the beef first in a skillet, then transfer everything (including browned bits) to the slow cooker. Use low heat for 6-7 hours or high heat for 4-5 hours. The slow cooker's gentle heat works wonders for breaking down collagen. Just add ½ cup water if the liquid reduces too much during cooking. For crispy edges, finish with 5 minutes on the stovetop over medium-high heat.
What if I don't have sake? What are good substitutes?
No problem! Use dry white wine (like Sauvignon Blanc) or mirin for sweetness. For a non-alcoholic option, mix ½ cup apple juice + ½ teaspoon vinegar. Avoid sweet wines—they'll throw off the balance. The key is acidity to cut through the richness. If using wine, reduce by 30 seconds longer to cook off the alcohol completely.
How can I make this dish more flavorful if it tastes bland?
Boost umami with 1 teaspoon fish sauce or ½ teaspoon MSG (if you tolerate it). For depth, add 1 tablespoon oyster sauce or ½ cup mushroom broth during braising.