
Main Courses
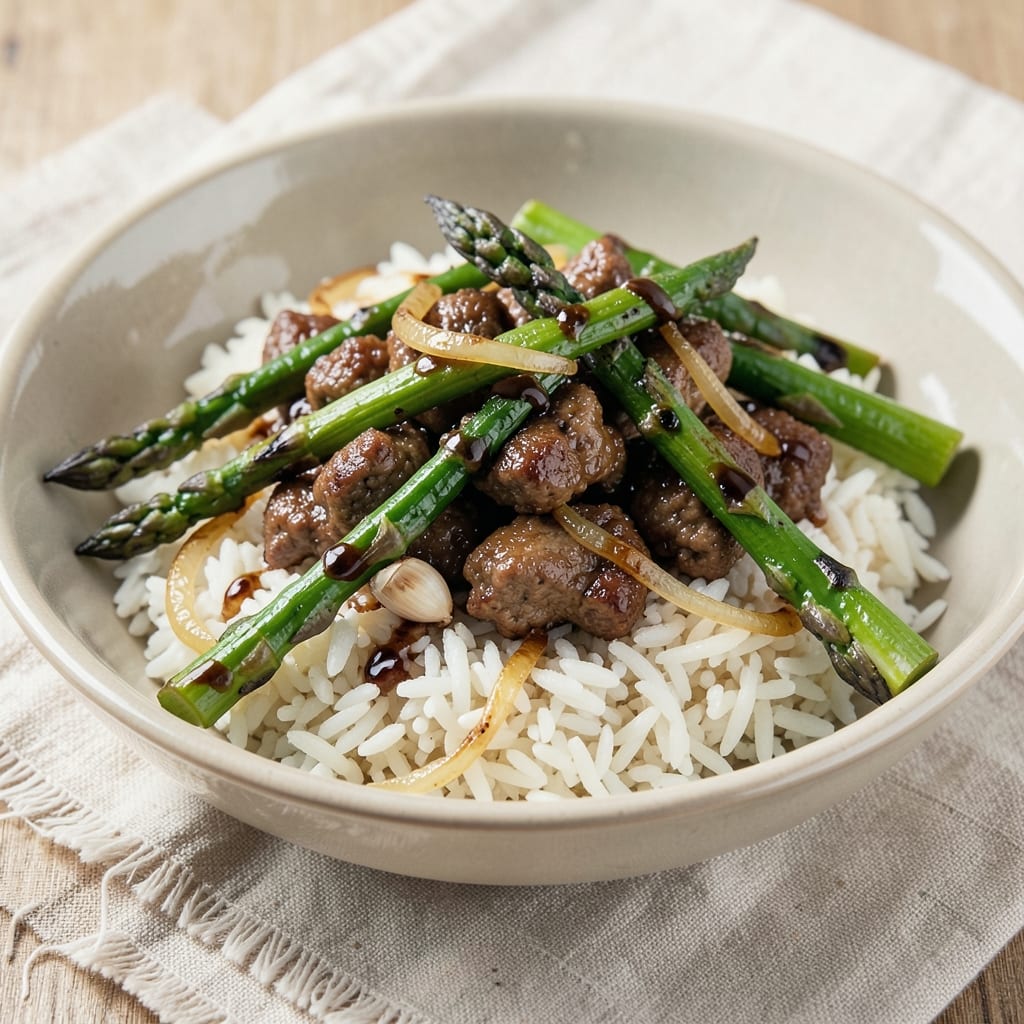
This asparagus ground beef rice recipe delivers a one-pan umami explosion that transforms weeknight dinners into restaurant-quality meals. The secret lies in perfectly seared ground beef with deep savory notes, tender asparagus spears, and fluffy rice that absorbs all the rich flavors. I developed this method after realizing most beef-and-veggie dishes either overpower the rice or leave it dry—this version gets it just right.
The beauty of this recipe is its versatility—cook everything in one pan for minimal cleanup, or prepare components separately for a more elegant presentation. We start with high-heat searing to develop the beef's flavor, then add asparagus that roasts until tender-crisp while the rice simmers in the same pot. The result? A dish where every bite balances meaty richness, vegetable freshness, and comforting carbs without a single bland element.
What makes this recipe truly special is how the ingredients work together—the beef's natural juices infuse the rice, while the asparagus adds a bright contrast that cuts through the richness. The technique is foolproof: no fancy equipment, just a single pan and about 30 minutes of hands-off cooking. Whether you're feeding a family or meal prepping for the week, this dish delivers satisfying texture and bold flavor with minimal effort.
Serve it as-is for a hearty main course, or elevate it with a squeeze of lemon, fresh parsley, or a drizzle of soy-ginger sauce. The possibilities are endless, but the foundation—perfectly seasoned beef, tender asparagus, and flavorful rice—remains the same. Let's get cooking!
Ingredients for asparagus ground beef rice
Fourteen ingredients for a restaurant-worthy one-pan dinner with perfect balance of meaty richness and vegetable brightness.
| Ingredient | Amount | Notes |
|---|---|---|
| Ground Beef (80/20) 🥩 | 1 lb | Finely ground for even cooking |
| Long-Grain White Rice 🍚 | 1 cup | Uncooked, jasmine or basmati preferred |
| Asparagus Spears 🌱 | 1 lb | Thick spears for texture contrast |
| Yellow Onion 🧅 | 1 whole | Medium size, finely diced |
| Garlic Cloves 🧄 | 3 cloves | Freshly minced for aromatic depth |
| Low-Sodium Soy Sauce 🥢 | 2 tbsp | High-quality brand for umami |
| Beef Broth 💧 | 1 ½ cups | Homemade or quality low-sodium |
| Extra-Virgin Olive Oil 🫒 | 1 tbsp | For high-heat searing |
| Sesame Oil 🌿 | 1 tsp | Toasted for nutty aroma |
| Diamond Crystal Kosher Salt 🧂 | 1 tsp | For seasoning and rice |
| Ground Black Pepper 🌶️ | ½ tsp | Freshly cracked for heat |
| Fresh Ginger 🧅 | 1 tbsp | Finely grated, aromatic kick |
| Green Onions 🌱 | 2 whole | Thinly sliced for garnish |
| Sesame Seeds 🌾 | 1 tsp | Toasted for crunchy texture |
The ground beef is the flavor foundation here—80/20 fat ratio ensures juiciness while searing. Trader Joe's and Whole Foods carry the finest cuts, but any quality supermarket brand works if labeled 'finely ground.' Avoid pre-formed patties; loose meat browns more evenly. The asparagus should be thick spears (1/2-inch diameter) for that satisfying crunch—local farmers markets often have the freshest selection. Fresh ginger and garlic are non-negotiable for authentic umami; Penzeys Spices sells pre-peeled garlic cloves if you're short on time. For the rice, jasmine or basmati varieties absorb flavors beautifully without becoming mushy.
No sesame oil? Toasted peanut oil works in a pinch, though the flavor profile shifts slightly. Short on beef broth? Low-sodium chicken broth plus 1 tsp soy sauce mimics the depth. The Diamond Crystal kosher salt is crucial—it dissolves completely, unlike table salt which can leave gritty residue. For a quicker prep, pre-chopped frozen asparagus (thawed and patted dry) saves time without sacrificing texture. The green onions can be swapped for chives or scallions if you prefer milder flavor. Need extra umami? Add 1 tsp fish sauce (ensure it's gluten-free if needed) to the beef mixture.
Store cooked rice in an airtight container with a paper towel pressed on top to prevent sogginess—keeps for 4-5 days in the fridge. The beef-asparagus mixture reheats beautifully; just add a splash of beef broth when warming. For meal prep, portion into glass containers with tight lids to maintain freshness. The sesame seeds toast best in a dry skillet over medium heat for 30 seconds—watch closely to avoid burning. Freeze components separately: rice lasts 3 months, beef mixture 2 months, and asparagus 1 month when blanched and frozen.
Why You'll Love This Recipe
- One-Pan Magic: I swear by this trick—just brown the beef with onions and garlic, toss in rice and asparagus, then let the broth work its magic. No fancy layers, no flipping pans, and the asparagus stays tender without wilting into mush.
- Umami Bomb: That 80/20 ground beef? Rich, juicy, and packed with flavor. When you sear it first, the edges get this caramelized crust that makes every bite taste like a little victory. Honestly, the asparagus just steals the show—crisp-tender and bright against the beef’s depth.
- Lunchbox Hero: Between us, this is my go-to for meal prep. The rice holds up for days, the asparagus stays fresh longer than you’d think, and the beef reheats like it’s fresh off the stove. Pack it cold or microwave it—either way, it’s a win.
- Budget Flex: I make this when I’m pinching pennies, and it never feels like I’m cutting corners. A pound of beef, a bunch of asparagus on sale, and rice that lasts—it’s a full meal for less than takeout. Leftovers? Even better.
Step-by-step instructions for asparagus ground beef rice
This one-pan method delivers perfectly balanced flavors with minimal cleanup.
Sear the Ground Beef for Maximum Flavor
Heat a large deep skillet or Dutch oven over medium-high heat until hot. Add the 1 tablespoon extra-virgin olive oil and swirl to coat the bottom evenly. Add the 1 pound ground beef (80/20) and cook, breaking it apart with a wooden spoon, until it loses its raw color and begins to brown—about 5-6 minutes.
This high-heat sear develops deep umami flavors through the Maillard reaction. Watch for the beef to form small crispy edges—this is your signal to add the 1 whole yellow onion and 3 cloves garlic cloves (minced). Stir these aromatics into the beef and cook for another 2 minutes until fragrant. The onions should soften slightly but not caramelize.
Toast the Rice and Build the Aromatic Base
Add the 1 cup long-grain white rice to the skillet and stir vigorously to coat each grain in the rendered beef fat. Toast the rice for 2 minutes until it becomes translucent at the edges and slightly opaque. This step prevents mushy rice by developing a light crust on each grain.
Next, stir in the 1 tablespoon fresh ginger (finely grated), 1 teaspoon diamond crystal kosher salt, and 0.5 teaspoon ground black pepper. Pour in the 1.5 cups beef broth and 2 tablespoons low-sodium soy sauce, scraping up any browned bits from the bottom of the pan. Bring to a gentle simmer—you should see small bubbles forming around the edges but not a vigorous boil.
Prepare the Asparagus and Layer Components
While the rice simmers, trim the tough ends from the 1 pound asparagus spears and cut them into 1-inch pieces. Add these to a separate bowl and toss with 1 teaspoon sesame oil and a pinch of diamond crystal kosher salt. This pre-seasoning ensures the asparagus absorbs flavor without becoming soggy.
After the rice mixture has simmered for 5 minutes, use a spatula to create a well in the center. Gently place the prepared asparagus pieces in this well, spreading them evenly across the surface. Pour the remaining 1 teaspoon sesame oil over the asparagus to help crisp the edges during cooking.
Simmer and Steam the Perfect One-Pan Meal
Cover the skillet tightly with a lid and reduce heat to low. Simmer for 15 minutes without lifting the lid—this allows the rice to absorb the liquid while the asparagus steams gently. The rice should be tender but still slightly firm to the bite, with the asparagus bright green and just tender-crisp.
If the rice appears dry before the asparagus is fully cooked, carefully add 2-3 tablespoons water through the lid's steam vent. The key is maintaining gentle heat—too high will scorch the bottom, too low will leave the rice undercooked. You'll know it's ready when the rice grains are separate and the asparagus can be pierced easily with a fork.
Finish and Garnish for Restaurant-Quality Presentation
Remove from heat and let the dish rest, covered, for 5 minutes. This resting period allows the rice to finish absorbing any remaining liquid and the asparagus to develop its final texture. While resting, thinly slice the 2 whole green onions and toast the 1 teaspoon sesame seeds in a dry skillet over medium heat for 1 minute until fragrant and golden.
Fluff the rice gently with a fork, then transfer to serving plates. Garnish each portion with the toasted sesame seeds and green onions. The dish should have vibrant colors—deep brown beef, bright green asparagus, and creamy white rice—with a complex flavor profile where each component stands out yet harmonizes perfectly.
Pro Tips For Making Asparagus Ground Beef Rice
- Cook beef in batches: I learned this the hard way—trying to brown all the ground beef at once just turns it into a greasy mess. Split it into two portions and cook each in its own pan over medium-high heat. Your rice will thank you later.
- Trim asparagus at an angle: The prettiest asparagus spears are the ones that stand up straight in the pan. Trim the ends at a 45-degree angle so they sit flat and cook evenly. (Yes, it takes 30 seconds, but it makes a difference.)
- Don’t overcrowd the rice: I used to dump everything in the pot at once, and the rice always ended up mushy. Cook the beef and veggies separately first, then fold them into the rice after it’s mostly done. This keeps the texture light and fluffy.
- Use the beef fat for flavor: That golden pool of fat from browning the beef? Don’t pour it out. Deglaze the pan with a splash of water or broth after cooking the onions and garlic—it’ll turn into a rich, savory sauce that ties everything together. (Your future self will thank you.)
Essential equipment for perfect results
One-Pan Essentials
A large deep skillet or Dutch oven (like the All-Clad Stainless Steel or Le Creuset Stoneware) is your best friend for this recipe. I prefer 10-12 inches in diameter to accommodate all components without overcrowding. The deep sides help create steam for tender asparagus while allowing room for rice expansion. If you're short on space, a 14-inch cast iron skillet works beautifully too—just monitor heat distribution closely. 🔥
Heat Control Tools
Invest in a high-quality silicone spatula (like OXO Good Grips) for stirring the beef and rice without scratching your pan. A digital instant-read thermometer (I recommend Thermoworks Smoke) ensures perfect doneness—aim for 165°F for the beef and 212°F for the rice water. For precise temperature adjustments, I use stainless steel tongs to gently move the asparagus without crushing it.
Rice Cooking Aids
While this recipe works without specialized tools, a fine-mesh strainer (like OXO Good Grips) comes in handy if you need to drain excess liquid from the asparagus before adding it to the pan. For meal prep, glass storage containers with tight lids (such as Pyrex 4-cup containers) preserve flavors better than plastic. The lid you use matters too—opt for a tight-fitting one to maintain moisture during simmering.
Asparagus Prep Tools
A sharp chef's knife (I love the Wüsthof Ikon) and cutting board are essential for trimming asparagus ends cleanly. For even cooking, a mandoline slicer (like Julius Rohner) creates uniform 1-inch pieces—though a steady hand works fine too. A small mixing bowl (for tossing asparagus with sesame oil) prevents cross-contamination and makes seasoning easier.
Optional Upgrades
For extra flavor depth, a mortar and pestle lets you grind fresh ginger to a smoother paste. A small saucepan comes in handy if you need to reduce beef broth for extra richness. For presentation, tweezers help place sesame seeds precisely on top of each serving. The only true "must-have" is your pan—everything else is about convenience and precision. 💡
Nutrition facts
Frequently asked questions
Can I substitute another protein like chicken or shrimp?
The recipe works beautifully with ground chicken or shrimp, but cooking times and techniques change. For chicken, use 1 lb boneless, skinless and cook until 165°F (about 6-8 minutes). For shrimp, add them after the rice has simmered 5 minutes and cook just 2-3 minutes until pink. The beef's fat adds richness—chicken will be leaner, while shrimp adds sweetness but requires quicker cooking to avoid overcooking.
How do I prevent the rice from getting mushy?
The key is toasting the rice in the beef fat for 2 minutes before adding liquid—this creates a protective crust. Use a 1:1.5 ratio of rice to liquid (1 cup rice to 1.5 cups broth) and simmer at low heat after covering. If it looks dry, add 2 tbsp water through the lid's steam vent. Never stir the rice while cooking—just fluff it gently at the end.
Can I make this dish in a slow cooker?
Yes! Brown the beef and onions first, then transfer everything to a 3-4 quart slow cooker. Add the rice, broth, soy sauce, and ginger, then cook on LOW for 3-4 hours or HIGH for 2 hours. Add asparagus 30 minutes before serving. The slow cooker method makes the rice slightly softer, so you may need 1/4 cup less liquid. The beef will be more tender but less seared.
What if my asparagus is still crunchy after cooking?
This usually means it didn't cook long enough. Asparagus should be tender-crisp—like a snap pea. If yours is still firm, cover the pan and cook 5 more minutes on low. For extra tenderness, add 1/4 cup water to the pan and cook another 3 minutes. If you prefer softer asparagus, cut it into 1/2-inch pieces instead of 1-inch—smaller pieces cook faster.
How can I make this gluten-free?
Replace the soy sauce with 2 tbsp gluten-free tamari or coconut aminos. Check your beef broth label for hidden gluten—opt for a certified gluten-free version. The rest of the ingredients are naturally gluten-free. For extra umami, add 1 tsp gluten-free fish sauce when cooking the beef. Always verify labels, as cross-contamination can occur in processed foods.