
Main Courses
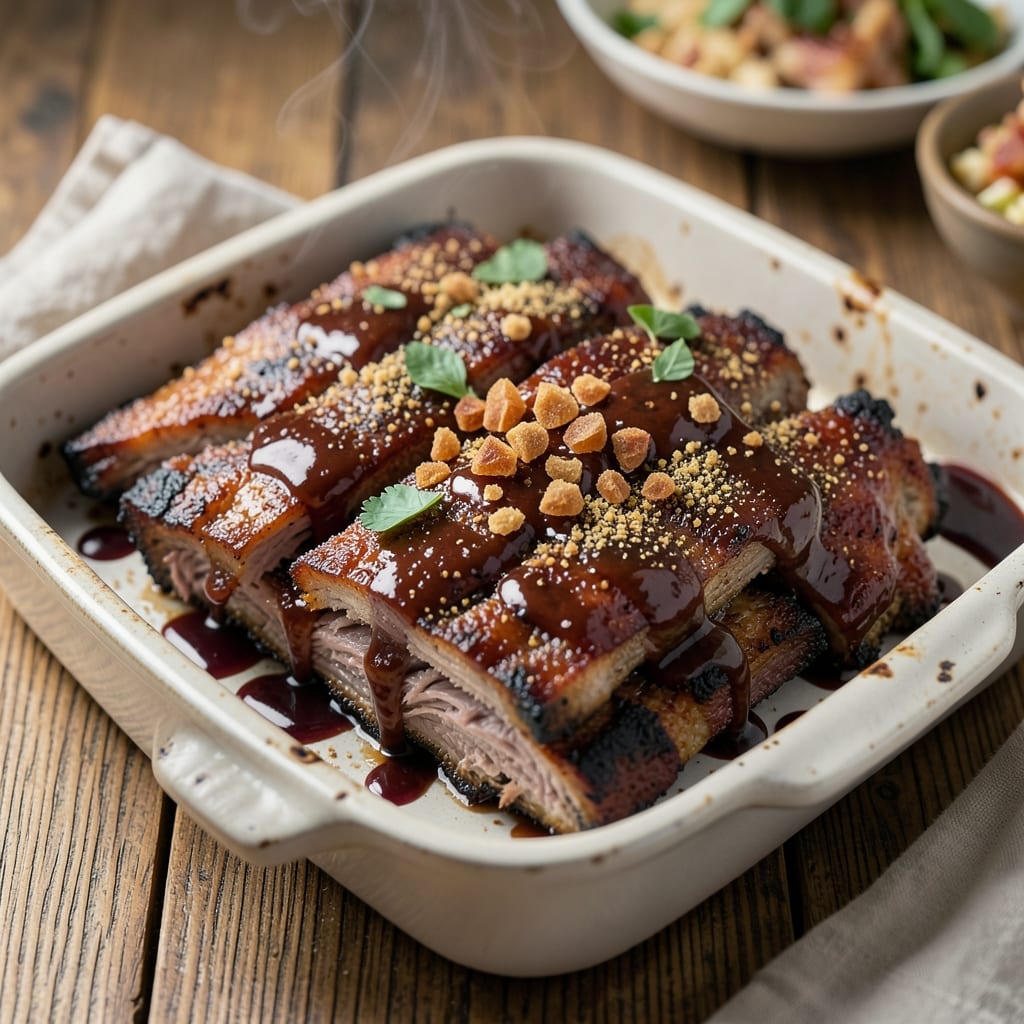
Baked BBQ beef ribs with fall-off-the-bone tenderness and a caramelized glaze are what I call a Sunday supper masterpiece. 🔥 After years of perfecting the balance between oven heat and basting technique, I've cracked the code for ribs that deliver smoky depth without the need for a smoker. The secret lies in a dry rub that develops flavor while the oven does the slow work, followed by a final basting that creates that coveted sticky crust.
What sets these ribs apart is the method: high heat for initial searing to lock in juices, then a slow bake that transforms tough meat into melt-in-your-mouth perfection. I use a simple but potent dry rub of brown sugar, smoked paprika, and garlic powder that builds flavor during the cooking process. The real magic happens when you baste with a tangy-sweet BBQ sauce in the final 15 minutes, creating that glossy, caramelized finish that makes these ribs irresistible.
By the time you're done, you'll have ribs that are so tender they practically fall apart at the touch, with a glaze that's both sticky and smoky. The aroma alone will have everyone gathering around your table, and each bite delivers that perfect combination of sweet, smoky, and savory flavors. This is the kind of dish that turns a regular weeknight into a celebration.
The best part? You don't need any special equipment beyond your oven and a basting brush. With just a few hours of hands-off cooking time, you'll have restaurant-quality ribs that will impress even the most discerning BBQ lovers. Let's get started on creating ribs that will become your new signature dish.
Ingredients for baked bbq beef ribs
A perfect blend of smoky, sweet, and savory ingredients for ribs that'll have everyone begging for seconds.
| Ingredient | Amount | Notes |
|---|---|---|
| Beef Ribs (Baby Back) 🍖 | 4 lb | Meaty portion, membrane removed |
| Brown Sugar 🍚 | ½ cup | Packed, light or dark |
| Smoked Paprika 🌶️ | 2 tbsp | High quality for smokiness |
| Garlic Powder 🧄 | 2 tsp | Freshly ground preferred |
| Onion Powder 🧅 | 1 tbsp | For depth of flavor |
| Ground Black Pepper 🌶️ | 1 tsp | Freshly cracked |
| Kosher Salt 🧂 | 1 tbsp | Diamond Crystal preferred |
| Olive Oil 🫒 | 2 tbsp | For searing |
| BBQ Sauce 🍅 | 1 cup | Sweet and tangy preferred |
| Apple Cider Vinegar 🍏 | 1 tbsp | For basting glaze |
| Honey 🍯 | 1 tbsp | For glaze sweetness |
| Fresh Rosemary 🌿 | ¼ cup | Chopped, for garnish |
| Fresh Thyme 🌿 | ¼ cup | Chopped, for garnish |
The ribs are the star, so pick the meaty portion of baby back ribs—they're more tender than spare ribs. Costco or local butchers often have the best cuts, but grocery stores work too. Look for ribs with good marbling—they'll stay juicier. Remove the membrane from the bone side (it's that silvery sheet) for better flavor penetration. I always grab extra ribs if I'm feeding a crowd, because they disappear fast. The dry rub is where the magic happens, so don't skimp on the smoked paprika—Penzeys or McCormick are solid choices, but check the spice date if you've had it a while.
No smoked paprika? Regular paprika plus a pinch of liquid smoke gets you close. Short on brown sugar? White sugar plus a dash of molasses works, but the color won't be as rich. The BBQ sauce can be store-bought (Sweet Baby Ray's is a crowd-pleaser) or homemade—just make sure it's sweet enough to balance the smokiness. For the glaze, I mix the BBQ sauce with honey and vinegar right before basting. Substitute maple syrup for honey if you're avoiding sugar. And if you're out of fresh herbs, dried thyme at half the amount is fine, but fresh gives that restaurant-quality aroma.
These ribs taste even better the next day, so plan ahead. Store leftovers in an airtight container with a paper towel on top to absorb any moisture. They keep for 4-5 days in the fridge, and you can freeze them for up to 3 months. I like to reheat them in the oven at 300°F until warmed through—just add a splash of water to the pan to keep them moist. The glaze might thicken when reheated, so a quick stir and maybe a splash of water or apple cider vinegar brings it back to perfection.
Why You'll Love This Recipe
- Sheet-Pan Simplicity: I swear by this recipe because it’s one pan, no fuss—just ribs, a quick dry rub of brown sugar and smoked paprika, and a bake. No smoker, no babysitting the grill, just set it and forget it while you toss a salad or open a cold beer.
- Sweet-Smoky Magic: That brown sugar caramelizes into a sticky glaze while the smoked paprika adds depth—like a cross between a BBQ joint and a cozy Sunday dinner. The garlic and onion powders? They’re the secret handshake that makes every bite ridiculously addictive.
- Tailgate or Tuesday: Between us, these ribs work for everything—game day, lazy Sundays, or even a weeknight when you’re craving something rich but don’t want to slave over it. (Yes, even on a Tuesday night.)
Step-by-step instructions for baked BBQ beef ribs
Here's how to transform tough ribs into melt-in-your-mouth perfection using just your oven.
🔥 Step 1: Prep and Season the Ribs for Maximum Flavor
Start by removing the ribs from the fridge and letting them sit at room temperature for 30 minutes. This ensures even cooking. Pat them dry completely with paper towels—moisture is the enemy of crispy bark. I like to use two towels, pressing firmly to remove all excess moisture.
In a small bowl, whisk together the 0.5 cup brown sugar, 2 tbsp smoked paprika, 2 tsp garlic powder, 1 tbsp onion powder, 1 tsp ground black pepper, and 1 tbsp kosher salt. Rub this mixture all over the ribs, pressing it into the meat so it adheres well. The sugar will caramelize beautifully during baking, creating that coveted sticky crust.
🍳 Step 2: Sear the Ribs for Deep Flavor
Heat a large oven-safe skillet over medium-high heat. Add the 2 tbsp olive oil and let it get hot but not smoking. Place the ribs in the skillet, fat-side down, and sear for 3-4 minutes until golden brown. Flip and sear the other side for another 3-4 minutes.
Here's the thing—don't move them around too much during searing. You want that fat to render and create a flavorful crust. If you notice the sugar mixture starting to burn, reduce the heat slightly. The ribs should be deeply browned but not blackened when done.
🥘 Step 3: Bake with Glaze for Fall-Off-Bones Tenderness
Preheat your oven to 275°F. Transfer the seared ribs to a baking dish and place them in the oven. Bake uncovered for 2 hours. This low-and-slow approach is key—it breaks down the collagen in the meat without drying it out.
After 2 hours, remove the ribs from the oven and increase the temperature to 375°F. In a small bowl, whisk together the 1 cup BBQ sauce, 1 tbsp apple cider vinegar, and 1 tbsp honey. Brush this mixture all over the ribs, making sure to get into all the crevices. Return the ribs to the oven and bake for another 30-45 minutes until the glaze is bubbly and caramelized.
🔪 Step 4: Rest and Garnish for Perfect Presentation
Once the ribs are beautifully glazed and the internal temperature reaches 203°F (use a meat thermometer to check), remove them from the oven. Let them rest for 10-15 minutes before serving. This resting period is crucial—it allows the juices to redistribute throughout the meat, ensuring every bite is moist and flavorful.
While the ribs rest, chop the 0.25 cup fresh rosemary and 0.25 cup fresh thyme finely. Sprinkle these herbs over the ribs just before serving. The fresh herbs add a bright, aromatic finish that complements the rich, smoky flavors of the BBQ.
⏰ Step 5: Serve with Confidence
Use two forks to pull the ribs apart at the bone, making it easy for your guests to enjoy. The meat should be so tender it practically falls off the bone, with a beautiful caramelized glaze that's both sweet and tangy. Serve with extra BBQ sauce on the side if desired, along with some crusty bread to soak up all those delicious juices.
Real talk: these ribs are worth the wait. The combination of the dry rub, searing, and slow baking creates a dish that's both restaurant-quality and surprisingly easy to make at home. Don't be afraid to make a double batch—these ribs disappear fast!
Pro Tips For Making Baked Bbq Beef Ribs
- CRANK THE OVEN TO 425°F FIRST: Start your ribs at high heat for the first 20 minutes—this caramelizes the brown sugar and paprika into a sticky, flavor-packed crust before you lower the temp. I used to bake them at 325°F the whole time, and the sauce just sat there like syrup instead of forming that golden, crackly layer.
- PAT DRY THE RIBS LIKE YOU MEAN IT: Wipe those ribs down with paper towels until they’re bone-dry before seasoning. Wet surfaces steam instead of sear, and you’ll end up with soggy ribs instead of that crispy bark. (Yes, even if you’re impatient like me—give it 10 seconds per side.)
- SKIP THE CROWDED PAN: Space the ribs at least 1 inch apart on the baking sheet, or they’ll steam instead of brown. I learned this the hard way when my first batch came out mushy in the middle. A rimmed sheet pan with edges helps here—no sliding ribs off.
- STIR THE SAUCE HALFWAY: After 45 minutes of baking, give that brown sugar-paprika mix a quick stir with a spoon. This redistributes the sticky glaze so every rib gets coated, not just the ones on top. (Pro move: Tilt the pan first to avoid spills.)
Troubleshooting this dish
Ribs Too Dry?
If your ribs end up dry, it’s usually from overcooking or not enough moisture. First, check your internal temperature—203°F is perfect, but anything above 210°F risks drying them out. I’ve found that wrapping ribs in butcher paper during the last 30 minutes of baking adds moisture without steaming. Also, make sure you’re basting with sauce every 15 minutes during the final stage. 💫
Uneven Cooking?
Uneven cooking often happens when ribs aren’t properly spaced in the pan. Leave at least ½ inch of space between each rack to allow heat to circulate. If one side cooks faster, rotate the pan halfway through baking. I also recommend using a wire rack on a baking sheet to elevate the ribs—this prevents steam buildup that can make the bottom dry while the top overcooks.
Bark Not Forming?
That crispy, caramelized bark is all about the sugar in your rub. If it’s not forming, your oven might not be hot enough during the final 375°F stage. Try increasing the heat to 400°F for the last 15 minutes to help the sugar caramelize. Also, make sure your ribs are bone-dry before searing—any moisture will prevent that perfect crust.
Glaze Too Thin?
A runny glaze usually means too much liquid or not enough cooking time. For a thicker glaze, reduce the apple cider vinegar to 1 teaspoon and add ½ teaspoon cornstarch to the sauce mixture. Brush it on in thin layers—thick glaze won’t stick properly. If it’s still too thin after baking, simmer it on the stovetop for 2-3 minutes to thicken before brushing back on the ribs.
Ribs Not Tender Enough?
Tough ribs often mean the cooking time wasn’t long enough. For baby back ribs, 2.5-3 hours at 275°F is ideal. If you’re in a hurry, try the reverse sear method: bake at 225°F for 3 hours, then finish at 450°F for 15 minutes. Also, don’t skip the rest—10-15 minutes is non-negotiable for juicy ribs.
Rub Falling Off?
If your rub keeps sliding off, it’s likely because the ribs weren’t dry enough before applying it. Pat them down with paper towels until they’re completely dry, then press the rub in firmly. For extra grip, mix 1 teaspoon cornstarch into your dry rub. Another trick? Let the ribs sit uncovered in the fridge for 1-2 hours** after rubbing to help the spices adhere better.
Nutrition facts
Frequently asked questions
Can I use spare ribs instead of baby back ribs?
Yes, but adjust the cooking time! Spare ribs have more connective tissue and need 3-4 hours at 275°F instead of 2 hours. The dry rub and glaze method works the same—just monitor closely after 2.5 hours to check tenderness. Spare ribs also benefit from removing more membrane for better flavor penetration.
How do I make these ribs without a meat thermometer?
Use the "bend test"—when the ribs bend easily at the bone and the meat pulls away cleanly, they're done. For baby backs, this usually happens after 2 hours at 275°F. Look for glossy glaze and deep caramelization too. If unsure, check at 203°F (the ideal internal temp) by cutting into the thickest part.
Can I prep the ribs ahead of time?
Rub the ribs 1-2 days ahead and store them uncovered in the fridge. This helps the spices adhere better. On cooking day, just sear and bake as directed. For the glaze, mix it 30 minutes before baking so it's ready when needed. Leftovers keep 4-5 days in the fridge—reheat at 300°F with a splash of water to maintain moisture.
Why does my oven-baked version taste different from smoked ribs?
The oven method creates a sweeter, caramelized flavor profile from the dry rub and glaze, while smoked ribs develop deeper wood-fired notes. To mimic smoke, add ½ teaspoon liquid smoke to your dry rub or use smoked salt instead of regular salt. For extra smokiness, place a metal tray with wood chips (soaked in water) on the oven rack during baking.
What sides pair best with these ribs?
Classic pairings include creamy mac and cheese, cornbread, or baked beans. For something lighter, try a crisp coleslaw or grilled vegetables. I love serving them with a simple potato salad—the coolness balances the rich, smoky ribs. Don't forget extra napkins! These ribs are messy in the best way.