
Main Courses
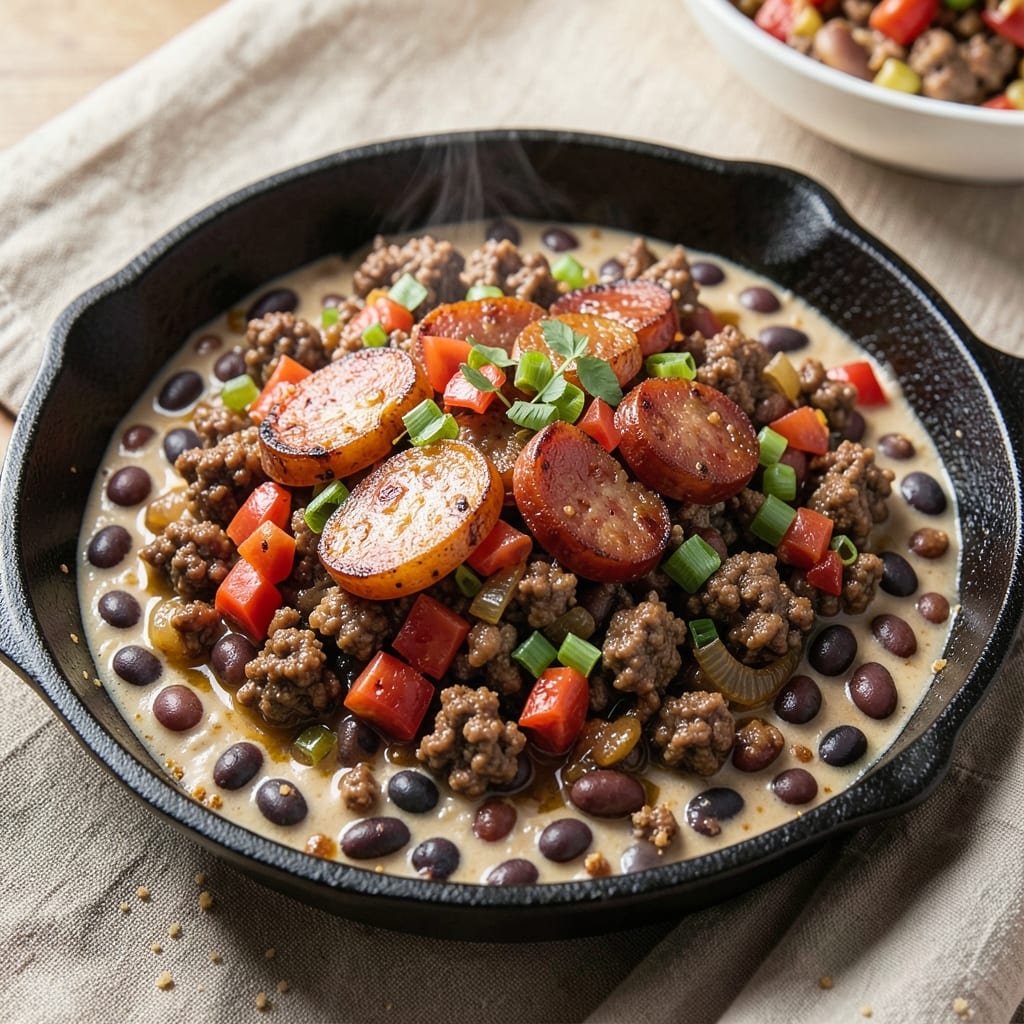
This baked bean recipe with ground beef and sausage delivers the ultimate one-pot comfort food experience—rich, smoky flavors that simmer into perfect harmony. The combination of tender beef, flavorful sausage, and slow-baked beans creates a dish that’s hearty enough for a family dinner but simple enough for a weeknight. What makes this recipe special is the balance of traditional techniques—like slow cooking to deepen flavors—and modern twists, such as smoked paprika and a touch of BBQ glaze for extra depth.
The beauty of this recipe lies in its simplicity: just one pot to prepare, one oven to monitor, and one incredible meal to enjoy. The ground beef and sausage brown beautifully, releasing their natural juices into the beans, while the spices infuse every bite with warmth and complexity. The result is a dish that’s tender, savory, and packed with texture—ideal for feeding a crowd or meal prepping for the week ahead.
By the time you pull this dish from the oven, you’ll have a pot of smoky-spiced baked beans that’s ready to serve with crusty bread, over rice, or even as a filling for sliders. The flavors meld together beautifully, creating a dish that’s both comforting and exciting. This recipe is designed to be foolproof, ensuring you’ll achieve restaurant-quality results every time.
Whether you're a seasoned cook or just starting out, this baked bean recipe is perfect for any occasion. The slow-baking process allows the flavors to develop fully, while the addition of beef and sausage adds a satisfying protein boost. Let’s get started on creating a dish that’s sure to become a family favorite.
Ingredients for baked bean recipe with ground beef and sausage
The perfect blend of smoky sausage, tender beef, and rich beans—everything you need for one-pot magic.
| Ingredient | Amount | Notes |
|---|---|---|
| Navy Beans (Dried) 🌱 | 2 cups | Soaked overnight for best texture |
| Ground Beef (80/20) 🥩 | 1 ½ lb | 80% lean for juicy flavor |
| Kielbasa Sausage 🌭 | 1 lb | Smoked variety preferred |
| Onion (Yellow) 🧅 | 1 whole | Diced medium-fine |
| Celery (Stalks) 🥬 | 3 stalks | Diced small |
| Carrot (Whole) 🥕 | 2 whole | Diced small |
| Garlic Cloves 🧄 | 4 cloves | Minced fine |
| Smoked Paprika 🌶️ | 2 tbsp | For deep smoky flavor |
| Ground Cumin 🌿 | 1 tbsp | Toasted for warmth |
| Dried Thyme 🌿 | 1 tsp | Or 1 tbsp fresh |
| Kosher Salt 🧂 | 1 ½ tsp | Adjust to taste |
| Black Pepper 🌶️ | ½ tsp | Freshly cracked |
| Tomato Paste 🍅 | ½ cup | Smooth texture preferred |
| Beef Broth (Low Sodium) 💧 | 2 cups | Homemade or quality store-bought |
| BBQ Sauce 🍯 | ½ cup | Sweet and smoky variety |
| Brown Sugar 🍬 | 2 tbsp | For subtle caramel notes |
| Apple Cider Vinegar 🍏 | 1 tbsp | Brightens flavors |
The beans are the heart of this dish, so pick navy beans—they hold up best to slow baking. Soak them overnight (or quick-soak with boiling water for 1 hour) for the creamiest texture. For the meat, 80/20 ground beef gives you the best fat-to-lean ratio, while smoked kielbasa from the deli section adds that authentic sausage flavor. I always grab mine from Costco when I'm doing a big batch, but any good butcher will have it. Freshness matters—if your beef smells funky or the sausage has a grayish tint, grab a new package. The onions, celery, and carrots? Fresh is best, but frozen diced veggies work in a pinch if you're short on time.
No smoked paprika? Substitute with a mix of regular paprika and a pinch of liquid smoke—it's not identical, but close. Out of cumin? Dried coriander at half the amount gives a similar earthy note. The tomato paste can be swapped for crushed tomatoes (1 can, drained), but you'll lose that rich, concentrated flavor. BBQ sauce feeling too sweet? Mix in a tablespoon of apple cider vinegar to balance it out. For extra depth, toast your spices in a dry pan for 30 seconds before adding to the pot—it brings out their flavors like magic. And if you're meal prepping, double the batch—this reheats beautifully for lunches all week.
This dish tastes even better the next day as all the flavors meld together. Store leftovers in an airtight container in the fridge for up to 5 days, or freeze portions for 3 months. I like to portion mine into individual containers right after baking so I can just grab and reheat. The beans will thicken as they cool, so add a splash of broth if they seem too stiff when reheating. And if you're serving a crowd, double the recipe—it's that good.
Why You'll Love This Recipe
- One-Pot Magic: I swear by this—just dump everything in one dish, cover it, and walk away. No chopping like a madman, no measuring cups stressing me out. The dried beans soak overnight, then simmer with the beef and sausage while I handle whatever else life throws at me. That’s the kind of recipe that doesn’t demand your full attention.
- Smoky, Savory Bomb: Between the kielbasa’s snap and the 80/20 ground beef’s richness, this isn’t your grandma’s canned beans. The yellow onion and celery mellow into sweetness, while the browned meat adds this deep, caramelized edge. Honestly, the first bite makes me pause—like, whoa, that’s good.
- Tailgate or Tuesday: Serve it in a cast-iron skillet at a backyard BBQ with cornbread and you’ve got a crowd-pleaser. Or reheat a portion for lunch the next day—same deliciousness, zero effort. My kids even ask for it when I bring it to school for their teacher’s potluck. (Yes, even on a Tuesday night.)
- Budget-Friendly Leftovers: Dried beans stretch this meal into a week’s worth of lunches without breaking the bank. The kielbasa and beef make it feel special, but the cost per serving is laughable. I’ll be real: this is how I feed my family without crying over grocery receipts—and still have money left for actual coffee.
Step-by-step instructions for smoky-spiced baked beans
This one-pot masterpiece delivers rich, smoky flavors and tender beans every time.
Sauté the Meat and Aromatics
In a large Dutch oven, cook the 1.5 lb ground beef (80/20) and 1 lb kielbasa sausage over medium-high heat for 8-10 minutes, breaking the meat into small pieces with a wooden spoon. The kielbasa should begin to crisp slightly at the edges.
Add the 1 whole diced yellow onion, 3 stalks diced celery, and 2 whole diced carrots to the pan. Cook for 5-6 minutes until the vegetables soften and the onion becomes translucent. Stir in the 4 minced garlic cloves and cook for 30 seconds until fragrant. This step builds the flavor foundation—don't rush it.
Toast the Spices and Add Wet Ingredients
Reduce heat to medium and sprinkle in the 2 tbsp smoked paprika, 1 tbsp ground cumin, 1 tsp dried thyme, 1.5 tsp kosher salt, and 0.5 tsp black pepper. Stir constantly for 1 minute until the spices are aromatic and the paprika deepens in color—this toasting step unlocks their full flavor potential.
Pour in the 0.5 cup tomato paste and cook for 2 minutes, stirring to create a thick paste. Gradually add the 2 cups beef broth (low sodium) and 0.5 cup BBQ sauce, scraping up any browned bits from the bottom of the pot. Bring the mixture to a gentle simmer, then stir in the 2 tbsp brown sugar and 1 tbsp apple cider vinegar. The vinegar brightens the flavors while the sugar adds subtle caramel depth.
Combine and Simmer the Beans
Drain and rinse the soaked 2 cups navy beans (dried) to remove any excess starch. Add them to the Dutch oven along with the cooked meat and vegetables. Stir gently to combine, ensuring the beans are evenly distributed. The liquid should just cover the beans—if it looks too thin, add a splash of water.
Bring the mixture to a boil, then reduce heat to low and cover with a tight-fitting lid. Let it simmer for 1.5 hours, stirring occasionally to prevent sticking. The beans should soften and absorb the smoky flavors. Real talk: This is the moment that matters—patience here ensures tender, flavorful beans.
Bake to Rich Perfection
Preheat your oven to 350°F. Transfer the Dutch oven to the oven and bake uncovered for 1.5-2 hours, stirring once halfway through. The beans are done when they're fork-tender and the sauce has thickened to a rich consistency. You'll know it's ready when the edges pull away slightly from the pot and the aroma is deeply smoky.
If the top looks too dry, add 2-3 tablespoons of water and stir. The beans should be fully tender with a glossy sauce clinging to each piece. This baking step transforms everything into a hearty, comforting dish that tastes even better the next day.
Rest and Serve
Remove the Dutch oven from the oven and let the beans rest for 10 minutes before serving. This resting period allows the flavors to meld and the beans to absorb any remaining liquid. Serve immediately with crusty bread or cornbread to soak up every last bit of that smoky, spiced sauce.
Each bite should deliver tender beans, savory meat, and a perfect balance of sweet, smoky, and tangy flavors. Don't skip the resting step—it makes all the difference in texture and taste. This one-pot wonder is perfect for feeding a crowd or meal prepping for the week ahead.
Pro Tips For Making Baked Bean Recipe With Ground Beef And Sausage
- CRACK THE BEANS FIRST: Soak your dried navy beans overnight in cold water—yes, even if the recipe says "quick soak." I learned this the hard way after ending up with a pot of mushy beans that refused to hold their shape. Cold water overnight (not boiling) keeps them from toughening up, and they’ll absorb flavors like a dream.
- BROWN THE MEAT SEPARATELY: Don’t skip browning the ground beef and sliced kielbasa before mixing with beans—this isn’t just for looks. The Maillard reaction happening in that skillet adds depth the canned beans and pre-cooked sausage can’t match. Use medium-high heat, break the beef into small pieces, and let the kielbasa render its fat before setting it aside.
- CHOP THE MISO MATTERS: Dice the yellow onion and celery into uniform ¼-inch pieces—no, your knife skills don’t need to be fancy, but consistency matters here. Larger chunks stay crunchy and undercooked, while smaller pieces dissolve into mush. A quick pulse in the food processor (then hand-chop the last bit) saves time without sacrificing texture.
- COVER IT TIGHT AFTER 30: After the first 30 minutes in the oven, slap that lid on and crank the heat down to 300°F. The initial high heat (350°F) gets everything cooking, but the real magic happens when the beans break down slowly under a tight seal. I used to peek every 10 minutes—bad move. Let it sit undisturbed for at least an hour.
Essential equipment for this dish
Dutch Oven
A large Dutch oven is my go-to for this recipe because it distributes heat evenly and handles the transition from stovetop to oven seamlessly. I recommend a 5-6 quart Dutch oven like the Lodge Pre-Seasoned Cast Iron Dutch Oven—it’s durable, retains heat beautifully, and develops a natural non-stick patina over time. The heavy cast iron ensures even cooking, preventing hot spots that could burn the bottom of your beans. 🔥
Wooden Spoon
Never use metal utensils when cooking beans—they can break them apart. A long-handled wooden spoon is essential for stirring and scraping up browned bits from the bottom of the pot. I prefer a sturdy 12-inch wooden spoon like the OXO Good Grips Wooden Spoon because it’s heat-resistant and easy to grip, even when the pot is hot. The natural wood also adds a subtle flavor over time.
Measuring Spoons
Precision matters with spices in this recipe. Invest in a set of stainless steel measuring spoons for accurate measurements of smoked paprika, cumin, thyme, salt, and pepper. I keep a small magnetic set from Amazon Basics on my stove for quick access. These spoons are durable, easy to read, and won’t rust like plastic ones. A 1/4 teaspoon difference in salt can make a big impact on flavor!
Kitchen Timer
Timing is everything when baking beans—1.5-2 hours in the oven requires attention. A digital kitchen timer with an audible alarm ensures you don’t overcook or undercook the dish. I love the Cuisinart CT-50 because it’s simple, reliable, and has a large display. Set it for the simmering phase (1.5 hours) and again for the baking phase (1.5-2 hours) to stay on track. Pro tip: Place it near your oven so you don’t miss the alert!
Mixing Bowls
Prep work is smoother with the right tools. Use two medium-sized mixing bowls—one for soaking the beans and another for chopping the onions, celery, and carrots. I use stainless steel bowls from Pyrex because they’re lightweight, stackable, and easy to clean. For the veggies, a sharp chef’s knife (like the Mercer Culinary Genesis) and a cutting board (I prefer Teakhaus bamboo) make dicing a breeze. Keep your prep station organized to avoid cross-contamination.
Oven Thermometer
Ovens can run hot or cold, and accuracy is key for perfect baked beans. An oven thermometer ensures your oven is truly at 350°F—not the 25°F lower or higher that many ovens actually hit. I use the Thermoworks Oven Thermometer because it’s precise and easy to read. Place it near the center rack while preheating, and adjust your oven’s temperature if needed. Trust me, this small step makes a huge difference in texture and flavor! 🌡️
Nutrition facts
Frequently asked questions
Can I use canned beans instead of dried for this recipe?
Yes, you can substitute canned beans, but there are a few key adjustments. Use 3 (15 oz) cans of navy beans (drained and rinsed) instead of dried. Since canned beans are already cooked, reduce the stovetop simmering time to just 15 minutes before transferring to the oven. The texture will be slightly softer, but still delicious! Just add 1/4 cup extra broth since canned beans release less liquid during cooking.
What kind of sausage works best with ground beef in baked beans?
For this recipe, smoked kielbasa is ideal because its natural smokiness complements the beans perfectly. You can also use Italian sausage (remove casings) or bratwurst for different flavor profiles. Avoid mild breakfast sausages—they won't hold up well to the long baking time. Pro tip: Look for sausages with at least 15% fat content for maximum flavor and juiciness.
How do I fix beans that are still crunchy after baking?
If your beans aren't tender enough, they likely need more time. First, check if they're fully covered with liquid—add 1/2 cup more broth if needed. Then return to the oven for another 30-45 minutes. For extra insurance, simmer on the stovetop (covered) for 20-30 minutes after baking. If they're still tough, they may have been under-soaked—next time, soak dried beans for 8-12 hours or use the quick-soak method (boil for 2 minutes, then let sit for 1 hour).
Can I make this recipe in a slow cooker instead of the oven?
Follow the same instructions until adding the beans, then transfer everything to a 6-quart slow cooker. Cook on LOW for 6-7 hours or HIGH for 3-4 hours, stirring occasionally. The slow cooker method actually enhances the flavors since everything cooks gently together. For best results, use a heavy-duty slow cooker—regular ones may struggle with the thick mixture. The texture will be creamier than oven-baked, but just as delicious!
What are some great side dishes to serve with these baked beans?
These smoky-spiced beans pair perfectly with hearty sides that balance their richness. Try cornbread or biscuits for soaking up the sauce, grilled corn on the cob for freshness, or crusty sourdough bread for a rustic touch. For a full meal, add roasted potatoes or a simple green salad with apple cider vinaigrette. The acidity in the vinaigrette cuts through the richness beautifully! For a BBQ-style spread, serve with pickled jalapeños and coleslaw.