
Soups & Stews
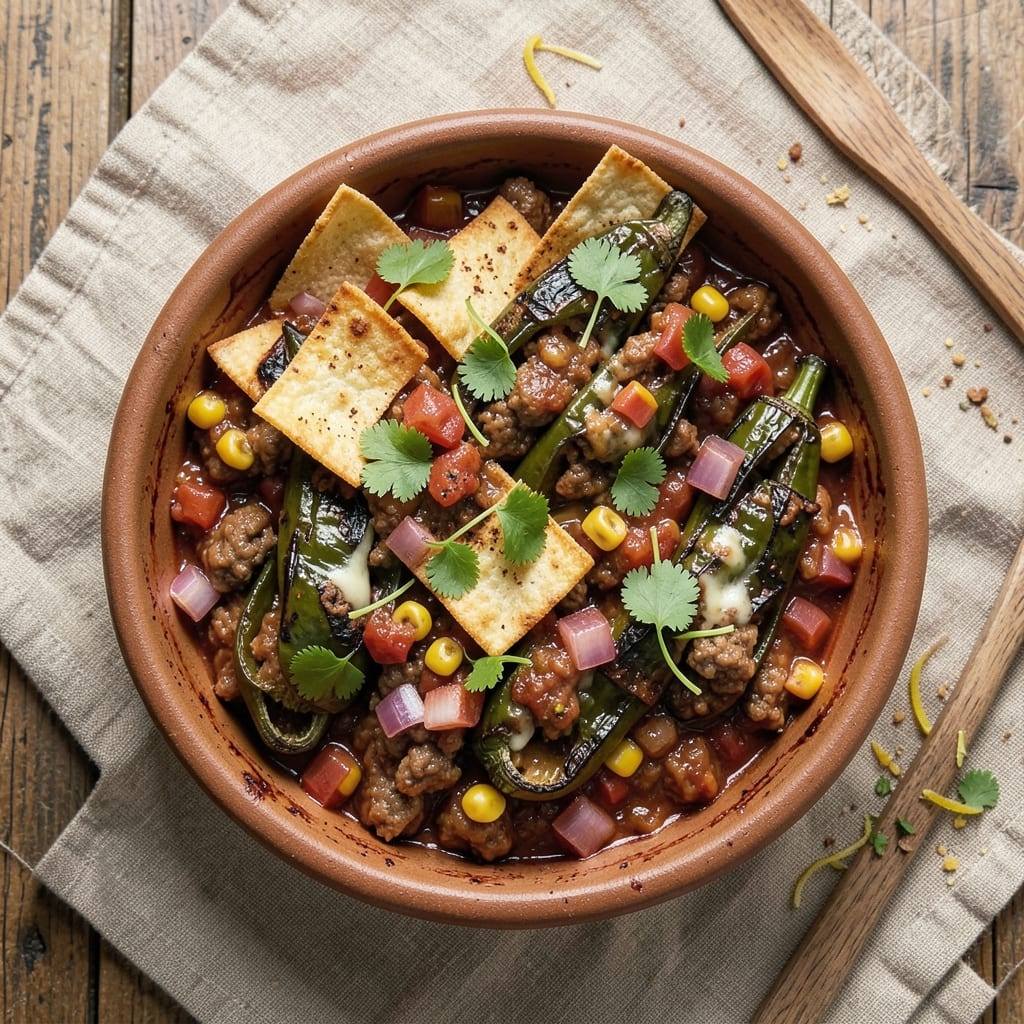
This baked beef chili relleno recipe transforms smoky, tender beef chili into a showstopping dish with crispy tortilla shells and charred poblano peppers. 🌟 The secret lies in properly charring the peppers and assembling the dish just right—no soggy shells here. This traditional Mexican masterpiece delivers bold flavors and restaurant-quality texture without the fuss.
The process starts with a rich, hearty beef chili base that simmers until the flavors meld perfectly. While that cooks, poblano peppers are charred and peeled, then stuffed with the chili and crispy tortilla triangles. The result? A dish that’s as impressive to serve as it is delicious to eat, with layers of smoky, spicy, and slightly sweet flavors in every bite.
What makes this recipe special is the crispy tortilla crunch that contrasts beautifully with the tender chili filling. The baking step ensures the tortillas stay crispy while the peppers soften just enough to hold their shape. This dish is perfect for special occasions or when you want to impress guests with authentic Mexican flavors.
Serve with warm tortillas, a side of rice, and a dollop of sour cream or avocado for the full experience. The combination of textures and flavors makes this more than just a dish—it’s a culinary experience. Let’s get started on creating this flavorful masterpiece!
Ingredients for baked beef chili relleno
Rich chili base meets crispy tortilla shells in this showstopping Mexican masterpiece.
| Ingredient | Amount | Notes |
|---|---|---|
| Ground Beef (Chuck) 🥩 | 1 ½ lb | Lean-to-fat ratio 85/15 preferred |
| Yellow Onions 🧅 | 1 whole | Medium size, diced finely |
| Poblano Peppers 🌶️ | 4 whole | Medium size, charred and peeled |
| Corn Tortillas 🌽 | 8 whole | Small size, cut into triangles |
| Canned Tomato Sauce 🍅 | 1 can | 28 oz, San Marzano preferred |
| Chicken Broth 💧 | 2 cups | Low-sodium preferred |
| Beer (Dark) 🍺 | ½ cup | Mexican lager or stout |
| Chili Powder 🌶️ | 2 tbsp | Smoked paprika blend preferred |
| Ground Cumin 🌿 | 1 tbsp | Freshly toasted preferred |
| Garlic Cloves 🧄 | 4 cloves | Fresh, minced finely |
| Cilantro 🌿 | ¼ cup | Fresh, chopped for garnish |
| Salt 🧂 | 1 ½ tsp | Kosher or sea salt |
| Black Pepper 🌶️ | ½ tsp | Freshly ground preferred |
| Vegetable Oil 🫒 | 2 tbsp | For frying tortilla triangles |
| Shredded Monterey Jack Cheese 🧀 | 1 cup | For topping before baking |
The poblano peppers are non-negotiable for that smoky depth—Mexican markets often carry them fresh year-round. Look for peppers that are deep green, firm, and about the size of a baseball. Char them over an open flame or under a broiler until blackened on all sides, then peel under running water. The chuck roast beef gives the chili its signature heartiness—Costco or local butchers usually carry it pre-ground, but if buying whole, trim excess fat for cleaner flavor. For the tortillas, Mission or La Banderita brands stay crispy during baking.
No poblano peppers? Anaheim peppers work in a pinch, though they're milder. Substituting beer? Extra chicken broth plus a splash of balsamic vinegar mimics the depth. Short on cilantro? Fresh parsley at half the amount adds brightness. The tortilla triangles should be fried until golden and crispy—don't overcrowd the pan or they'll steam instead of fry. For extra crunch, sprinkle crushed tortilla chips on top before baking. The cheese topping is optional but adds that restaurant-quality melt.
Assemble the dish just before baking to keep the tortillas crispy. Bake at 375°F for 15-20 minutes until the cheese bubbles and edges brown. Leftovers keep 3-4 days in the fridge, but the tortillas lose crispness—reheat only the filling and make fresh shells. For meal prep, assemble without baking, wrap tightly, and refrigerate—bake straight from cold. The chili base freezes beautifully for up to 3 months, so make extra for future meals.
Why You'll Love This Recipe
- One-Pan Magic: I swear by this recipe because it’s literally one pan. Brown the chuck, toss in onions and poblanos, then dump everything into a baking dish with tortillas and sauce—no extra pots, no extra stress. My counter stays clear, and my cleanup time? Ten minutes max.
- Smoky-Sweet Crunch: That charred poblano and crispy tortilla combo? It’s the best part. The chuck stays tender while the edges get just crisp enough to shatter—like a hug for your taste buds. Honestly, I’ll take this over any takeout burrito.
- Weeknight to Party: Make it for yourself on a Tuesday or double the batch for game day. The filling reheats beautifully, and the tortillas hold up when you serve it warm or at room temp. (Yes, even on a Tuesday night.)
- Budget-Friendly Feast: Chuck roast is cheap, canned sauce is cheap, and tortillas? Even cheaper. This feeds four for under $12 and leaves enough for leftovers that taste just as good the next day. My wallet and my family thank me.
Step-by-step instructions for baked beef chili relleno
Here's the method for achieving that perfect balance of crispy tortilla shells and rich, smoky chili filling.
🔥 Step 1: Char and Peel the Poblano Peppers
Preheat your broiler to high and place the 4 whole poblano peppers directly on a baking sheet. Broil for 8-10 minutes until the skins blacken completely and blister in several spots. Here's the thing—you want them fully charred, not just slightly browned.
Transfer the peppers to a bowl, cover with plastic wrap, and let them steam for 10 minutes. The steam makes the skins slip right off when you rub them with your fingers. Peel away all the charred skin, then remove the stems and seeds. Finely dice the peeled peppers—they'll add deep, smoky flavor to your chili filling. If any pieces look too tough, give them an extra rub with your fingers to soften them further.
🍳 Step 2: Sauté Aromatics and Brown the Ground Beef
Heat 2 tablespoons vegetable oil in a large Dutch oven over medium-high heat. Add the diced yellow onions and cook for 4-5 minutes until they soften and begin to caramelize at the edges. Add the 4 minced garlic cloves and cook for 30 seconds until fragrant—this prevents the garlic from burning.
Push the onions to one side of the pot and add the 1.5 lb ground beef (chuck) to the empty space. Let it brown undisturbed for 3-4 minutes until the meat loses its raw color. Break it up with a wooden spoon, then mix everything together. Season immediately with 1.5 teaspoons salt, 0.5 teaspoon black pepper, 2 tablespoons chili powder, and 1 tablespoon ground cumin. Cook for another 2 minutes to toast the spices and deepen their flavors.
🥘 Step 3: Build the Smoky Chili Filling
Pour in the 0.5 cup dark beer and scrape up any browned bits from the bottom of the pot with a wooden spoon. This deglazing step captures all the meaty flavor. Add the 1 can canned tomato sauce, 2 cups chicken broth, and the diced poblano peppers you prepared earlier. Bring the mixture to a simmer, then reduce heat to medium-low and let it cook uncovered for 25-30 minutes until the liquid reduces slightly and the flavors meld together.
Taste and adjust seasoning if needed. The chili should be rich and flavorful, but not overly salty. If it's too thick, add 1-2 tablespoons water to loosen it slightly. Remove from heat and let it cool for 10 minutes—this makes it easier to work with when filling the tortillas. Here's the key: the filling should be thick enough to hold its shape when spooned into the tortillas but still spreadable.
🍳 Step 4: Fry the Tortilla Triangles for Crispy Crunch
Cut each of the 8 corn tortillas into 4 triangles, giving you 32 pieces total. Heat 2 tablespoons vegetable oil in a large skillet over medium heat until it shimmers but doesn't smoke. Fry the tortilla triangles in batches for 30-45 seconds per side until they're golden brown and crispy. The edges should be slightly puffed and the centers still pliable.
Drain the fried tortillas on paper towels to remove excess oil, but don't let them cool completely—you want them warm and flexible when you fill them. If they start to stiffen up, give them a quick reheat in the oven at 300°F for 2-3 minutes. The goal is to maintain that perfect balance of crispy edges and slightly soft centers that can hold the chili filling without breaking.
🥘 Step 5: Assemble and Bake the Chili Relleno
Preheat your oven to 375°F. Working quickly, spoon 1-2 tablespoons of the chili filling onto each tortilla triangle, leaving a ½-inch border at the top. Fold the triangle up to enclose the filling, creating a neat little package. Place the filled tortillas seam-side down in a greased 9x13-inch baking dish.
Sprinkle the 1 cup shredded Monterey Jack cheese evenly over the top of all the tortillas. Bake for 15-20 minutes until the cheese is bubbly and golden brown and the tortillas are heated through. The cheese should melt completely, creating a delicious sauce that binds everything together. Garnish with the 0.25 cup chopped cilantro before serving immediately—this dish is best enjoyed fresh from the oven.
Pro Tips For Making Baked Beef Chili Relleno
- Char the Poblanos First: I learned this the hard way—roasting poblano peppers over an open flame (or broiler) until their skins blacken makes them miles more flavorful than just charring them in a pan. Once blackened, seal them in a bowl for 10 minutes to steam off the skin, then peel and slice. The smoky depth carries through the chili filling like magic.
- Brown the Beef Properly: Skip the "quick sear" and let that chuck beef actually brown—5-7 minutes on medium-high heat, breaking it into crumbles with a spoon. You’re not making hamburgers here; you want deep, caramelized flavor before adding onions and peppers. (Yes, it takes longer, but your chili will taste like it simmered all day.)
- Prevent Tortilla Sog: Corn tortillas turn to mush when stuffed with wet chili filling. My fix? Lightly toast them in a dry skillet for 20 seconds per side before stuffing, then pat the chili mixture very dry with a paper towel before filling. No one likes a sad, soggy relleno.
- Upgrade with a Tomato Base: Ditch the plain canned tomato sauce for a quick blend of crushed tomatoes, tomato paste, and a splash of beef broth—it thickens better and adds richness. Simmer it for 5 minutes before adding the beef to build flavor. (I know, it’s one extra step, but your chili will taste like it came from a taqueria.)
Essential equipment for this dish
Essential Oven Tools
Your broiler is non-negotiable for charring those poblano peppers—look for a model with even heat distribution like the Breville Smart Oven Air Fryer. I also recommend a 9x13-inch glass baking dish (like Pyrex) for even heat circulation during the final bake. The glass allows you to monitor the cheese bubbling without opening the oven door. 🌡️
Skillet Selection
For frying the tortilla triangles, a heavy-bottomed cast iron skillet (like Lodge Pre-Seasoned) is my go-to—it maintains even heat and prevents burning. If you prefer non-stick, a 10-inch All-Clad stainless steel pan with a lid works well for batch cooking. Keep oil temperature steady at 350°F using a kitchen thermometer like Thermoworks Thermapen. 🍳
Prep Station Essentials
Gather a sharp chef's knife (I use Victorinox 8-inch) and cutting board for dicing onions and peppers efficiently. A wooden spoon (like OXO Good Grips) helps scrape up flavorful browned bits during deglazing. For assembly, a small offset spatula makes it easy to transfer crispy tortillas without breaking them. 🧂
Optional Pro Upgrades
Invest in a meat thermometer (like Thermoworks Smoke) to monitor beef doneness—it should reach 160°F for safety. A fine-mesh strainer helps drain excess oil from fried tortillas faster. For presentation, tortilla press (like MexiPress) creates perfectly crisp shells if you prefer pre-made options. 💡
Budget-Friendly Swaps
Skip the fancy thermometer and use a kitchen timer with visual cues—oil should shimmer but not smoke when ready. A sharp serrated knife** works for peeling charred peppers if you don't have a chef's knife. For baking, any oven-safe dish works, but avoid dark-colored pans that can over-browne the cheese. 💰
Nutrition facts
Frequently asked questions
What's the best way to char poblano peppers for this recipe?
Use your broiler on high for 8-10 minutes, turning occasionally, until the skins blacken completely. The key is full charring—not just browning. After charring, place them in a bowl, cover with plastic wrap, and let steam for 10 minutes before peeling. This makes the skins slip right off when rubbed with your fingers.
Can I make this recipe ahead of time?
Yes, but with a few adjustments! Assemble the dish without baking, wrap tightly, and refrigerate for up to 24 hours. Bake straight from cold at 375°F for 20-25 minutes (add 5 minutes). For leftovers, reheat only the filling and make fresh tortilla shells to maintain crispness.
Why did my tortilla shells get soggy?
This usually happens when tortillas cool completely before filling or if the chili filling is too wet. Keep tortillas warm in a 200°F oven while assembling, and ensure your chili has reduced enough to hold its shape. Frying tortillas at 350°F oil (not too hot) also helps maintain crispness.
What can I substitute for poblano peppers?
If you can't find poblano peppers, try Anaheim peppers (milder) or bell peppers (sweeter). For smoky depth, add ½ teaspoon smoked paprika to the chili filling. Avoid jalapeños—they're too spicy and won't char properly. The key is a mild, slightly sweet pepper that holds its shape when stuffed.
How do I make this dish vegetarian?
Replace the ground beef with 1.5 lbs crumbled tempeh or extra-firm tofu, pressed and pan-fried until crispy. Use vegetable broth instead of chicken broth, and add 1 cup black beans to the chili for texture. The smoky poblano peppers and crispy tortillas will still deliver that satisfying crunch!