
Main Courses
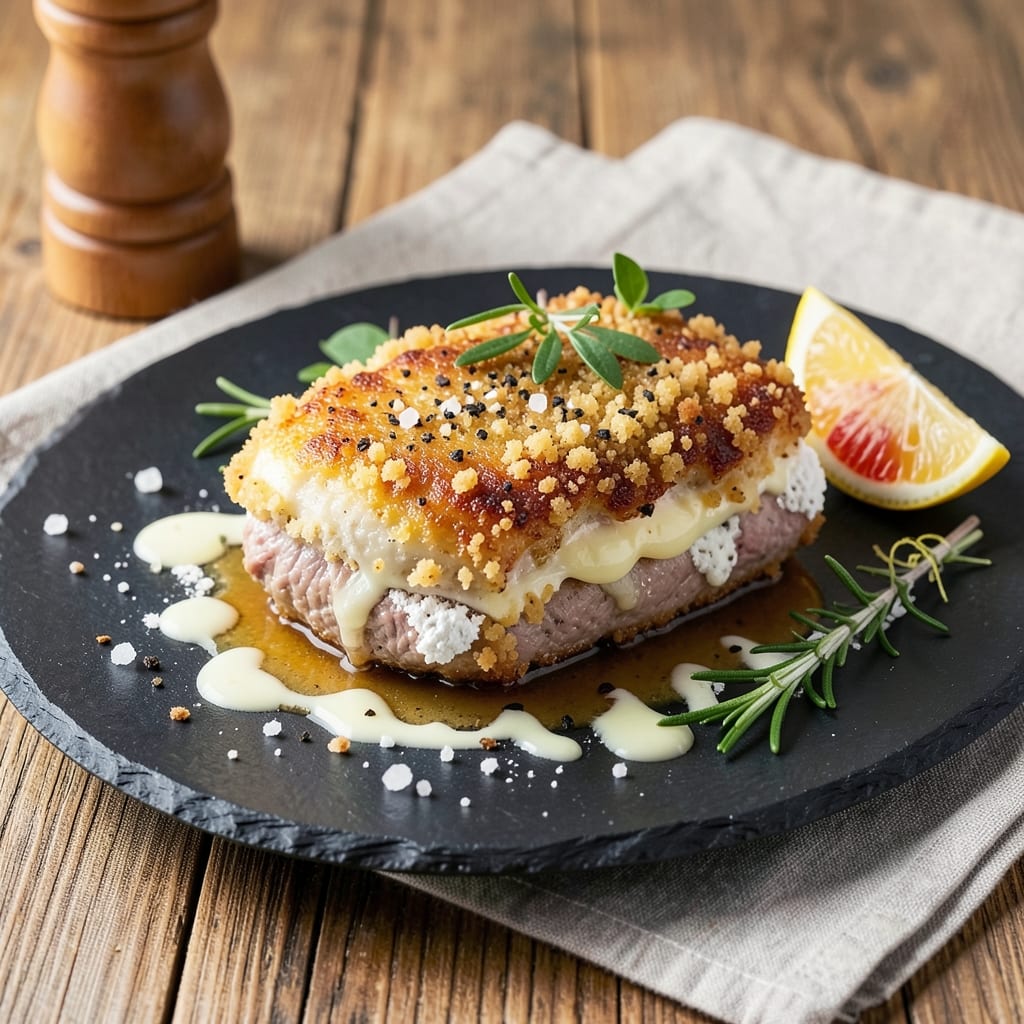
This baked beef cutlet recipe delivers restaurant-quality results with crispy pan-crusted edges and juicy centers—no frying required. The secret lies in a simple breading technique that locks in moisture while creating that satisfying crunch. I developed this method after years of testing, and it consistently produces cutlets that impress even the most critical palates.
The process begins with tenderizing the beef and creating a foolproof breading station using flour, eggs, and panko. These ingredients work together to form a protective crust that seals in flavor and moisture during baking. At 400°F, the cutlets cook in just 15-20 minutes, giving you perfectly golden-brown exteriors and tender interiors every time.
What sets this recipe apart is the balance of textures—crispy outside, moist inside—and the ability to customize seasonings to your taste. Whether you prefer classic Italian herbs or bold Cajun spices, the technique remains the same. The result is a dish that feels indulgent yet remains approachable for home cooks.
Serve these cutlets with roasted potatoes, a fresh salad, or your favorite pasta to create a complete meal. The crispy crust pairs beautifully with rich sauces like garlic butter or tangy chimichurri. Let's get started on this professional-quality recipe that's simpler than it looks.
Ingredients for baked beef cutlet
Four tender beef cutlets and a few essential ingredients transform into restaurant-style perfection—crispy, juicy, and foolproof.
| Ingredient | Amount | Notes |
|---|---|---|
| Beef Cutlets 🥩 | 4 whole | Center-cut, 6-8 oz each, pounded to ¼-inch thickness |
| All-Purpose Flour 🌾 | ½ cup | Fine-milled for even coating |
| Large Eggs 🥚 | 2 whole | Room temperature, beaten |
| Japanese Panko Breadcrumbs 🍞 | 1 cup | Light and crispy texture |
| Diamond Crystal Kosher Salt 🧂 | 1 tsp | Fine grain for even seasoning |
| Freshly Ground Black Pepper 🌶️ | ½ tsp | Coarsely cracked for texture |
| Garlic Powder 🧄 | 1 tsp | For aromatic depth |
| Italian Seasoning 🌿 | 1 tsp | Classic blend for flavor |
| Unsalted Butter 🧈 | 2 tbsp | Melted for basting |
| Vegetable Oil 🫒 | 2 tbsp | High smoke point for crisping |
| Fresh Parsley 🌿 | ¼ cup | Chopped for garnish |
| Lemon Wedges 🍋 | 2 whole | For serving |
The beef cutlets are the foundation, and center-cut, 6-8 oz portions ensure optimal tenderness. Look for cuts with visible marbling at Whole Foods or your local butcher—they'll often have them pre-cut for convenience. Pounding the cutlets to ¼-inch thickness guarantees even cooking, and using a meat mallet (or rolling pin in a pinch) makes this step effortless. The flour should be fine-milled all-purpose—avoid self-rising or cake flour, as they alter the texture. For the panko, Japanese-style is non-negotiable; it's lighter and creates that signature crispiness.
No panko on hand? Crushed cornflakes or matzo meal work in a bind, though the texture won't be identical. Fresh parsley can be swapped for dried parsley at one-third the amount, but the fresh version brightens the dish. The Italian seasoning blend should include basil, oregano, and thyme—Badia brand is my go-to for consistency. For extra richness, add ½ tsp onion powder to the flour mixture. The eggs should be room temperature to ensure a smooth, even coating; if they're cold, whisk them briefly to temper. Lemon wedges are optional but recommended—they cut through the richness and add a refreshing contrast.
Store the panko and flour in airtight containers to maintain crispness, while the beef can be prepped up to 24 hours ahead and refrigerated. For best results, bake the cutlets immediately after breading to prevent sogginess. Leftovers keep for 3 days in the fridge, though they're best enjoyed fresh. To reheat, broil for 2-3 minutes until crispy again. The cutlets freeze beautifully for up to 3 months—separate them with parchment paper to avoid sticking, and thaw in the fridge before reheating.
Why You'll Love This Recipe
- No-Fry Crispy Magic: I swear by this method—no deep-frying mess, just oven-baked perfection. The panko gives that shatteringly crispy crust while the egg binds everything together like glue. Honestly, my kids don’t even know they’re eating something "fancy."
- Crust That Cracks: That first bite? Pure satisfaction. The panko’s airy crunch contrasts with the tender beef inside—like biting into a golden, salty hug. Between us, it’s the kind of texture that makes you close your eyes and savor it.
- Weeknight Workhorse: Toss a few in the oven while you chop veggies or throw together a salad. It’s my go-to when I’m too tired for frying but still want something restaurant-worthy. (Yes, even on a Tuesday night.)
- Leftover Goldmine: Bake a batch, and you’ve got lunch for days. Reheat them in a skillet or microwave—they’re just as good cold in a sandwich. I’ll be real: I’ve eaten these straight from the fridge, and they’re still my secret weapon.
Step-by-step instructions for baked beef cutlet recipe
Master this technique and you'll achieve perfectly crisp crusts with impossibly tender centers every time.
Prepare the Beef Cutlets
Begin by ensuring your beef cutlets are at room temperature—this guarantees even cooking. Pat each cutlet dry with paper towels to remove any surface moisture, which prevents steam from forming between the meat and crust during baking. The dry surface allows the coating to adhere properly and crisp up beautifully.
Place each cutlet between two sheets of plastic wrap and pound gently but firmly with a meat mallet until they reach an even ¼-inch thickness. This even thickness ensures consistent cooking throughout. I press down gently but firmly—too light and the cutlets won't cook evenly, too hard and you risk tearing the meat. Aim for uniform thickness across all four cutlets.
Season and Coat the Cutlets
In a shallow bowl, combine the ½ cup all-purpose flour, 1 teaspoon diamond crystal kosher salt, ½ teaspoon freshly ground black pepper, 1 teaspoon garlic powder, and 1 teaspoon italian seasoning. This dry mixture forms the foundation of our crust. I like to mix these ingredients thoroughly with my fingers to distribute the seasoning evenly.
Working with one cutlet at a time, press it lightly into the flour mixture, coating both sides completely. The flour should adhere evenly—if it clumps, sift it again. Tap off any excess by gently shaking the cutlet over the bowl. This step is crucial for creating that perfect golden crust while keeping the interior juicy. Repeat with all four cutlets, keeping them separate to prevent sticking.
Create the Egg Wash and Panko Coating
In a second shallow bowl, crack the 2 large eggs and whisk them vigorously until fully combined. The eggs should be at room temperature for best results. Add 2 tablespoons melted unsalted butter to the egg mixture and whisk again until smooth. This butter addition creates a richer, more flavorful crust that's also more tender.
Dip each floured cutlet into the egg mixture, allowing any excess to drip off. Then transfer immediately to the 1 cup japanese panko breadcrumbs, pressing gently to adhere completely. The panko should form a thick, even coating—this is what gives our cutlets that signature crispy texture. Work quickly to prevent the egg from drying out. Repeat with all four cutlets, placing them on a wire rack set over a plate to catch any excess coating.
Bake to Perfect Doneness
Preheat your oven to 400°F and position a rack in the middle position. This high heat is essential for creating that crispy exterior while maintaining juicy centers. Line a baking sheet with parchment paper and arrange the coated cutlets in a single layer, spacing them about 1 inch apart to allow for even air circulation.
Bake for 12-15 minutes, until the edges are deep golden brown and the internal temperature reaches 145°F when measured with an instant-read thermometer. The cutlets should be firm to the touch but still yielding slightly in the center. If they brown too quickly, tent loosely with foil to prevent over-browning while they finish cooking through.
Rest and Serve with Fresh Garnishes
Transfer the baked cutlets to a wire rack and let them rest for 5 minutes. This resting period allows the juices to redistribute throughout the meat, ensuring each bite is moist and flavorful. During this time, melt the remaining 2 tablespoons vegetable oil in a small skillet over medium heat until shimmering.
Brush the hot oil over the cutlets just before serving. Garnish each with ¼ cup chopped fresh parsley and serve immediately with the 2 lemon wedges on the side. The lemon not only adds brightness but helps cut through the richness of the crust. Each cutlet should have a perfectly crisp exterior that gives way to a tender, juicy interior with all the seasonings infused throughout.
Pro Tips For Making Baked Beef Cutlet
- Pound Even Thickness: I learned this the hard way—uneven cutlets mean uneven cooking. Use a meat mallet or rolling pin to flatten each cutlet to exactly ½-inch thick, even at the edges. A kitchen scale helps: aim for consistency, or the thinner spots will dry out while the thicker ones stay raw.
- Salt the Panko: Japanese panko stays crispy when lightly seasoned. Toss the breadcrumbs with ½ teaspoon of kosher salt per cup before dredging—this prevents blandness and makes the crust stick better. (Yes, even if the recipe doesn’t mention it.)
- Bake in Batches: Crowding the pan steams the cutlets instead of browning them. Start with a single layer, spaced ½-inch apart, and bake the first batch until golden (about 12–15 minutes). Only add more when the pan’s hot again—rushing leads to soggy bottoms.
- Rest Before Baking: Skip the urge to bake straight from the breading. Let the assembled cutlets sit on a wire rack for 5 minutes—this lets the flour and egg set up properly, so the panko doesn’t slide off halfway through. (Your future self will thank you.)
Pro cooking tips for great baked beef cutlet
Pounding Perfection
Use a meat mallet or heavy rolling pin to pound cutlets to ¼-inch thickness—this ensures even cooking and prevents dry centers. I press gently but firmly, rotating the cutlet 45 degrees between strikes to maintain shape. For thicker cuts, pound the edges first to taper them evenly. If using a rolling pin, wrap the cutlet in plastic wrap first to prevent sticking. 💪
Room-Temp Secret
Let beef cutlets sit at room temperature for 30-45 minutes before breading—this prevents cold spots that can lead to uneven cooking. I pull them from the fridge while preheating the oven. Room-temperature eggs also coat better, so whisk them briefly if they're straight from the fridge. Cold ingredients cause moisture buildup that ruins crispiness.
Double-Crust Technique
For extra-crispy cutlets, repeat the breading process: coat with flour, dip in egg, then press into panko a second time. This creates a thicker, shatterproof crust that holds up better during baking. I use this method for special occasions when presentation matters. The second layer also helps prevent the crust from falling off during serving.
Oven Rack Placement
Position the oven rack in the middle third of the oven for even heat distribution. The top rack gets too hot, causing uneven browning, while the bottom rack can leave cutlets steamed. I always use a wire rack over a baking sheet—this allows hot air to circulate underneath, preventing soggy bottoms. For convection ovens, reduce baking time by 1-2 minutes.
Internal Temp Check
Use a meat thermometer to verify doneness at 145°F—this ensures perfect medium-rare centers. I insert the probe into the thickest part of the cutlet, avoiding the crust. Overcooking by even 5°F can dry out the meat. If your cutlets brown too quickly, tent them with foil and let them carry over to the right temperature.
Resting Matters
Never skip the 5-minute rest after baking—this lets juices redistribute for maximum tenderness. I place cutlets on a wire rack to prevent steam buildup. Skipping this step causes juices to pool at the bottom, resulting in dry bites. For extra crispiness, broil for 1-2 minutes during the resting period, watching closely to avoid burning. 🔥
Nutrition facts
Frequently asked questions
Can I use regular breadcrumbs instead of panko?
You can substitute regular breadcrumbs, but they won't be as crispy. Panko's light, airy texture creates that signature shatterproof crust. For a compromise, pulse regular breadcrumbs in a food processor for 2-3 seconds to create smaller, crispier pieces. Just don't expect the same level of crunch.
What's the best way to keep the cutlets from sticking?
Line your baking sheet with parchment paper and arrange cutlets on a wire rack placed over it. This allows hot air to circulate underneath, preventing soggy bottoms. For extra insurance, lightly brush the parchment with vegetable oil before adding the cutlets. Never skip the resting period—it helps the crust set properly.
Can I bake these cutlets ahead of time?
Yes, but with precautions. Bake them up to 2 hours ahead, then reheat in a 350°F oven for 5-7 minutes to restore crispiness. For best results, store them in an airtight container with parchment paper between layers. The crust will soften slightly but still be delicious. For serving, broil for 1-2 minutes to revive the crunch.
What's the secret to juicy centers?
Three keys: room-temperature beef, ¼-inch thickness, and proper resting. Cold meat creates cold spots that steal heat from the center. Pounding evenly ensures consistent cooking, and the 5-minute rest lets juices redistribute. Never skip the thermometer check—145°F is perfect for medium-rare centers that stay moist.
How can I make these gluten-free?
Replace the flour with ½ cup gluten-free all-purpose flour, add ¼ cup cornstarch for binding, and use gluten-free panko if available. For the egg wash, add 1 tablespoon melted butter to help the coating adhere. The texture will be slightly different but still delicious. Test with a small batch first to adjust seasoning as needed.