Main Courses
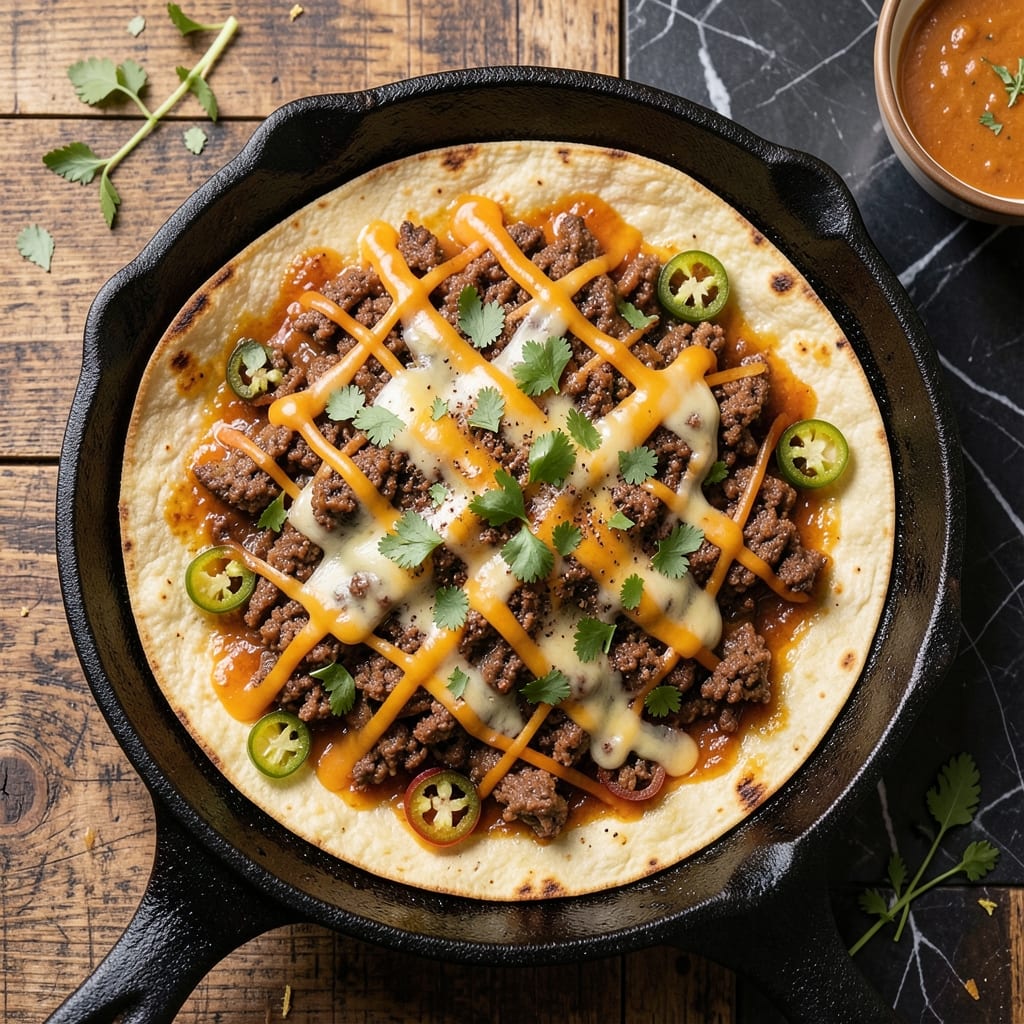
This baked beef quesadilla recipe delivers crispy edges and gooey melted cheese with restaurant-quality results you can make at home. 🔥 The secret lies in perfectly seasoned ground beef and the right baking technique—no frying required. I developed this after years of testing, and it never fails to impress even the pickiest eaters.
What makes this recipe stand out is the combination of tender, flavorful beef with layers of melted cheese that create a satisfying crunch with every bite. The assembly is simple: seasoned beef between tortillas, topped with cheese, and baked until golden and bubbly. No flipping or flipping over—just set it and forget it for 15 minutes at 400°F.
By the time you pull it from the oven, you'll have a quesadilla with crispy, golden-brown edges and a center that's perfectly melted and cheesy. The beef stays juicy, the tortillas get just the right amount of crunch, and the cheese pulls apart in delicious strings. This is comfort food at its finest—easy enough for a weeknight but impressive enough for company.
Serve with sour cream, salsa, or guacamole for dipping, and pair with a simple side salad or black beans for a complete meal. The best part? Leftovers reheat beautifully, making this the ultimate meal prep solution. Let's get started!
Ingredients for baked beef quesadilla
Four tortillas, a pound of beef, and cheese that melts like magic—this is your crispy-edged quesadilla game changer.
| Ingredient | Amount | Notes |
|---|---|---|
| Ground Beef (80/20 Lean-to-Fat Ratio) 🥩 | 1 lb | Freshly ground for maximum flavor |
| Large Flour Tortillas 🌯 | 4 whole | 10-inch size preferred for even baking |
| Shredded Monterey Jack Cheese 🧀 | 2 cups | Freshly shredded for best melt |
| Cheddar Cheese (Sharp Variety) 🧀 | 1 cup | Shredded, for extra cheesy bite |
| Taco Seasoning 🌶️ | 1 tbsp | Homemade or store-bought blend |
| Ground Cumin 🌿 | ½ tsp | Enhances beef flavor depth |
| Garlic Powder 🧄 | ½ tsp | Freshly ground preferred |
| Onion Powder 🧅 | ½ tsp | Adds sweetness to seasoning |
| Smoked Paprika 🌶️ | ¼ tsp | For subtle smoky depth |
| Salt 🧂 | ½ tsp | Diamond Crystal kosher salt |
| Black Pepper 🌶️ | ¼ tsp | Freshly cracked for best flavor |
| Olive Oil 🫒 | 1 tbsp | For browning beef |
| Sour Cream (Optional) 🥛 | ¼ cup | For serving, full-fat preferred |
| Salsa (Optional) 🍅 | ½ cup | Fresh pico de gallo works best |
The beef is where the magic starts. Ground chuck with an 80/20 fat ratio gives you that perfect balance of juiciness and crispy edges—leaner cuts won't brown as beautifully. I always grab mine from the butcher counter (not pre-packaged) because it's fresher, but the store-bought stuff works in a pinch. Freshly ground spices make all the difference too—Penzeys or Trader Joe's carry great pre-mixed taco seasonings if you don't want to DIY. For the tortillas, Mission brand is my go-to—they hold up perfectly in the oven without tearing. Store them in a cool, dark place (not the fridge) so they stay fresh for up to 2 weeks.
No taco seasoning? Mix your own with chili powder, cumin, garlic powder, and a pinch of cayenne—it's easier than you think. The cheese combo is non-negotiable though: Monterey Jack melts smoothly while sharp cheddar adds that satisfying bite. Pre-shredded cheese has anti-caking agents that prevent perfect melting, so I always grab blocks and shred them myself. Short on time? Pre-shredded still works—just don't overfill the quesadilla or it'll get soggy. The tortillas can be warmed briefly in a dry skillet if they feel stiff, but room temperature works fine too.
This recipe reheats like a dream—30 seconds in the microwave or 5 minutes at 350°F keeps everything crispy. Store leftovers in an airtight container for 3 days (if they last that long). For meal prep, assemble the quesadillas ahead but bake them fresh—they're best served immediately when the cheese is still gooey. The sour cream and salsa on the side? Full-fat everything—it makes all the difference for that restaurant-quality finish. And trust me, the crispy edges are worth the 15 minutes of baking time.
Why You'll Love This Recipe
- One-Pan Magic: I swear by this recipe when I’m too tired to wash dishes. Brown the beef in the same pan you’ll bake them in—no extra pots, no fuss—just a single sheet pan later, and you’re done. The 80/20 ground beef actually works in your favor here, crisping up perfectly while keeping the tortillas from getting soggy.
- Cheese Pull Factor: That combo of sharp cheddar and Monterey Jack? It’s a flavor bomb. The cheddar adds a tangy bite that cuts through the richness of the beef, while the Monterey Jack melts into gooey perfection. Honestly, the first time I made this, I ate one straight from the oven with my hands—no shame.
- Game for Any Meal: These are my go-to for lazy Sundays, quick weeknight dinners, or even a tailgate spread. Double the batch and freeze half for when you’re craving comfort food but don’t want to cook. My college-aged kids grab them for late-night snacks, and my parents think they’re restaurant-quality.
- Budget Win: Ground beef, tortillas, and cheese are all pantry staples that won’t break the bank. A single pound of 80/20 beef stretches across two quesadillas, and the taco seasoning adds depth without costing extra. Between us, this is the kind of meal that makes grocery night feel like a victory.
Step-by-step instructions for baked beef quesadillas
Here's how to create restaurant-quality quesadillas with perfectly crispy edges and gooey melted cheese.
🔥 Step 1: Brown the Seasoned Ground Beef
Heat the 1 tablespoon olive oil in a large skillet over medium-high heat until shimmering. Add the 1 pound ground beef (80/20 ratio) and break it apart with a wooden spoon, cooking until it loses its raw color and starts to brown.
Here's the thing—don't drain the fat. That rendered beef fat is flavor gold. When the meat is about 80% cooked (5-6 minutes), sprinkle in the 1 tablespoon taco seasoning, ½ teaspoon ground cumin, ½ teaspoon garlic powder, ½ teaspoon onion powder, ¼ teaspoon smoked paprika, ½ teaspoon salt, and ¼ teaspoon black pepper. Stir well to coat the beef evenly, then cook for another 2-3 minutes until the spices bloom and the mixture is fully cooked. You're aiming for a texture that's slightly crumbly but still moist—this ensures your quesadillas stay juicy.
🍳 Step 2: Assemble the Quesadillas with Perfect Layering
Preheat your oven to 400°F and line a baking sheet with parchment paper. Lay out the 4 large flour tortillas on a clean surface. Divide the seasoned beef evenly among them, spreading about ¼ pound of beef on each tortilla, leaving a ½-inch border around the edges.
Now for the cheese—this is where the magic happens. Sprinkle ½ cup shredded Monterey Jack cheese and ¼ cup sharp cheddar cheese on each half of the beef. The key here is to overlap the cheese slightly in the center so when you fold, you get that thick, cheesy center. Fold each tortilla in half, pressing gently but firmly to seal the edges. You want them to stay together during baking, but not so tight that the filling can't melt properly.
🔥 Step 3: Bake Until Golden and Crispy
Place the assembled quesadillas on the prepared baking sheet, seam-side down. Bake for 12-15 minutes until the edges are deep golden brown and the cheese is fully melted. Here's what to watch for: the tortillas should look crispy around the edges with just a hint of browning on the top, and you should see cheese bubbling through the folds. If you peek and they're not golden enough, return them to the oven for another 2-3 minutes—don't walk away or they'll overbake.
I like to flip them halfway through the baking time (after 6-7 minutes) for even browning. Just carefully lift each quesadilla with a spatula and flip them over. This ensures both sides get that perfect crispy texture. The quesadillas are done when they're firm to the touch and the cheese inside is completely melted with no cold spots.
🍽️ Step 4: Serve with Optional Toppings
Let the quesadillas rest for 2-3 minutes after baking—this gives the cheese time to set slightly so they're easier to cut. Cut each quesadilla into 4 wedges and serve immediately with the optional toppings. Dollop each serving with 1 tablespoon sour cream and 1 tablespoon salsa for that fresh, tangy contrast to the rich, cheesy filling.
Here's the pro tip: serve with a side of lime wedges. A squeeze of fresh lime over the top brightens all the flavors and cuts through the richness. The result should be crispy, cheesy, perfectly seasoned beef quesadillas that hold together beautifully and deliver that satisfying crunch with every bite. And yes, they're even better the next day when slightly cooled—the cheese firms up just enough to make them even more delicious.
Pro Tips For Making Baked Beef Quesadilla
- CRANK THE OVEN TO 400°F: I learned this the hard way—baking quesadillas at 375°F leaves them soggy and sad. That crispy, golden crust only happens when the oven is screaming hot. Preheat for 10 minutes, then bake those bad boys on the middle rack where the heat hits hardest.
- DON’T SKIP THE TACO SEASONING REST: After mixing taco seasoning into your beef, let it sit for 5 minutes before assembling. I used to rush this, and the flavors never melded right. That short wait lets the spices bloom and coats every bite—trust me, your quesadilla will taste like a taco truck, not a sad lunchbox sandwich.
- LAYER CHEESE LIKE A PRO: Start with a thin layer of Monterey Jack on the tortilla, then add your beef, then finish with sharp chedddar. The Monterey Jack melts faster and creates a glue-like seal, while the chedddar adds that sharp, gooey finish. Skip this order, and you’ll end up with cheese leaks or uneven melting.
- USE A LIGHT HAND WITH THE TORTILLAS: Flour tortillas are delicate—don’t stack them too high or they’ll steam instead of crisp. Two layers max per batch, and if you’re making more, work in batches. I once tried to bake four at once, and they came out like wet burritos. Patience here means perfect golden edges every time.
Wine and beer pairings for baked beef quesadilla
Crispy Edge Pairings
The rich, savory flavors of baked beef quesadillas pair beautifully with crispy, textured sides that complement their cheesy richness. I love serving them with tortilla chips topped with guacamole and pico de gallo—the crunch contrasts perfectly with the soft quesadilla. For something heartier, try crispy roasted potatoes tossed in olive oil, smoked paprika, and garlic powder at 425°F for 25 minutes. 🌶️
Light and Fresh Contrasts
To balance the richness, add a cool, fresh element like a black bean and corn salad. Toss 1 can black beans (drained), 1 cup corn, ½ diced red onion, and ¼ cup chopped cilantro with lime juice and olive oil. Serve chilled for a refreshing bite. Another great option is avocado slices drizzled with lime and Tajín seasoning—the creamy texture cuts through the quesadilla’s bold flavors.
Wine Pairings
A bold red wine like Malbec or Cabernet Sauvignon stands up to the beef and cheese, with its dark fruit and smoky notes complementing the spices. For something lighter, try a Mexican lager such as Modelo Especial—its crisp, clean finish cleanses the palate between bites. If you prefer white, a Chardonnay with oak notes adds a buttery contrast that enhances the cheese. 🍷
Beer Pairings
For beer lovers, a Mexican-style lager like Corona or Pacifico works perfectly—its citrusy, light body balances the richness. If you enjoy hoppier beers, a West Coast IPA with piney, citrusy notes adds a refreshing contrast. Avoid heavy stouts or dark ales, as they can overpower the quesadilla’s delicate flavors. For a fun twist, try a Mexican wheat beer like Pacifico Clara—its light, crisp profile pairs beautifully with the dish.
Spicy Kick Add-Ons
If you love heat, serve spicy salsa or chipotle crema on the side. I like habanero-lime salsa for a fiery kick, or smoky chipotle crema made with sour cream, chipotle peppers, and lime. A sprinkle of Tajín seasoning on top adds a citrusy, chili-lime crunch that elevates every bite. 🌶️
Sweet and Tangy Finishes
For a sweet contrast, offer mango slices or pineapple chunks—their juicy acidity brightens the dish. A drizzle of honey on top of the sour cream adds a subtle sweetness that balances the savory flavors. If you’re feeling fancy, serve with chocolate-dipped strawberries for a dessert-like finish that surprises and delights. 🍓
Nutrition facts
Frequently asked questions
Can I use a different type of cheese in my baked beef quesadillas?
While Monterey Jack and cheddar create the perfect melt, you can swap in pepper jack for a spicy kick, Oaxaca cheese for stretchiness, or Colby Jack for a milder flavor. Avoid pre-shredded cheese—it contains anti-caking agents that prevent proper melting. For extra richness, try a blend of 2 cups Mexican blend cheese instead.
Why did my quesadillas turn out soggy instead of crispy?
Soggy quesadillas usually happen from overfilling or underbaking. Use only ¼ pound beef per tortilla and ½ cup cheese total per quesadilla—too much filling creates steam that softens the tortilla. Bake at 400°F for 12-15 minutes, flipping halfway, until edges are golden. If your oven runs hot, reduce temp to 375°F and check at 10 minutes.
How do I make these ahead of time for meal prep?
Assemble the quesadillas but don't bake them—wrap individually in foil and refrigerate for up to 2 days or freeze for 1 month. To bake from frozen, add 5-7 extra minutes at 400°F. For best texture, reheat in a 375°F oven for 10-12 minutes (not microwave) to restore crispiness. The cheese will firm up slightly but still be delicious!
What's the best way to make these gluten-free?
Swap regular flour tortillas for gluten-free corn tortillas (like Siete brand) and use a gluten-free taco seasoning blend without hidden fillers. For extra crispiness, brush tortillas lightly with olive oil before baking. The texture will be slightly different but still delicious—just don't expect the same chewy edge as flour tortillas.
Can I use leaner ground beef (like 90/10) for this recipe?
Technically yes, but I don't recommend it. The 80/20 fat ratio is key for juicy, flavorful beef that browns beautifully. If you must use leaner meat, add 1 tablespoon beef broth or olive oil to the pan while cooking to compensate for lost moisture. The result will be less crispy and slightly drier—worth it for health but not for maximum flavor!