Main Courses
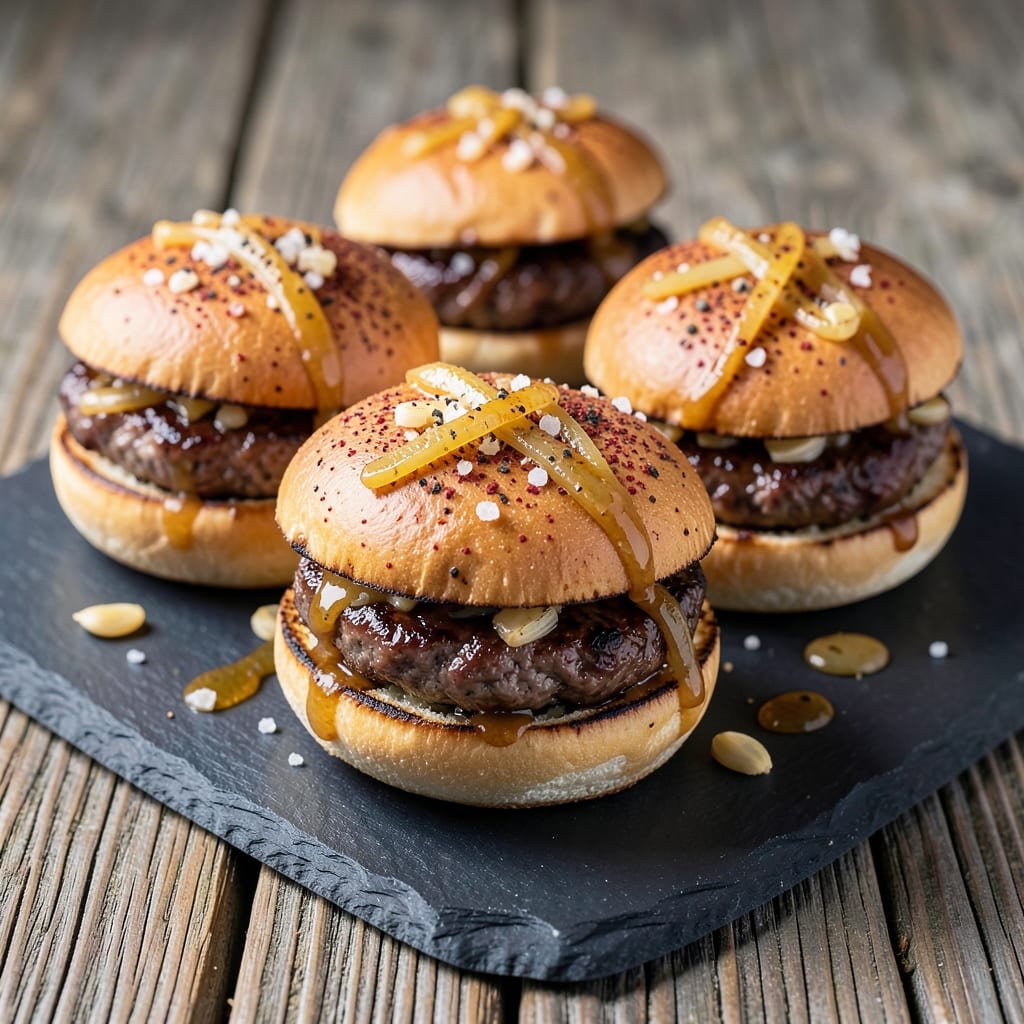
This baked beef sliders recipe delivers restaurant-quality mini burgers with perfectly caramelized crusts and tender centers—no grill required. 🔥 The secret lies in a precise seasoning blend and baking technique that transforms ground beef into juicy, flavorful patties every time. These sliders are ideal for game day, parties, or a quick weeknight dinner that feels special.
What sets these sliders apart is the caramelized crust, achieved by baking the patties at 400°F until golden and crispy on the outside while staying juicy inside. The recipe includes a foolproof seasoning mix that balances savory, smoky, and slightly sweet notes, ensuring every bite is packed with flavor. You'll also learn how to assemble them with soft buns, melted cheese, and your favorite toppings for a satisfying, handheld meal.
The best part? These sliders are ready in under 30 minutes—perfect for feeding a crowd without spending hours in the kitchen. Whether you're serving them at a tailgate, family gathering, or casual dinner, this recipe guarantees delicious results with minimal effort. The crispy edges and tender beef will have everyone asking for seconds.
Pair these sliders with classic toppings like pickles, onions, and a drizzle of special sauce, or keep it simple with just cheese and a sprinkle of fresh herbs. The versatility makes them a crowd-pleaser for any occasion. Let’s get started on creating these irresistible mini burgers!
Ingredients for baked beef sliders
Twelve simple ingredients for irresistible mini burgers with that perfect caramelized crust everyone loves.
| Ingredient | Amount | Notes |
|---|---|---|
| Ground Beef (80/20) 🥩 | 2 ½ lb | 80% lean, 20% fat preferred |
| Yellow Onion 🧅 | 1 whole | Finely diced, about 1 cup |
| Garlic Cloves 🧄 | 4 cloves | Minced, for seasoning blend |
| Kosher Salt 🧂 | 1 ½ tbsp | Diamond Crystal preferred |
| Ground Black Pepper 🌶️ | 1 tbsp | Freshly cracked preferred |
| Smoked Paprika 🌶️ | 1 ½ tsp | For smoky depth |
| Granulated Garlic 🧄 | 1 tsp | Extra for flavor boost |
| Onion Powder 🧅 | 1 tsp | For extra savory punch |
| Worcestershire Sauce 🍶 | 1 tbsp | For umami richness |
| Hamburger Buns 🍞 | 12 whole | Soft, potato or brioche style |
| American Cheese Slices 🧀 | 12 slices | Or cheddar for sharper taste |
| Butter 🧈 | 2 tbsp | Unsalted, for greasing pan |
| Vegetable Oil 🫒 | 1 tbsp | For extra pan lubrication |
| Pickles 🥒 | 12 slices | Classic slider topping |
The beef is everything here—80/20 fat ratio gives you that juicy, flavorful bite. Grab the ground beef from Costco or your butcher's counter—they usually have it pre-ground, which saves time. If you're buying a whole chuck roast, ask for it to be ground fresh. The higher fat content is worth it for those crispy edges. For the buns, potato or brioche styles hold up best to the cheese and toppings without getting soggy. I always grab extra at Trader Joe's—their potato buns are a game-changer.
No Worcestershire? Soy sauce plus a dash of vinegar works in a pinch, but you'll lose some depth. Short on smoked paprika? Regular paprika plus a pinch of liquid smoke gets you close. The cheese can be swapped for cheddar or Swiss—just melt it first. For the onions, if you don't have time to dice, pre-sliced from a jar works fine (drain and pat dry). The pickles can be any kind—dill, bread & butter, whatever you've got. And if you're feeling fancy, add a sprinkle of grated onion on top before baking for extra crunch.
These sliders reheat beautifully—just pop them in the oven at 350°F for 5-10 minutes. Store leftovers in an airtight container for 3-4 days in the fridge. For freezing, assemble the sliders (without cheese) and freeze on a tray before transferring to a bag. They'll keep for up to 3 months. Pro tip: Make the seasoning mix ahead—it keeps for months in a jar, so you can whip up sliders anytime.
Why You'll Love This Recipe
- No-Fuss Prep: I swear by the 80/20 ground beef here—it’s the fat that makes these sliders actually juicy. Just mix, shape, and bake. No searing, no flipping, no stress. My hands stay clean while the oven does all the work.
- Garlic-Onion Magic: That raw onion and minced garlic get baked right into the beef, creating this caramelized, savory punch. Honestly, the first bite always makes me pause—it’s like a little flavor explosion in your mouth.
- Game for Any Event: Sliders are my secret weapon for game days, potlucks, or even lazy Sundays. Serve them on toothpicks with pickles and mustard for a picnic vibe, or stack them on buns for a quick dinner. They’re that adaptable.
- Budget Meets Leftovers: Ground beef is cheap, and these sliders freeze like a dream. I make a double batch, reheat slices in a pan, and suddenly I’ve got a week’s worth of easy lunches. No waste, all flavor.
Step-by-step instructions for baked beef sliders
Here's how to make juicy, caramelized beef sliders that'll disappear faster than you can say "slider party."
👨🍳 Step 1: Mix the Seasoning Blend
In a small bowl, combine all the dry seasonings: the 1.5 tbsp kosher salt, 1 tbsp ground black pepper, 1.5 tsp smoked paprika, 1 tsp granulated garlic, and 1 tsp onion powder. Give it a good whisk to break up any clumps - you want this blend to be fine and evenly distributed. The smoked paprika adds that perfect smoky depth that makes these sliders taste restaurant-worthy.
I like to press the seasoning mix between my palms to break up any remaining clumps before adding it to the beef. This ensures every bite gets that perfect balance of salt, pepper, and smoky flavor. Keep this seasoning blend handy - you'll need it in the next step.
🍳 Step 2: Shape and Season the Slider Patties
In a large mixing bowl, gently combine the 2.5 lb ground beef (80/20) with the 1 tbsp Worcestershire sauce. The fat content is crucial here - that 20% fat ensures juicy, flavorful patties. Using your hands (or a fork), mix just until the ingredients come together, being careful not to overwork the meat.
Now, divide the beef mixture into 12 equal portions (about 2.5 ounces each). This is where precision matters - uniform-sized patties cook evenly. On a lightly floured surface, gently shape each portion into a ¾-inch thick patty, about 2.5 inches wide. Press the seasoning blend firmly onto both sides of each patty, making sure it adheres well - this creates that perfect caramelized crust.
🔥 Step 3: Bake for Perfectly Caramelized Crusts
Preheat your oven to 425°F and line a large baking sheet with parchment paper. In a small bowl, melt the 2 tbsp butter with the 1 tbsp vegetable oil - this creates a perfect fat blend for crispy patties. Brush this mixture lightly over both sides of all 12 patties, being careful not to make them too greasy.
Arrange the patties on the prepared baking sheet, leaving about ½ inch of space between each one. Bake for 10-12 minutes until the edges are deep golden brown and the internal temperature reaches 160°F (use an instant-read thermometer). The patties should be cooked through but still juicy - they'll continue cooking slightly when you add the cheese.
🥘 Step 4: Add Cheese and Finish Baking
Place one slice of American cheese on each patty, then return the baking sheet to the oven. Bake for an additional 1-2 minutes until the cheese is fully melted and the patties are heated through. Watch closely - you want the cheese to melt completely but not get stringy. The patties should now be perfectly caramelized on the outside with gooey, melty cheese inside.
While the patties finish baking, lightly toast the 12 hamburger buns in a toaster or toaster oven for about 1 minute. This gives them a nice crunch that complements the soft, juicy patties. The warm buns are ready to assemble as soon as the patties come out of the oven.
🍽️ Step 5: Assemble and Serve
Let the patties rest for 2-3 minutes before assembling - this helps them hold together better when you cut them in half. Place one patty on the bottom half of each toasted bun, then top with a slice of pickles. The tangy pickles cut through the richness of the beef perfectly.
Cut each slider in half and serve immediately. These sliders are best enjoyed fresh off the baking sheet while the buns are still warm and the cheese is melty. For extra flavor, you can drizzle a little extra Worcestershire sauce or add a dash of hot sauce on top. These sliders are perfect for parties, game day, or just a fun weeknight dinner!
Pro Tips For Making Baked Beef Sliders
- USE A MEAT THERMOMETER: I learned this the hard way—sliders baked to "look done" often stay gray inside. For 80/20 beef, pull them at 155°F (they’ll rise to 160°F while resting). No guessing, no dry sliders.
- PULSE THE ONIONS: Chop the yellow onion into tiny, uneven pieces—think rice-sized—not uniform dice. This increases surface area, so they caramelize faster and deeper during baking. Skip the food processor; your hands work better here.
- SALT THE BEEF TWICE: Add half the kosher salt when mixing the raw beef, then sprinkle the rest after shaping the patties. The first salt breaks down proteins for better texture, while the second layer locks in flavor during baking. (Yes, it’s extra work, but it matters.)
- BAKE IN BATCHES: Don’t crowd the tray—leave at least ½ inch between sliders. Overcrowding steams them instead of browning, and you’ll end up with sad, gray patties. Bake in two rounds if needed; the extra time is worth the crust.
Common mistakes when making perfect results
Overworking the Beef
I’ve ruined more sliders than I’d like to admit by overmixing the beef. When you combine the ground beef with Worcestershire sauce, handle it gently—just until the ingredients come together. Overworking the meat develops gluten, which makes the patties tough instead of tender. Use your hands or a fork to mix lightly, and resist the urge to press the patties flat. They’ll hold their shape better when shaped gently and pressed firmly with the seasoning blend. 💪
Uneven Patty Sizes
Uniform patty sizes are key to even cooking. If your sliders come out at different doneness levels, it’s likely because some patties were thicker or thinner than others. Weigh the beef portions at 2.5 ounces each for consistency, or use a kitchen scale for precision. Shape them to ¾-inch thickness—this ensures they all hit the 160°F internal temperature at the same time. Trust me, your guests will notice the difference!
Skipping the Rest
One of the biggest mistakes I see is skipping the 2-3 minute rest before assembling the sliders. This short pause lets the juices redistribute, so they don’t squirt out when you cut them in half. If you assemble them immediately, the patties can fall apart or get soggy buns. Let them rest on a wire rack or plate while you toast the buns—it’s worth the wait. ✨
Overcrowding the Pan
Crowding the baking sheet leads to steam instead of crispy crusts. Leave at least ½ inch of space between each patty so heat circulates evenly. If you’re short on space, bake in batches—it’s better than sacrificing that perfect caramelization. I’ve even used two baking sheets at once for big crowds. The extra effort ensures every slider has that golden, crispy edge.
Using Wrong Fat Ratio
The 80/20 fat ratio is non-negotiable for juicy sliders. If you use leaner beef (like 90/10), the patties will dry out, especially with the high-heat baking method. Stick to 80/20—the fat renders out during baking, creating that flavorful crust while keeping the inside moist. If you’re worried about calories, don’t be—these sliders are worth every bite! 🥩
Cheese Timing Issues
Adding cheese too early can make the patties soggy, while waiting too long can burn it. Place the cheese slices on the patties just before the final 1-2 minutes of baking. Watch closely—American cheese melts fast, and you want it gooey, not rubbery. If you’re using cheddar or Swiss, melt them first to save time. Pro tip: Use a lighter-colored cheese so you can see when it’s fully melted through. 🧀
Nutrition facts
Frequently asked questions
Can I use ground turkey instead of beef for these sliders?
You can try, but the texture and flavor won't be the same. Ground turkey is leaner and dries out faster when baked at high heat. If you must use it, go for 93/7 and add 1 extra tablespoon of oil to the beef mixture to compensate for the lower fat content. For best results, stick with 80/20 ground beef—it's what gives these sliders that perfect juicy crunch.
How do I make these sliders ahead of time for a party?
Assemble the sliders (patties + cheese) but skip the pickles and toppings. Store them in an airtight container in the fridge for up to 24 hours. Reheat at 350°F for 5-7 minutes until warmed through. Add toppings just before serving to keep them fresh. For freezing, bake the patties first, then freeze them on a tray before transferring to a bag. Thaw overnight in the fridge and reheat as directed.
What's the best way to keep the buns from getting soggy?
Toast the buns just before assembling—this creates a barrier between the soft bun and juicy patty. If you're making them ahead, keep the patties and buns separate until serving. For extra insurance, brush the inside of the buns with a tiny bit of melted butter before adding the patties. Also, avoid cutting the sliders until you're ready to serve—they hold up better whole.
Can I make these sliders in an air fryer instead of the oven?
Yes! Preheat the air fryer to 375°F and cook the patties for 8-10 minutes, flipping halfway through. Add cheese for the last 1-2 minutes to melt it properly. The air fryer gives a slightly different texture—more crispy on the edges but still juicy inside. You'll need to toast the buns separately. For best results, use the oven method for that classic caramelized crust.
What are the best toppings besides pickles?
Classic options include sliced red onions, fresh lettuce, tomato, or a drizzle of special sauce. For something different, try caramelized onions, jalapeños, or a sprinkle of crispy bacon bits. Keep it simple with just cheese and a dash of hot sauce, or go all out with multiple toppings. The key is to add them after baking so they stay fresh. Pro tip: Warm toppings like onions or bacon in a pan for 1-2 minutes before adding.