
Soups & Stews
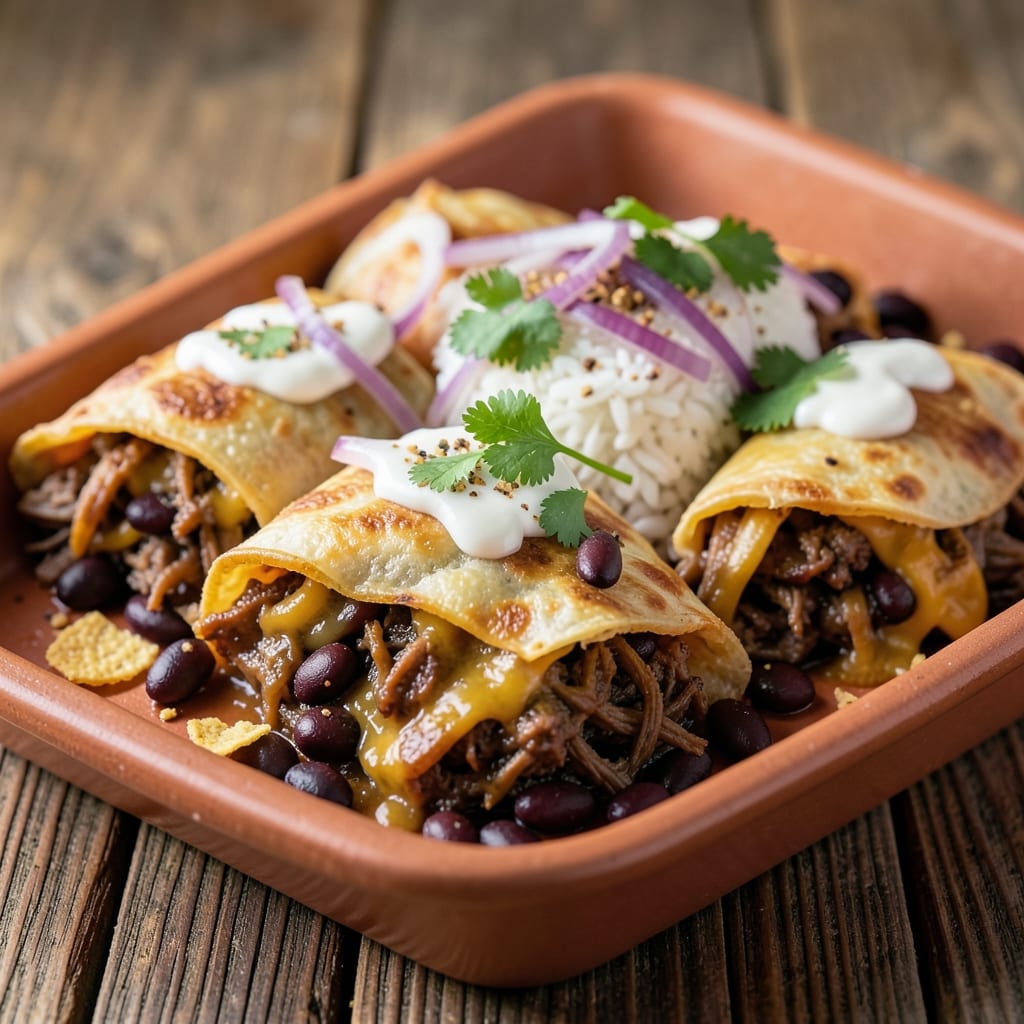
This baked shredded beef chimichanga recipe delivers the ultimate fusion of Tex-Mex comfort and crispy perfection—no deep-frying required. The secret lies in slow-cooked, tender beef layered with melted cheese and wrapped in tortillas, then baked until the edges turn golden and shatteringly crisp. After years of perfecting the balance between juicy fillings and a sturdy crust, I’ve cracked the code for restaurant-quality results at home.
The process starts with slow-cooked beef—simmered in a rich, spiced broth until fork-tender—then assembled with rice, beans, and cheese inside warm tortillas. The baking method ensures the crust stays crispy while keeping the fillings warm and gooey. No frying means less mess, but the texture is just as satisfying.
By the time these chimichangas emerge from the oven, you’ll have golden, crispy edges that hold up to every bite, with layers of savory beef, creamy cheese, and zesty fillings inside. The aroma alone will have everyone gathering around the table—this is the kind of dish that turns a weeknight into a fiesta.
Serve with classic toppings like sour cream, guacamole, and salsa for the full experience, or keep it simple with lime wedges and cilantro. Here’s how to make them—crispy, comforting, and foolproof—in just 40 minutes.
Ingredients for baked shredded beef chimichanga
Eight tortillas, tender beef, and a crispy crust—this is Tex-Mex comfort elevated.
| Ingredient | Amount | Notes |
|---|---|---|
| Beef Chuck Roast 🥩 | 2 lb | Pre-cubed for even cooking |
| Large Flour Tortillas 🌯 | 8 whole | 10-inch size preferred |
| Sharp Cheddar Cheese 🧀 | 2 cups | Shredded, sharp flavor |
| Cooked White Rice 🍚 | 2 cups | Day-old rice preferred |
| Black Beans 🫘 | 1 ½ cups | Drained and rinsed |
| Onion 🧅 | 1 whole | Medium, finely diced |
| Garlic Cloves 🧄 | 4 cloves | Minced for depth |
| Tomato Sauce 🍅 | 1 ½ cups | Canned, crushed tomatoes |
| Beef Broth 💧 | 1 cup | Low-sodium preferred |
| Chili Powder 🌶️ | 2 tbsp | Smoked variety enhances flavor |
| Ground Cumin 🌿 | 1 tbsp | Toasted for richer notes |
| Olive Oil 🫒 | 2 tbsp | Extra-virgin for searing |
| Salt 🧂 | 1 ½ tsp | Kosher or sea salt |
| Black Pepper 🌶️ | ½ tsp | Freshly ground preferred |
| Sour Cream 🥛 | ½ cup | For serving, full-fat |
The beef is non-negotiable here—chuck roast delivers that melt-in-your-mouth texture when slow-cooked. Most grocery stores carry pre-cubed chuck, but if you're buying a whole roast, ask your butcher to cut it into 1.5-inch cubes for even cooking. For the tortillas, Mission brand or La Tortilla Factory deliver consistent quality, but any large 10-inch flour tortilla works. The cheese? Sharp cheddar is essential—pre-shredded gets clumpy, so grate your own if possible. Freshly minced garlic and toasted cumin (quickly dry-toast whole cumin seeds in a dry pan for 30 seconds) take this from good to restaurant-quality.
No chili powder? Smoked paprika plus a pinch of cayenne gets you close. Short on black beans? Kidney beans or pinto beans work in a pinch, but the texture won't be identical. The tomato sauce can be store-bought (look for San Marzano if you want premium flavor) or homemade—just simmer crushed tomatoes with the garlic and spices for 10 minutes to deepen the flavor. For the rice, day-old works best as it's firmer and less likely to make the tortillas soggy. The olive oil matters here too—avoid light or refined oils that lack flavor. If you're making this ahead, assemble the chimichangas and refrigerate uncooked for up to 24 hours before baking.
These reheat beautifully—450°F for 10-12 minutes restores that crispy edge. Store leftovers in an airtight container for 3 days in the fridge or 3 months frozen. For freezing, bake first, then cool completely before wrapping tightly in foil. The sour cream should be full-fat for the best texture—Kroger's private label or Breyers are reliable choices. When reheating, cover with foil for the first 5 minutes to prevent over-browning, then uncover for that golden finish. The aroma alone will have your whole house gathering around the table.
Why You'll Love This Recipe
- I swear by this trick: just toss the shredded beef, beans, and rice on a sheet pan, wrap it all in tortillas, and bake. No pots, no pans—just one tray and 20 minutes of hands-off magic.
- One-Pan Wonder: I swear by this trick: just toss the shredded beef, beans, and rice on a sheet pan, wrap it all in tortillas, and bake. No pots, no pans—just one tray and 20 minutes of hands-off magic.
- Cheddar-Crusted Magic: That sharp cheddar melts into a golden, gooey blanket when baked, turning every bite into a creamy, cheesy hug. Honestly, the first time it happened, I nearly burned my tongue from excitement.
- Game for Any Night: Pack leftovers for lunch or reheat them for dinner—this dish doesn’t care what day it is. (Yes, even on a Tuesday night when takeout feels impossible.)
Step-by-step instructions for baked shredded beef chimichangas
Here's the method for achieving that perfect crispy crust while keeping the filling tender and flavorful.
Sear and Braise the Beef Chuck Roast
Heat the 2 tablespoons olive oil in a large Dutch oven over medium-high heat until shimmering. Add the 2 lb beef chuck roast, cut into 1-inch cubes, and sear undisturbed for 3-4 minutes until deeply browned on all sides. This step develops rich, caramelized flavors that penetrate the meat during braising.
Remove the beef and set aside. In the same pot, add the 1 whole onion, finely diced, and cook for 5 minutes until softened. Add the 4 cloves garlic cloves, minced, and stir for 30 seconds until fragrant. Sprinkle in the 2 tablespoons chili powder and 1 tablespoon ground cumin, stirring constantly for 1 minute to toast the spices and release their aromas.
Return the beef to the pot, add the 1.5 cups tomato sauce and 1 cup beef broth, and bring to a gentle simmer. Cover and reduce heat to low, then braise for 2-2.5 hours until the beef is fork-tender and easily shreds. The sauce should reduce to a thick, glossy consistency that clings to the meat.
Prepare the Filling Components
While the beef braises, combine the 2 cups cooked white rice, 1.5 cups black beans, and 2 cups shredded sharp cheddar cheese in a large mixing bowl. Stir in 1.5 teaspoons salt and 0.5 teaspoon black pepper to taste. The cheese will melt slightly from the warm rice, creating a cohesive filling that won't fall apart when wrapped.
Once the beef is tender, remove it from the braising liquid and shred using two forks, discarding any large connective tissue. Transfer the shredded beef to the rice mixture and gently fold everything together until evenly distributed. The filling should be moist but not soupy—if it's too dry, add 1-2 tablespoons of the reserved braising liquid.
Assemble and Wrap the Chimichangas
Preheat your oven to 375°F and line two baking sheets with parchment paper. Lay out the 8 large flour tortillas and divide the filling evenly among them, spreading each portion into a 1-inch thick rectangle in the center of a tortilla. Fold the sides inward, then roll tightly from the bottom up, tucking in the edges as you go to create compact, sealed packages.
Place the wrapped chimichangas seam-side down on the prepared baking sheets, leaving 1 inch of space between each. Brush the tops lightly with any remaining braising liquid to add moisture and enhance browning. For extra crispiness, you can also lightly brush with 1 tablespoon olive oil before baking.
Bake Until Golden and Crispy
Bake the chimichangas for 25-30 minutes until the tortillas are deep golden brown and crispy to the touch. Rotate the baking sheets halfway through for even browning. The internal temperature of the filling should reach 165°F, ensuring it's fully heated through without drying out.
For maximum crispiness, transfer the baked chimichangas to a wire rack and let them rest for 5 minutes. Serve immediately with the 0.5 cup sour cream on the side for dipping, or dollop it directly over each chimichanga before serving. The contrast of cool, creamy sour cream against the warm, crispy tortilla is what makes this dish truly satisfying.
Pro Tips For Making Baked Shredded Beef Chimichanga
- Preheat Tortillas First: I learned this the hard way—cold tortillas shrink like sad party balloons when they hit the oven. Warm them for 10 seconds in a dry skillet or microwave (wrapped in a damp towel) before filling. They’ll stay pliable and wrap neatly, which matters when you’re rolling up rice, beans, and shredded beef without it all spilling out.
- Shred Beef at Peak Tenderness: Don’t pull the chuck roast off the heat the second it hits 203°F—wait until it’s 205°F. The extra 2°F makes all the difference for shredding effortlessly. Toss it in a bowl with a splash of beef broth or chimichurri sauce while it rests; the liquid helps break it down further and keeps it juicy when you fold it into the chimichangas.
- Layer Cheese Strategically: Skip the "dump it all on top" move. Instead, sprinkle sharp cheddar between the tortilla layers (half in the bottom, half in the top) and save a handful for the final sprinkle. This guarantees every bite has melty cheese, not just the top crust. Use the block kind—pre-shredded sticks together like glue when it melts.
- Bake Two Trays at Once: If you’re feeding a crowd, double your chimichangas and bake them on separate sheets. The oven gets crowded fast, and that’s when the edges burn before the centers cook. Rotate the trays halfway through—this ensures even browning and saves you from flipping half-cooked chimichangas onto a fresh sheet mid-bake.
Dietary considerations for this recipe
Gluten-Free Adaptations
For a gluten-free version, use corn tortillas instead of flour tortillas—they hold up well to baking and add a slightly sweet, earthy flavor. I recommend Mission Corn Tortillas for their sturdy texture. To prevent the filling from leaking, brush the tortillas lightly with olive oil before wrapping, then bake at 375°F for 25-30 minutes as directed. The corn tortillas will crisp up beautifully while keeping the filling intact. 🌟
Dairy-Free Options
Skip the sharp cheddar cheese and replace it with dairy-free shreds like Violife Just Like Cheddar or Daiya. For extra creaminess, mix in ½ cup dairy-free sour cream (like Kite Hill) into the filling. The texture will be slightly different but still delicious. If you're avoiding all dairy, use nutritional yeast for a cheesy flavor—sprinkle 1 tbsp over the filling before rolling. 🧀
Low-Carb Modifications
Cut out the white rice and replace it with cauliflower rice (fresh or frozen) cooked until tender. For extra flavor, sauté the cauliflower rice with 1 tsp garlic powder and ½ tsp smoked paprika before mixing into the filling. Use low-carb tortillas like Mission Carb Balance or Siete Grain-Free for a crispier, lower-carb crust. The result is still hearty and satisfying! 🥬
Vegetarian Swap
Replace the beef with shredded jackfruit or lentils for a meatless version. For jackfruit, drain and rinse a 20-ounce can of young green jackfruit in water, then shred it and sauté with the onions, garlic, and spices. For lentils, cook 1.5 cups dry brown lentils until tender, then mix with the spices. Both options absorb the flavors beautifully and keep the filling cohesive. 🌱
Allergen-Friendly Tips
If you're avoiding eggs, no changes are needed—the recipe is naturally egg-free. For nut allergies, double-check all ingredients, especially the sour cream (some brands contain dairy-derived additives). Store-bought tortillas often contain wheat, so always verify labels. When in doubt, make your own tortillas with a simple mix of flour, water, and oil** for complete control. 🚫
Nutrition facts
Frequently asked questions
Can I make these chimichangas ahead of time?
Assemble the chimichangas (unbaked) and refrigerate them in an airtight container for up to 24 hours. When ready to bake, simply follow the same instructions but add 5 extra minutes to the baking time. For freezing, bake first, then cool completely before wrapping tightly in foil. They'll keep for 3 months in the freezer—just reheat at 375°F for 10-12 minutes until crispy again.
Why did my chimichangas get soggy?
Soggy chimichangas usually happen when the filling is too wet or the tortillas aren't sealed properly. Use day-old rice (it's firmer) and avoid over-moistening the filling. When rolling, press edges firmly to seal air pockets. For extra crispiness, brush the tops with olive oil before baking, and bake on a wire rack instead of a baking sheet.
What's the best way to reheat leftover chimichangas?
For best results, reheat in a 450°F oven for 10-12 minutes on a wire rack. Cover loosely with foil for the first 5 minutes to prevent over-browning, then uncover to restore crispiness. Avoid microwaving—they'll turn rubbery. If you must use the microwave, cover with a damp paper towel and heat in 30-second bursts until warm.
Can I use ground beef instead of chuck roast?
Yes, but the texture will be different. Ground beef cooks much faster and can turn dry if braised too long. Use 1 lb lean ground beef and cook it separately with the spices until just done (5-6 minutes over medium heat). Drain excess fat, then mix with the rice and beans. The result will be more like a stuffed burrito than a traditional chimichanga, but still delicious!
How do I make these extra crispy?
For maximum crispiness, try these pro tips:
- Use thin tortillas (like Mission Thin Crispy) and roll tightly.
- Brush the tops with egg wash (1 egg beaten with 1 tbsp water) before baking.
- Bake on a wire rack over a baking sheet to allow air circulation.
- Broil for 1-2 minutes at the end for extra color. The result? A shatteringly crisp crust that holds up to every bite!