
Side Dishes
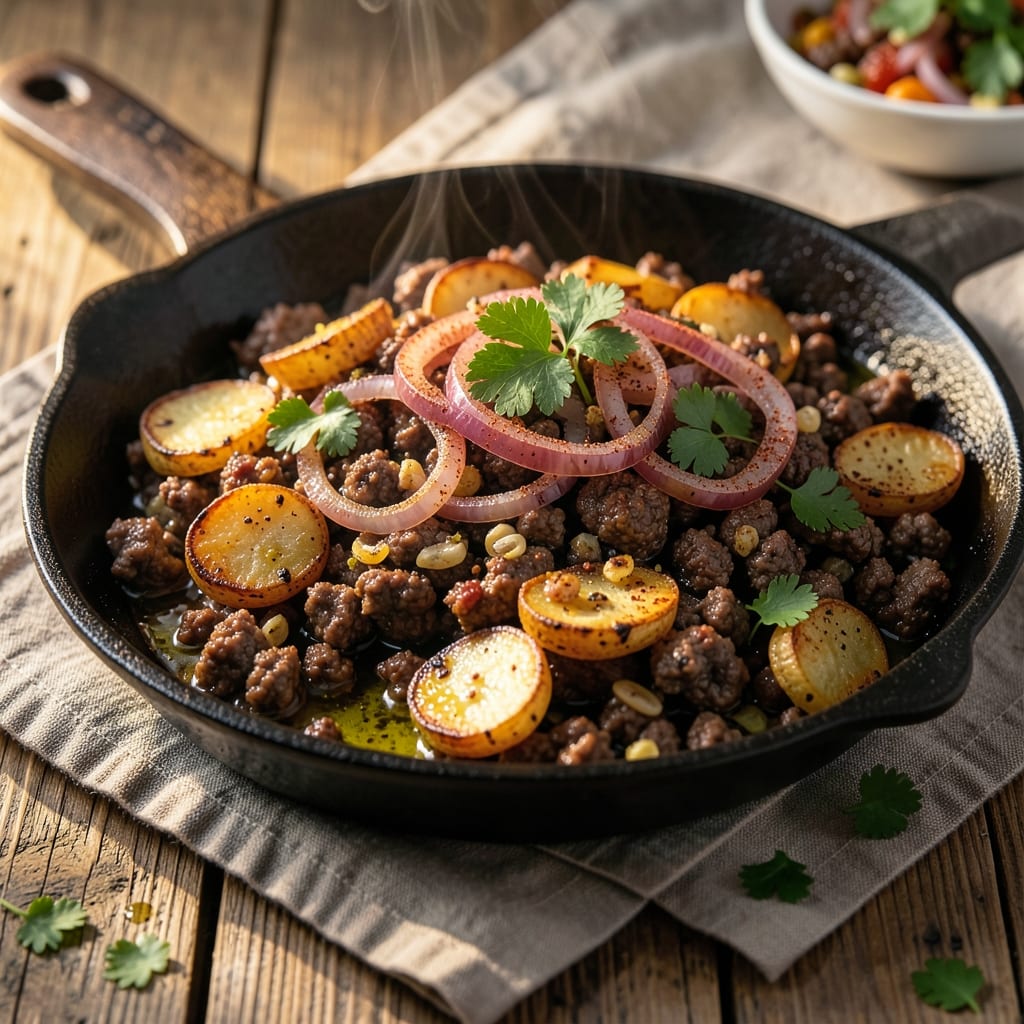
Ground beef potato hash transforms simple ingredients into a restaurant-worthy dish with crispy edges and savory layers—all in just 30 minutes. The secret lies in perfectly browning the beef and layering thinly sliced potatoes for even cooking and maximum crunch. This recipe delivers hearty, satisfying bites that work as a breakfast main or a side dish for brunch.
Start by cooking the ground beef until fully browned, breaking it into small pieces for even distribution. Thinly sliced potatoes (about 1/8-inch thick) cook faster and develop that coveted crispy texture when layered properly. The onions add sweetness that balances the savory beef, while a sprinkle of garlic powder and paprika deepens the flavor profile.
What you'll end up with is a dish that's crispy on top, tender in the middle, and packed with flavor in every bite. The beef stays juicy while the potatoes achieve that perfect golden-brown crust without burning. This hash reheats beautifully, making it ideal for meal prep or serving leftovers.
For extra richness, top with a fried egg or melted cheese before serving. Pair with toasted sourdough or fresh fruit for a complete meal. Here's how to make it!
Ingredients for ground beef potato hash
Simple ingredients that deliver restaurant-style crispy edges and savory layers in just 30 minutes.
| Ingredient | Amount | Notes |
|---|---|---|
| Ground Beef 🥩 | 1 lb | 80/20 fat ratio preferred |
| Russet Potatoes 🥔 | 2 ½ lbs | Thinly sliced, 1/8-inch thick |
| Yellow Onion 🧅 | 1 whole | Diced, medium size preferred |
| Garlic Powder 🧄 | 1 tsp | Freshly ground preferred |
| Smoked Paprika 🌶️ | 1 tsp | For smoky depth |
| Salt 🧂 | 1 ½ tsp | Kosher or sea salt |
| Black Pepper 🌶️ | ½ tsp | Freshly ground preferred |
| Olive Oil 🫒 | 2 tbsp | For crispy potatoes |
| Butter 🧈 | 2 tbsp | Unsalted, for richness |
| Fresh Parsley 🌿 | ¼ cup | Chopped, for garnish |
| Eggs 🥚 | 2 whole | Optional fried topping |
The potatoes are non-negotiable for that perfect crispy texture. Russets are your best bet—they're starchy and hold their shape. Grocery stores usually have them pre-bagged, but if you're buying loose, grab the ones that feel firm and heavy for their size. Thinly slicing them (about 1/8-inch) is key—use a mandoline if you've got one, or carefully hand-slice with a sharp knife. The beef should be 80/20 fat ratio for juiciness, and Costco or Trader Joe's often have it pre-ground, saving you time. Onions add sweetness that balances the savory beef, so don't skip them.
No mandoline? Carefully hand-slice the potatoes—just take your time. Short on smoked paprika? Regular paprika plus a pinch of cayenne works in a pinch. The butter and olive oil combo creates that perfect crispy crust, so don't substitute with just one. For extra richness, top with a fried egg—runny yolk is ideal. The parsley is just for garnish, but it adds freshness that ties everything together. If you're meal prepping, store components separately—reheat the beef and potatoes together for best texture.
This hash reheats beautifully, but the potatoes lose crispiness if microwaved. Use a skillet over medium heat to revive it, adding a splash of water to steam the bottom layer. Keeps for 4-5 days in the fridge, or freeze for up to 3 months—just thaw and crisp again in the skillet. For extra flavor, add a dash of hot sauce or crumbled bacon before serving. The beef stays juicy, but if it dries out, just add a splash of beef broth when reheating.
Why You'll Love This Recipe
- One-Pan Magic: I swear by this recipe because it’s that easy—just dice potatoes, brown beef, and toss everything on one sheet pan. No chopping boards to clean, no extra pots clogging the sink. The onions caramelize right alongside the beef, and by the time the potatoes crisp up, dinner’s ready.
- Smoky Comfort Bite: That smoked paprika? It’s the secret weapon here. It gives the whole dish this warm, slightly sweet depth that makes it taste like a hug from your grandma’s kitchen. The garlic powder ties it all together—simple, but ridiculously good when the flavors meld.
- Lunchbox Hero: Between us, this hash is my go-to for meal prep. I make a big batch on Sundays, portion it out, and reheat slices straight from the fridge for breakfast or lunch. The potatoes stay crispy even after a day, and the beef keeps its texture—no sad, rubbery leftovers here.
- Budget Breakthrough: Honestly, this recipe is my wallet’s best friend. Ground beef and russets are cheap staples, and a single onion and a pinch of spices stretch it into a filling meal for four. I’ve fed my whole family for under $10, and no one complains—because it’s that satisfying.
Step-by-step instructions for crispy ground beef potato hash
Here's how to build layers of savory potato hash with a perfectly crispy top.
Prep and Par-Cook the Potatoes
Slice the 2.5 lbs russet potatoes into 1/8-inch thick rounds using a mandoline or sharp knife. Spread them on a baking sheet and toss with 1 tsp of the olive oil, 1 tsp salt, and 1/4 tsp black pepper. Roast at 425°F for 15 minutes until they begin softening but aren't fully cooked.
This partial cooking ensures the potatoes finish perfectly when layered back in the skillet. The high heat also helps develop that crispy exterior we want. Don't skip this step—raw potatoes will steam instead of crisp when cooked later. Remove them from the oven and set aside.
Sauté the Aromatics and Brown the Beef
Heat 1 tbsp olive oil in a large cast-iron skillet over medium-high heat. Add the diced yellow onion and cook for 5 minutes until softened. Add the 1 lb ground beef and break it apart with a wooden spoon, cooking until it loses its raw color and begins to brown.
Drain any excess fat that accumulates, leaving about 1 tbsp in the pan. Stir in the garlic powder, smoked paprika, remaining 1/2 tsp salt, and 1/4 tsp black pepper. Cook for another 2 minutes until the spices are fragrant and the beef is fully browned. This forms the flavorful base layer of your hash.
Layer and Build the Hash
Push the beef mixture to one side of the skillet and add 1 tbsp butter to the empty space. When melted, spread the par-cooked potatoes evenly across the skillet, pressing down gently to create a compact layer. Cook for 5 minutes until the bottom begins to crisp.
Spoon the beef mixture over the potatoes, then sprinkle the remaining 1 tbsp butter evenly over the top. The butter will melt and create steam, helping cook the potatoes through while adding richness. Cover the skillet and cook for 10 minutes, allowing the layers to meld together.
Achieve the Perfect Crispy Top
Remove the cover and increase heat to medium-high. Let the hash cook uncovered for 8-10 minutes until the top develops a deep golden brown crust and the potatoes are tender when pierced with a fork. You'll see the edges start to crisp—that's your signal to finish.
Finish with Eggs and Garnish
Make two small wells in the hash and crack the 2 whole eggs into them. Cover the skillet and cook for 3-4 minutes until the eggs are set to your preferred doneness. Garnish with the chopped fresh parsley and serve immediately while the hash is still crispy.
The eggs should be perfectly cooked with runny yolks, adding a rich contrast to the savory hash. Each bite should deliver crispy potato layers, tender beef, and herby freshness. Serve with hot sauce or extra parsley if desired.
Pro Tips For Making Ground Beef Potato Hash
- CUT POTATOES SMALLER THAN YOU THINK: I used to eyeball it and end up with mushy potatoes or undercooked centers. For hash, dice Russets into ¼-inch cubes—small enough to cook through fast but not so fine they turn to paste. If you’re impatient like me, skip the peel; the skin adds texture, and scrubbing saves time.
- BROWN THE BEEF FIRST: Dumping raw ground beef into the pan with potatoes means a greasy, uneven mess. Cook the beef until fully browned and crumbly (about 5-6 minutes) before adding potatoes—this builds flavor and prevents a soggy hash. Drain excess fat if you’re watching calories, but leave a little for crisping.
- DON’T SKIP THE COLD WATER SOAK: After dicing potatoes, toss them in ice water for 10 minutes—this stops them from oxidizing (they’ll stay bright, not gray) and removes excess starch so they crisp instead of steam. Drain well before cooking, or your hash will turn gummy. (Yes, even if you’re in a hurry.)
- SALT THE POTATOES BEFORE COOKING: Seasoning potatoes after they’re cooked is a missed opportunity. Toss the diced Russets with ½ teaspoon salt per pound right after dicing—this draws out moisture and ensures they crisp properly. The flavor also penetrates deeper than a sprinkle at the end. (Your taste buds will notice.)
Creative variations of this recipe
Breakfast Power-Up
Transform this hash into a hearty breakfast by adding crispy bacon or sausage crumbles to the beef layer. I like using thick-cut bacon cooked until crispy, then crumbled over the top during the final 8-10 minutes of cooking. For extra protein, top with a fried egg—runny yolk is key! This version is perfect for brunch crowds or a satisfying weekend morning meal. 🍳
Cheesy Comfort Twist
Add shredded cheddar or pepper jack cheese (about 1 cup) to the top layer before the final crisping step. The cheese melts into a gooey blanket while the potatoes crisp, creating a restaurant-worthy texture. I recommend sharp cheddar for maximum flavor impact—it pairs perfectly with the smoky paprika and beef. Serve immediately for the best melt! 🧀
Spicy Southwest Style
Swap the smoked paprika for 1 tsp chili powder and ½ tsp cumin, then add diced green bell peppers (about ½ cup) with the onions. For extra heat, stir in ½ tsp cayenne pepper with the beef. Top with sour cream and avocado slices before serving. This version feels like a breakfast taco in hash form! 🌶️
Meal Prep Adaptation
For easy prep ahead, cook the beef and potatoes separately but store them in the same airtight container. When reheating, combine in a skillet with 1 tbsp butter and 2 tbsp water over medium heat for 5-7 minutes to revive crispiness. Add a splash of beef broth if needed. Store components separately for up to 5 days—this keeps the texture perfect! ⏰
Herb-Infused Variations
Boost freshness with fresh herbs—try chopped chives or dill instead of parsley. For a Mediterranean twist, add ½ tsp dried oregano with the spices and top with crumbled feta cheese. The herbs add brightness that cuts through the richness of the beef and potatoes beautifully. 🌿
Sweet Potato Swap
Replace russet potatoes with sweet potatoes for a naturally sweet, caramelized hash. Slice them ¼-inch thick and par-cook at 400°F for 12 minutes before layering. Add ½ tsp cinnamon to the beef mixture for warmth. This version works perfectly as a side for roasted meats or as a standalone dish. 🍠
Nutrition facts
Frequently asked questions
Can I use ground turkey or chicken instead of beef?
Ground turkey (especially dark meat) or chicken works beautifully. Use the same cooking method, but reduce the cooking time slightly since poultry cooks faster than beef. For extra flavor, add an extra ½ tsp of garlic powder or smoked paprika to compensate for the milder taste of poultry.
Why are my potatoes turning out mushy instead of crispy?
This usually happens when the potatoes aren't sliced thin enough or aren't par-cooked properly. For best results, slice them 1/8-inch thick and always par-cook them in the oven for 15 minutes at 425°F before layering. Also, make sure your skillet is hot enough—medium-high heat is key for crispy edges.
How do I make this hash ahead of time?
Cook the beef and potatoes separately, then store them in an airtight container in the fridge for up to 5 days. To reheat, combine them in a skillet with 1 tbsp butter and 2 tbsp water over medium heat for 5-7 minutes. For extra crispiness, broil for 2-3 minutes at the end.
Can I make this dish in the oven instead of a skillet?
Yes! Spread the beef mixture and potatoes in a single layer on a baking sheet, drizzle with olive oil, and bake at 400°F for 25-30 minutes. For extra crispiness, broil for 3-5 minutes at the end. The oven method works well for larger batches or when you want hands-off cooking.
What’s the best way to store leftovers?
Store components separately in airtight containers in the fridge for up to 5 days. For freezing, wrap individual portions tightly and freeze for up to 3 months. Thaw overnight in the fridge, then reheat in a skillet with a splash of water to restore crispiness.