Soups & Stews
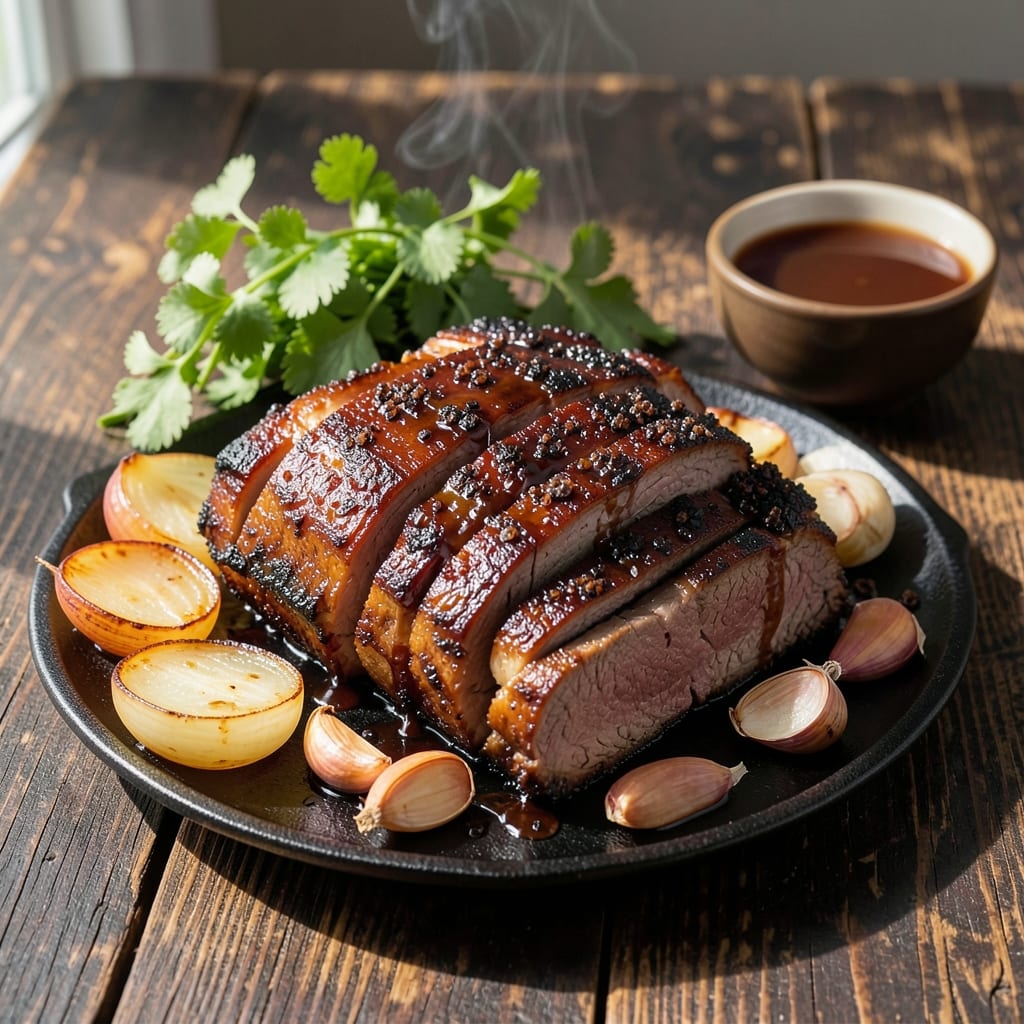
This American beef brisket recipe delivers that legendary smoky crust and melt-in-your-mouth tenderness that defines true barbecue. The secret lies in low-and-slow cooking—patiently transforming tough beef into fork-tender perfection through Maillard magic and careful temperature control. What sets this apart is the balance between tradition and modern flexibility, whether you prefer a classic dry rub or a deeper marinade infusion.
Mastering brisket means understanding the 195–203°F sweet spot for collagen breakdown, where connective tissue dissolves into rich, velvety juices. We’ll guide you through every step—from choosing the right cut to monitoring internal temps and resting properly—so you avoid the pitfalls of overcooking or drying out. The result? A brisket so tender it nearly falls apart, with a deep, caramelized bark that’s impossible to resist.
Pair this brisket with classic sides like buttery cornbread and creamy coleslaw for a full Southern spread, or serve it sliced thin over toasted buns for sandwiches that’ll have everyone asking for seconds. The beauty of this recipe is its versatility—whether you’re smoking it low and slow or roasting it in the oven, the principles remain the same for restaurant-quality results at home.
Ready to tackle a brisket that’ll impress even the most seasoned pitmasters? Let’s break down the process step by step—from prep to plating—so you can achieve that perfectly tender, smoky masterpiece every time.
Ingredients for american beef brisket
Six pounds of brisket, a handful of pantry staples, and the patience for low-and-slow magic.
| Ingredient | Amount | Notes |
|---|---|---|
| Beef Brisket (Packer Cut) 🥩 | 6 lb | Whole packer cut, fat cap intact |
| Yellow Onion 🧅 | 2 whole | Yellow or red, sliced into wedges |
| Garlic Cloves 🧄 | 8 cloves | Fresh, peeled and smashed |
| Beef Broth 💧 | 2 cups | Low-sodium preferred, homemade or store-bought |
| Apple Cider Vinegar 🍎 | ¼ cup | For tenderizing, not sweet |
| Dark Brown Sugar 🍚 | ½ cup | Packed, for caramelization |
| Smoked Paprika 🌶️ | 2 tbsp | High-quality for smoky depth |
| Ground Black Pepper 🌶️ | 1 ½ tbsp | Freshly cracked, coarse grind |
| Kosher Salt 🧂 | 1 tbsp | Diamond Crystal preferred |
| Mustard Powder 🌶️ | 1 tbsp | For subtle tang |
| Bay Leaves 🌿 | 2 whole | Fresh if available |
| Wood Chips (Hickory or Oak) 🌳 | 2 cups | Soaked for 30 minutes |
| Yellow Mustard 🍯 | ¼ cup | For finishing glaze |
| Black Peppercorns 🌶️ | 1 tbsp | Crushed for garnish |
| Fresh Thyme Sprigs 🌿 | 4 whole | For aroma, optional |
The brisket cut is everything—packer cuts with that thick fat cap are worth hunting down. Costco or Whole Foods usually carry them, or ask your butcher to trim the fat to about 1/4-inch thick. Look for vibrant red meat with good marbling—this is your collagen goldmine. If you're using a flat cut instead, plan for an extra 30 minutes of cook time. The wood chips? Oak gives a classic brisket flavor, while hickory adds more smoke intensity. Soak them in water for at least 30 minutes before using—this prevents flare-ups and keeps your smoker happy.
No smoked paprika? Substitute with a mix of chili powder and a pinch of liquid smoke—about 1 tsp of smoke per tbsp of chili powder. Apple cider vinegar can be swapped for white vinegar, but the apple adds subtle sweetness that pairs beautifully. For the brown sugar, muscovado sugar has deeper caramel notes if you want to splurge. The beef broth? Homemade is ideal, but low-sodium store-bought works in a pinch. Just remember—never use salted broth. And if you're short on time, a quick 24-hour marinade with the vinegar, garlic, and spices will jumpstart the tenderizing process.
Brisket tastes even better the next day, so plan ahead—it's a 3-4 day meal when you account for resting and reheating. Store cooked brisket in the fridge, wrapped tightly in butcher paper or foil, for up to 5 days. For leftovers, slice against the grain and reheat in the oven at 300°F until warmed through—microwaving makes it tough. Freeze portions in airtight containers for up to 3 months. Pro tip: Spritz the brisket with apple juice every 2 hours during cooking for extra moisture and bark development.
Why You'll Love This Recipe
- One-Pan Magic: I swear by this—just toss the brisket, sliced onions, and garlic in a Dutch oven with broth and vinegar. No chopping boards, no extra pots. The onions caramelize right alongside the meat, and honestly? That’s half the flavor.
- Tangy-Sweet Crust: The apple cider vinegar does something wild—it cuts through the richness while adding this just-right sharpness that makes every bite sing. That crispy edge on the brisket? Pure satisfaction. (Yes, even on a Tuesday night.)
- Budget-Friendly Feast: A packer cut of brisket feeds a crowd without breaking the bank, and the ingredients? Basic stuff you already have. Between us—this is my go-to for game days, potlucks, or when I’m craving something hearty but don’t want to spend a fortune.
Step-by-step instructions for American beef brisket with smoky crust
This method unlocks the perfect balance of tender meat and deep, smoky bark.
Prepare the Brisket and Create the Rub
Begin by trimming the fat cap of the 6 lb beef brisket (packer cut) to about ¼ inch thickness, leaving the fat intact on the sides. This preserves moisture while allowing the rub to adhere properly. Pat the entire surface dry with paper towels—this is crucial for developing that prized bark.
In a small bowl, combine the 2 tbsp smoked paprika, 1.5 tbsp ground black pepper, 1 tbsp kosher salt, and 1 tbsp mustard powder. Mix well to distribute the spices evenly. Press this mixture firmly onto all sides of the brisket, including the fat cap. The rub should stick to the meat rather than just sit on top. Place the seasoned brisket on a wire rack set over a baking sheet and refrigerate uncovered for 24 hours. This dry-brining step enhances flavor penetration and ensures maximum tenderness.
Soak Wood Chips and Set Up the Smoker
Place the 2 cups wood chips (hickory or oak) in a bowl and cover with hot water. Let them soak for at least 30 minutes—this prevents flare-ups and ensures steady smoke production. While the chips soak, preheat your smoker to 225°F using the soaked wood chips. The ideal temperature for low-and-slow cooking is between 225-250°F, but I prefer the lower end for more control and even cooking.
Once the smoker reaches temperature and you see clean, blue smoke (not thick white steam), it's ready. Place the brisket fat-side up on the smoker grate. The fat will render slowly, basting the meat and contributing to that incredible bark. Avoid opening the smoker during the first hour—each time you do, you lose heat and extend cook time.
Smoke Until the Stall Begins
Smoke the brisket undisturbed for 6-8 hours, maintaining a consistent temperature of 225°F. You'll know it's time to check for the stall when the internal temperature reaches 165-170°F on the thicker end. The stall is a normal part of the process where the meat's moisture evaporates, causing the temperature to plateau. This is when the brisket needs help pushing through to tenderness.
At this point, remove the brisket from the smoker and wrap it tightly in butcher paper (not aluminum foil). The paper allows the bark to develop while trapping steam to tenderize the meat. Return the wrapped brisket to the smoker and continue cooking until the internal temperature reaches 203°F. This typically takes an additional 3-5 hours, but don't rush it—patience is key to achieving that perfect texture.
Create the Glaze and Finish Cooking
While the brisket finishes cooking, prepare the glaze by combining the 2 cups beef broth, 0.25 cup apple cider vinegar, 0.5 cup dark brown sugar, and 4 whole fresh thyme sprigs in a saucepan. Bring to a simmer over medium heat and reduce by half, about 10-15 minutes. Strain out the thyme sprigs and set the glaze aside.
Once the brisket reaches 203°F, remove it from the smoker and let it rest for 15 minutes. Unwrap the brisket and brush the reduced glaze evenly over the top. Return it to the smoker for 10-15 minutes to caramelize the sugar and create a glossy, sticky crust. This step adds depth of flavor and a beautiful finish.
Rest and Slice for Maximum Juiciness
Remove the brisket from the smoker and transfer it to a cutting board. Tent loosely with foil and let it rest for at least 1 hour. This resting period allows the juices to redistribute throughout the meat, ensuring every slice is moist and flavorful. The brisket should be fork-tender, with a dark, mahogany bark on the outside and a pink smoke ring just beneath.
Slice the brisket against the grain into ¼-inch thick slices. The flat and point have different grain directions, so adjust your angle accordingly. Serve immediately with the remaining glaze spooned over the top and garnish with crushed black peppercorns. Each bite should deliver a perfect balance of tender meat, smoky depth, and a touch of sweetness from the glaze.
Pro Tips For Making American Beef Brisket
- Trim the Fat First: Packer brisket comes with a thick fat cap—leave it on for flavor, but trim it down to about ¼-inch. This keeps your brisket from steaming in its own juices during the long cook, which is the thing that matters most for tender results. (I used to skip this and ended up with soggy bark.) ---
- Sweat Onions Low and Slow: Don’t rush the onion and garlic step—cook them in beef broth on low heat for 10-15 minutes until they’re soft and translucent. This builds deep flavor without burning, which is the foundation of your sauce. (Yes, even if you’re impatient like me.) ---
- Vinegar Early, Not Late: Add the apple cider vinegar with the broth at the start, not as a last-minute splash. It tenderizes the meat gradually and balances the richness without making the brisket taste sharp. (I learned this the hard way when I added it too late and got a weird tang.) ---
- Check Internal Temp Twice: Use a meat thermometer to hit 195°F in the thickest part, but pull it when it reaches 190°F—it’ll carry over to perfect doneness. Rest it wrapped in foil for 30 minutes before slicing, or you’ll lose all that precious juice. (Your future self will thank you.)
Make-ahead tips for this american beef brisket
Prep Ahead for Smoky Perfection
The key to stress-free brisket day starts 48 hours before cooking. Trim the fat cap to ¼ inch and apply the dry rub, then refrigerate uncovered for 24 hours. This dry-brining step ensures maximum flavor penetration and tenderness. I like to prep my brisket the night before while I’m making dinner—it’s one less thing to worry about on cook day. 🥩
Smoker Prep Shortcuts
Set up your smoker the night before if possible. Soak your 2 cups wood chips (hickory or oak) in water and store them in a sealed container in the fridge. Preheat your smoker to 225°F at least 1 hour before cooking to ensure stable temperature. I keep a small propane tank nearby for quick adjustments—this saves time when the temperature dips unexpectedly. ⏰
Glaze Prep While Cooking
Make the glaze 2-3 hours before serving while your brisket smokes. Combine 2 cups beef broth, ½ cup brown sugar, and ¼ cup apple cider vinegar in a saucepan and reduce by half. Store it in the fridge until ready to use. This gives you a ready-to-use finishing sauce that adds that perfect caramelized crust. The glaze can also be reheated gently if you’re serving family-style. 🍯
Resting and Storing Leftovers
After cooking, let the brisket rest for at least 1 hour before slicing. For leftovers, store in an airtight container in the fridge for up to 5 days. Reheat slices in a 300°F oven for 10-15 minutes until warmed through—this keeps them juicy, unlike microwaving. I like to portion leftovers into quart-sized freezer bags for easy grab-and-go meals. Freeze for up to 3 months. ❄️
Make-Ahead Marinade Option
If you’re short on time, marinate the brisket overnight in 2 cups beef broth, ¼ cup apple cider vinegar, 2 tbsp smoked paprika, and 1 tbsp kosher salt. This jumpstarts the tenderizing process and adds extra depth of flavor. Store the marinade in a ziplock bag in the fridge for up to 24 hours before cooking. Just pat dry before applying the dry rub for that perfect bark. 💫
Equipment Prep
Nutrition facts
Frequently asked questions
What's the difference between a packer cut and flat cut brisket?
A packer cut includes both the flat and point sections, giving you more meat and better flavor concentration. The flat cut is leaner and cooks faster, but lacks the rich point section's tenderness. For this recipe, use the packer cut—it's worth the extra effort for that perfect balance of texture and juiciness.
Can I cook brisket in the oven instead of a smoker?
Use a meat thermometer to maintain 225°F in your oven with a water pan for moisture. Place the brisket on a rack over a tray, and wrap it in butcher paper when it hits 165°F. The cook time will be similar—just monitor temps closely. For extra smokiness, add 1 tbsp liquid smoke to your rub or glaze.
Why does my brisket turn out tough instead of tender?
Overcooking or cutting against the grain are the most common mistakes. Always cook to 203°F internal temp and rest for 1 hour before slicing. The grain runs diagonally—slice at a 45-degree angle to shorten the muscle fibers. If it's still tough, you may have rushed the cooking or used too much heat. Patience is key!
How do I know when the brisket is done?
Use a meat thermometer to check the thickest part of the flat section. It should reach 203°F—this is when collagen fully breaks down. The point may read slightly lower. Look for a dark mahogany bark and a pink smoke ring just beneath the surface. Press your finger gently—it should feel like butter.
What's the best way to reheat brisket leftovers?
Slice against the grain and reheat in a 300°F oven for 10-15 minutes with a splash of beef broth. Microwaving makes it tough. For sandwiches, warm slices on a skillet over medium heat until crispy. Leftovers keep well in the fridge for 5 days or frozen for 3 months.