
Main Courses
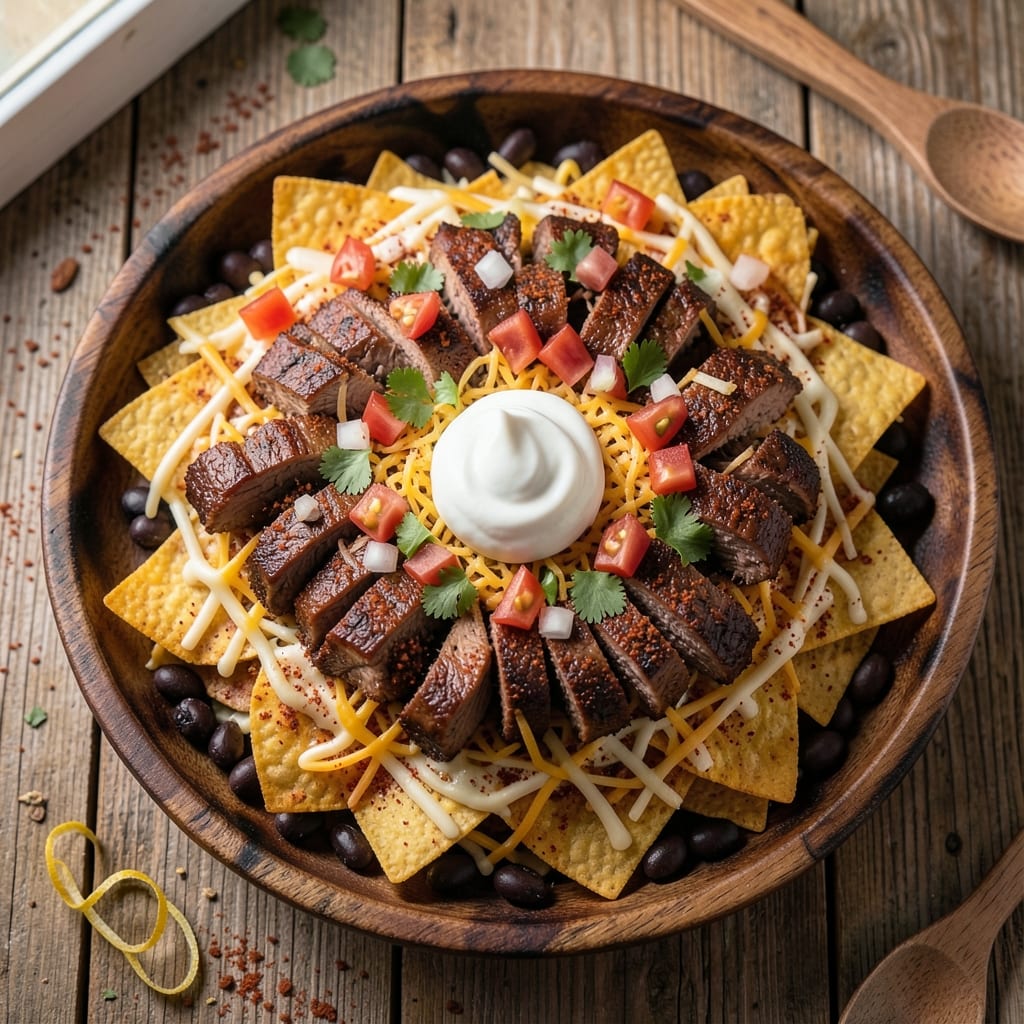
Applebee's Neighborhood Nachos Beef recipe brings that iconic smoky, layered goodness straight to your kitchen table. The secret lies in perfectly seasoned, grilled beef that melts into crispy tortilla chips, topped with melted cheese and all the classic fixings. I've recreated this restaurant favorite with a foolproof method that delivers the same bold flavors and satisfying texture at home.
What makes these nachos special is the balance of textures—crispy chips, tender beef, gooey cheese, and fresh toppings all coming together in one delicious bite. The beef is marinated in a smoky blend of spices and grilled to juicy perfection, then shredded for easy layering. This isn't just another nacho recipe; it's a restaurant-quality experience with a homemade touch.
By the time you're done assembling, you'll have a towering pile of nachos with all the classic elements: smoky beef, melted cheddar and Monterey Jack, crisp jalapeños, and fresh toppings. The cheese stretches and bubbles as it melts, creating that signature gooey texture that makes nachos irresistible. This is comfort food at its finest—perfect for game day, movie night, or when you're craving something hearty.
One of the best parts? You can customize it with your favorite toppings while keeping the core method simple. The instructions walk you through every step, from grilling the beef to layering the chips and melting the cheese. Ready to make nachos that taste just like Applebee's? Let's get started!
Ingredients for applebee's neighborhood nachos beef
Smoky beef, crispy chips, and melty cheese—here's what you need for nachos that taste just like Applebee's.
| Ingredient | Amount | Notes |
|---|---|---|
| Beef Chuck Roast 🥩 | 2 lb | Pre-cubed for even cooking |
| Tortilla Chips 🍟 | 2 bags | Sturdy, restaurant-style preferred |
| Shredded Cheddar Cheese 🧀 | 2 cups | Medium or sharp variety |
| Shredded Monterey Jack Cheese 🧀 | 1 ½ cups | Freshly shredded for melt |
| Smoked Paprika 🌶️ | 1 tbsp | For that signature smoky flavor |
| Ground Cumin 🌿 | 1 tbsp | Toasted for deeper flavor |
| Garlic Powder 🧄 | 1 tbsp | Freshly ground preferred |
| Onion Powder 🧅 | 1 tbsp | For balanced seasoning |
| Salt 🧂 | 1 tsp | Kosher or sea salt |
| Black Pepper 🌶️ | ½ tsp | Freshly ground for heat |
| Olive Oil 🫒 | 2 tbsp | For grilling beef |
| Fresh Jalapeños 🌶️ | 4 whole | Sliced for heat and crunch |
| Fresh Cilantro 🌿 | ¼ cup | Chopped for garnish |
| Sour Cream 🥛 | ½ cup | For cooling contrast |
| Lime Wedges 🍋 | 2 whole | For serving |
The beef is the star, so grab a chuck roast from the butcher section—it's cheaper and more flavorful than pre-cubed. I always ask for it to be cut into 1-inch cubes myself, but most grocery stores carry pre-cubed beef in the freezer section. For the chips, Tostitos Scoops or Fritos hold up best under all that cheese. The cheeses? Freshly shredded is non-negotiable—pre-shredded gets gummy. If you're in a pinch, buy a block of cheddar and Monterey Jack and shred it yourself.
No smoked paprika? Mix regular paprika with a pinch of liquid smoke—it's a game-changer. The spices can be swapped too: Mexican oregano for the cumin adds depth. For the jalapeños, pick ones with a little heat but not too spicy—you want flavor, not a mouthful of fire. Fresh cilantro is ideal, but dried works at one-third the amount if you're out. The sour cream adds that creamy contrast, but vegan sour cream works just as well if you're avoiding dairy.
Store your prepped beef mixture in an airtight container for up to 3 days—it actually tastes better the next day. Tortilla chips stay crispy for 2 days if you keep them in a sealed bag. The cheeses? Freeze them in portions to prevent clumping. Assemble your nachos right before serving so everything stays crispy. Leftovers? Reheat in a 350°F oven for 5 minutes to restore the crunch.
Why You'll Love This Recipe
- Tender Beef Shortcut: I swear, the slow-cooked beef chuck roast here is so much easier than it sounds. Just dump it in the crockpot with a little seasoning—smoked paprika, garlic powder, onion—and let it do its thing. No chopping, no browning, just melt-in-your-mouth beef that shreds like a dream.
- Cheese Pull Perfection: That double cheese combo—cheddar and Monterey Jack—is where the magic happens. The cheddar gets all gooey and golden on top while the Monterey Jack adds that creamy, stretchy pull. Honestly, I’ve tried fancier cheese blends, but this simple combo hits the spot every time.
- Game Day Flex: This is my go-to for football Sundays or lazy Fridays. The chips stay crispy under the melty cheese, and the beef? It’s hearty enough for a crowd but easy to scale down. Plus, everyone can customize their own—extra cheese, hot sauce, sour cream—no stress.
- Budget-Friendly Feast: A big bag of tortilla chips and a chuck roast stretch way further than you’d think. I’ve fed six people for under $15, and the leftovers? Even better the next day—just reheat and add a sprinkle of paprika for that smoky kick. Minimal cost, maximum satisfaction.
Step-by-step instructions for smoky layered loaded nachos
Here's how to recreate Applebee's signature nachos with restaurant-quality beef and perfect cheese layers.
Season and Cook the Beef Chuck Roast
In a large bowl, combine the 2 lb beef chuck roast with 1 tbsp smoked paprika, 1 tbsp ground cumin, 1 tbsp garlic powder, 1 tbsp onion powder, 1 tsp salt, and 0.5 tsp black pepper. Toss until the meat is evenly coated in the spice blend. This dry rub will give your nachos that signature smoky flavor.
Heat 2 tbsp olive oil in a large skillet over medium-high heat. Add the seasoned beef and cook for 8-10 minutes, stirring occasionally, until the beef is browned on all sides. The pieces should be well-seared but not fully cooked through. Transfer the beef to a cutting board and let it rest for 5 minutes before slicing into thin strips. This resting period keeps the meat juicy during the baking process.
Prepare the Nacho Base
Preheat your oven to 375°F. Spread one bag of tortilla chips evenly on a large baking sheet, creating a single layer. Sprinkle 1 cup of shredded cheddar cheese and 0.75 cups of shredded Monterey Jack cheese over the chips. This initial layer ensures the chips stay crispy while the cheese melts perfectly.
Add half of the sliced beef strips over the cheese layer, spreading them evenly. Top with 2 sliced fresh jalapeños (save the remaining 2 for garnish later). Repeat the process with the second bag of tortilla chips, another 1 cup of shredded cheddar cheese, 0.75 cups of shredded Monterey Jack cheese, and the remaining beef strips. This layered approach creates that classic nacho tower effect with each bite.
Bake Until Cheese is Bubbly
Bake the nachos for 10-12 minutes until the cheese is fully melted and bubbly. You'll see the edges of the chips starting to crisp up, and the cheese should have a golden, slightly browned appearance. This is your cue that the nachos are ready to be topped. Keep a close eye on them during the last few minutes to prevent over-browning.
Remove the nachos from the oven and let them cool for 2-3 minutes. This brief resting period allows the cheese to set slightly, making it easier to handle when you add the final toppings. The nachos should still be warm but not scorching hot when you serve them.
Garnish and Serve
While the nachos are still warm, sprinkle the 0.25 cup chopped fresh cilantro evenly over the top. Dollop 0.5 cup sour cream in small spoonfuls across the nachos, creating a cooling contrast to the spicy beef and cheese. Add the remaining 2 sliced fresh jalapeños for a final touch of heat and crunch.
Serve immediately with the 2 whole lime wedges on the side. The acidity of the lime cuts through the richness of the cheese and beef, balancing every bite. These nachos are best enjoyed straight from the oven while the chips are still crispy and the cheese is gooey.
Pro Tips For Making Applebee'S Neighborhood Nachos Beef
- CRUMBLE LOW AND SLOW: I learned this the hard way—don’t rush the beef chuck roast. Cook it on medium-low heat for at least 2 hours, stirring occasionally, until it’s shredding effortlessly with a fork. The slow breakdown keeps it tender and makes the nachos actually hold together instead of turning to mush.
- LAYER CHEESE IN THIN BITS: Skip dumping a mountain of cheese at once. Sprinkle cheddar and Monterey Jack in thin, even layers—about ¼ cup each—so every chip gets melty goodness without turning into a glue trap. The first layer melts into a sauce, the second gives that perfect stretch.
- SAVOR THE CHIP CRUNCH: Don’t soak the chips in cheese sauce. After layering cheese, hit the nachos with a quick blast of broiler heat (3-5 minutes) before adding the beef. This crisps the top layer of chips so they don’t turn soggy when the warm beef goes on—trust me, your mouth will notice.
- SMOKE THE BEEF RIGHT: The smoked paprika is the flavor hero here, but don’t just sprinkle it on top. Mix 1-2 teaspoons directly into the crumbled beef while it’s still warm—this lets the spices bloom and cling to every bite. (Yes, even if you’re impatient like me, wait until the beef is off the heat to stir it in.)
Storing and reheating this applebee's neighborhood nachos beef
Refrigerator Storage
Store your prepped beef mixture in an airtight container for up to 3 days—it actually tastes better the next day as the spices meld. Keep the tortilla chips in their original sealed bag to maintain crispness for 2 days. For the cheeses, freeze them in portions to prevent clumping, or store shredded cheese in parchment-lined containers to absorb excess moisture. 🧊
Freezer Prep Tips
Assemble your nachos before freezing for convenience later. Place the fully built nachos (without sour cream or fresh toppings) on a baking sheet, cover with foil, and freeze for 1 hour. Then transfer to a freezer-safe bag, squeezing out excess air. Label with the date—these keep for up to 2 months.
Oven Reheating Method
For the best texture, reheat nachos straight from the freezer. Place them on a baking sheet and bake at 375°F for 15-20 minutes, until the cheese is bubbly and chips regain crispness. If reheating from the fridge, add 5 minutes to the time. Cover loosely with foil during the first 10 minutes to help the cheese melt faster. 🔥
Microwave Shortcut
When short on time, use the microwave for a quick fix. Cover nachos with a damp paper towel and heat on 70% power for 2-3 minutes, stirring halfway. Add a splash of water to prevent drying, then finish with fresh toppings. This method works best for day-old nachos stored in the fridge.
Topping Refresh
After reheating, always add fresh toppings to restore crispness. Sprinkle chopped cilantro and sour cream, then squeeze lime wedges over the top. The acidity brightens the flavors and cuts through any reheated richness. For extra crunch, sprinkle crushed tortilla chips on top before serving. ✨
Portioning for Leftovers
Divide nachos into individual portions before storing to avoid soggy bottoms. Use small baking dishes or ramekins for easy reheating. Store in the fridge for up to 4 days or freeze for 2 months. When reheating, cover portions with foil to trap heat and prevent drying. 🍽️
Nutrition facts
Frequently asked questions
Can I use ground beef instead of beef chuck roast?
You can substitute 1 lb of ground beef (85% lean) for the chuck roast, but the texture will be different. Ground beef cooks faster and won't have the same tender, shredded quality. For best results, use 1-inch cubes of beef chuck roast as called for—they stay juicy and develop that signature smoky flavor when grilled. If you must use ground beef, brown it thoroughly first to remove excess fat.
How do I get the cheese extra gooey like Applebee's?
The secret is using freshly shredded cheese (not pre-shredded) and baking at 375°F until the edges bubble and turn golden. For extra meltiness, sprinkle a tiny pinch of baking powder (1/8 tsp) over the cheese before baking—it helps create steam for that signature stretchy texture. Also, make sure your oven rack is in the middle position for even heat distribution.
Can I make these nachos ahead of time?
Yes! Assemble the nachos without the sour cream and fresh toppings, then refrigerate for up to 2 days or freeze for 2 months. When ready to serve, bake at 375°F for 10-15 minutes (longer if frozen). Always add fresh toppings after reheating to maintain crispness. The beef and cheese layers stay delicious when prepped ahead, but the chips may lose some crunch.
What's the best way to crisp up soggy nachos?
If your nachos lose their crunch, don't despair! Place them on a baking sheet and bake at 400°F for 5-7 minutes to restore crispiness. For extra crunch, sprinkle crushed tortilla chips on top before serving. You can also reheat in a skillet over medium heat for 2-3 minutes**, stirring constantly, until the chips crisp up again.
Can I make this recipe vegetarian?
Swap the beef for 1 lb of seasoned black beans or crumbled soyrizo, and add 1 cup of sautéed mushrooms or bell peppers for extra flavor. Use the same spice blend (smoked paprika, cumin, garlic powder) on your protein substitute. For a cheesy boost, add 0.5 cup of vegan cheese shreds along with the regular cheese. The layered technique works perfectly with plant-based ingredients too!