
Main Courses
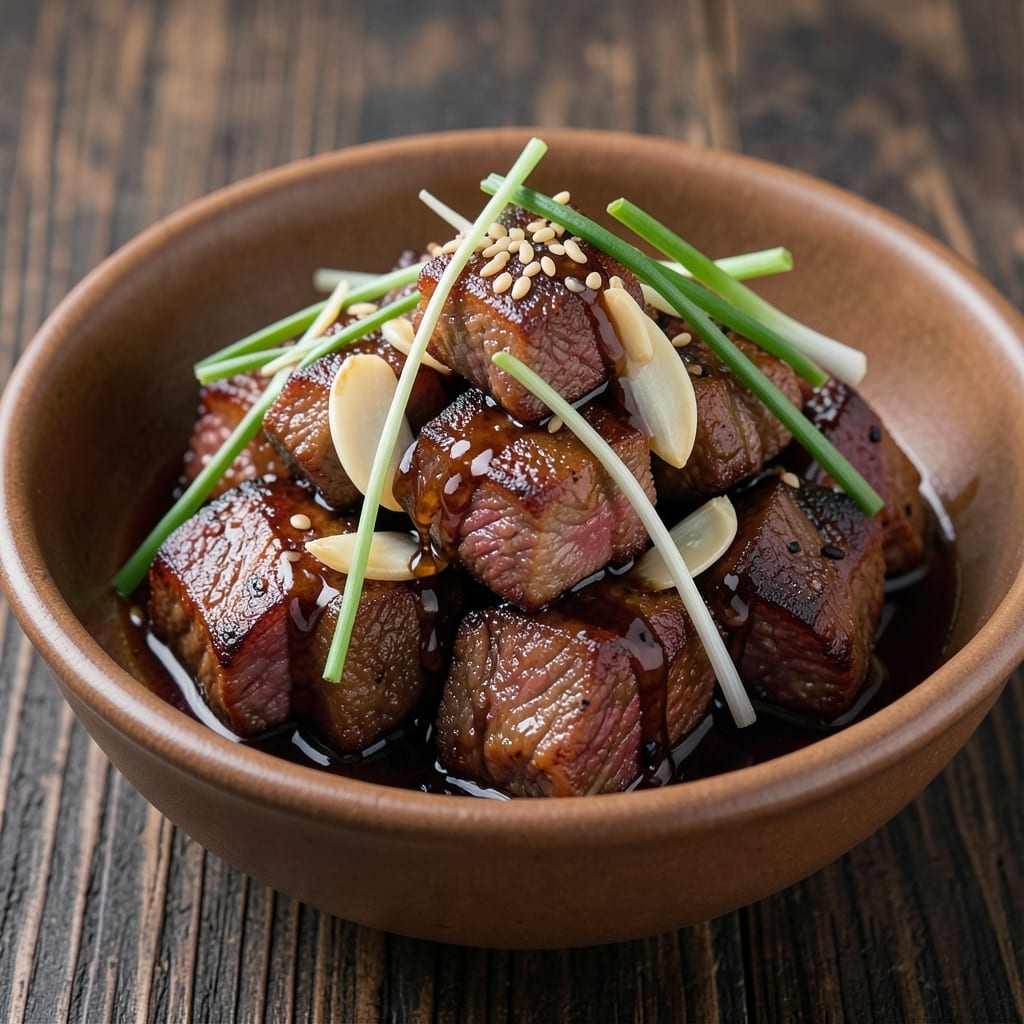
This Asian beef cheek recipe transforms tough, flavorful cuts into melt-in-your-mouth perfection through slow braising—just like the legendary Korean galbi jjim or Chinese braised beef dishes. The secret lies in marinating the meat overnight to tenderize it, then simmering it low and slow until the collagen dissolves into a glossy, velvety sauce that clings to every bite. What starts as a simple protein becomes a rich, aromatic masterpiece that pairs beautifully with steamed rice and quick-pickled vegetables.
The process is straightforward but requires patience: sear the beef cheek first to develop deep, caramelized flavors, then braise it in a savory-sweet sauce until fork-tender. The result is silky, fall-apart texture with a sauce so rich it coats your rice like a luxurious blanket. This dish is perfect for special occasions or when you want to impress guests—it’s the kind of meal that makes people ask for seconds before they’ve even finished their first plate.
What makes this recipe stand out is its versatility—adjust the sauce to suit your taste, whether you prefer a tangy soy-based broth or a sweeter, five-spice-infused glaze. The beef cheek’s natural richness means you don’t need heavy seasoning, just a balance of aromatics like ginger, garlic, and star anise to elevate the dish. Once you try it, you’ll never settle for anything less than this restaurant-quality result at home.
Serve it with steamed jasmine rice and a side of kimchi or quick-pickled cucumbers to cut through the richness. The leftovers, if there are any, reheat beautifully—making this an even better meal for feeding a crowd or prepping ahead. Ready to master this dish? Let’s get started.
Ingredients for asian beef cheek
Six aromatic ingredients transform tough beef cheek into restaurant-worthy melt-in-your-mouth perfection.
| Ingredient | Amount | Notes |
|---|---|---|
| Beef Cheek (connective tissue side) 🥩 | 3 lb | Trim excess fat, cut into 1-inch cubes |
| Kosher Salt 🧂 | 2 tbsp | Diamond Crystal preferred, for marinade |
| Black Peppercorns 🌶️ | 1 tbsp | Freshly cracked, for marinade |
| Soy Sauce (light) 🥢 | ½ cup | Kikkoman preferred, for marinade |
| Sesame Oil 🫒 | 2 tbsp | Toasted, for marinade |
| Garlic Cloves 🧄 | 8 cloves | Smashed, for marinade |
| Fresh Ginger 🌿 | 2 tbsp | Grated, for marinade |
| Brown Sugar 🍯 | ¼ cup | Packed, for braising sauce |
| Red Wine (dry) 🍷 | 1 cup | Cabernet Sauvignon preferred |
| Star Anise Pods 🌟 | 2 whole | Whole, for braising |
| Cinnamon Sticks 🍃 | 2 whole | For braising aroma |
| Bay Leaves 🍃 | 2 whole | Fresh preferred, for braising |
| Vegetable Oil 🫒 | 2 tbsp | High smoke point for searing |
| Jasmine Rice 🍚 | 2 cups | Uncooked, for serving |
| Green Onions 🧅 | ¼ cup | Sliced, for garnish |
The beef cheek is the star—look for well-marbled cuts at specialty butchers or Asian markets. Costco often carries pre-cut beef cheek, but if buying whole, ask for the connective tissue side (it's more flavorful). Trim excess fat to avoid greasy sauce, but leave some for richness. The marinade needs to work its magic overnight, so measure out all wet ingredients first—soy sauce, sesame oil, and red wine should be room temperature for even absorption. Fresh ginger and garlic? Buy organic if possible—the skins should be vibrant, not shriveled.
No red wine? Substitute with beef broth plus 1 tbsp balsamic vinegar—it mimics the acidity. Running low on star anise? Swap for 1/2 tsp ground cinnamon plus 1/4 tsp ground cloves. The brown sugar can be swapped for coconut sugar, but lightly packed is key—don't compact it or you'll end up with clumps. For the oil, avocado oil has the highest smoke point if you're worried about burning during searing. And if you're serving a crowd, double the rice—this dish disappears faster than you think.
Marinated beef cheek keeps 3 days in the fridge, covered tightly. The braised sauce actually improves overnight—reheat gently on low to preserve texture. For make-ahead prep, freeze portions of the cooked beef in the sauce (no rice) for up to 3 months. When reheating, add a splash of water if the sauce seems thickened. The rice? Cook it fresh—leftover rice turns mushy when reheated with the rich sauce. Garnish with green onions right before serving—they add freshness that cuts through the richness.
Why You'll Love This Recipe
- I’ll be real: I often make this on Sundays just so I can reheat portions all week. The beef cheek stays tender, the sauce clings perfectly, and it’s way better than takeout. Throw it in rice bowls, noodles, or even a sandwich—it’s that versatile.
- Minimal Chopping Required: I swear, this recipe is one of those rare dishes where the hardest part is deciding when to eat it. The beef cheek—tough on the outside, melt-in-your-mouth tender inside—just needs a quick sear and a slow simmer. No dicing, no mincing, no fuss. Honestly, I’ve made it while scrolling through my phone because it’s that low-effort.
- Umami Bomb: That first bite? Chef’s kiss. The soy sauce and sesame oil turn the beef cheek into a flavor powerhouse—deep, savory, with a hint of smoky richness. Between us, it’s the kind of taste that makes you pause mid-bite, like, "Wait, is this actually dinner?" (Yes, it is.)
- Leftovers That Shine: I’ll be real: I often make this on Sundays just so I can reheat portions all week. The beef cheek stays tender, the sauce clings perfectly, and it’s way better than takeout. Throw it in rice bowls, noodles, or even a sandwich—it’s that versatile.
Step-by-step instructions for slow-braised Asian beef cheek
Transform tough beef cheek into silky, melt-in-your-mouth perfection through slow braising.
Prepare and Sear the Beef Cheek
Start by trimming any excess fat from the 3 lb beef cheek, leaving about ¼-inch thickness for flavor. Cut the meat into 1-inch cubes, ensuring each piece is uniform for even cooking. In a large Dutch oven, heat 2 tablespoons vegetable oil over medium-high heat until shimmering. Working in batches to avoid overcrowding, sear the beef cheek cubes until deeply browned on all sides—about 4-5 minutes per batch. This step builds rich, caramelized flavors that penetrate the meat during braising.
As you sear, I like to press down gently on each piece with a spatula for the first 30 seconds—this prevents curling and ensures maximum contact with the hot oil. Once all pieces are browned, transfer them to a plate and set aside. The pan will be your flavor foundation, so don't wipe it clean.
Build the Aromatic Marinade
In the same Dutch oven, reduce heat to medium and add 8 smashed garlic cloves and 2 tablespoons grated fresh ginger. Sauté for 2 minutes until fragrant and just beginning to color—this releases their essential oils. Add 2 tablespoons kosher salt and 1 tablespoon freshly cracked black peppercorns, stirring for 30 seconds to toast the spices lightly.
Pour in ½ cup light soy sauce and 2 tablespoons toasted sesame oil, scraping up any browned bits from the bottom of the pan. These bits, called fond, pack intense umami flavor. Let the mixture simmer for 1 minute until slightly reduced. Return the seared beef cheek to the pot, coating each piece thoroughly with the marinade.
Braise with Spiced Red Wine
Pour in 1 cup dry red wine, then add 2 whole star anise pods, 2 whole cinnamon sticks, and 2 whole bay leaves. Bring to a gentle simmer, then reduce heat to low and cover partially with a lid. The liquid should barely bubble—this slow cook transforms tough collagen into silky texture. Simmer for 3 hours, stirring occasionally to prevent sticking.
After 3 hours, check the liquid level—if it's reduced too much, add ½ cup hot water to maintain moisture. The beef cheek should be fork-tender but still holding its shape. Here's the thing—don't rush this step. The magic happens when connective tissue breaks down slowly into gelatin, creating that luxurious mouthfeel we're after.
Finish with Sweet and Glossy Sauce
Increase heat to medium and stir in ¼ cup packed brown sugar. Let it simmer uncovered for 10-15 minutes, stirring occasionally, until the sauce thickens slightly and becomes glossy. The sugar caramelizes, adding depth while balancing the savory flavors. Taste and adjust seasoning—you might need a touch more soy sauce or salt to harmonize all the elements.
Once the sauce reaches your desired consistency (it should coat the back of a spoon), remove the beef cheek and strain the braising liquid through a fine-mesh sieve into a bowl, pressing on the solids to extract maximum flavor. Discard the star anise, cinnamon sticks, and bay leaves. Return the strained sauce to the pot and simmer for 5 more minutes to reduce slightly if needed.
Serve Over Jasmine Rice
Cook 2 cups jasmine rice according to package instructions until fluffy. To serve, spoon the rice onto plates, then arrange the silky beef cheek cubes on top. Ladle the rich braising sauce generously over the meat, ensuring each bite gets that glossy, flavorful coating. Garnish with ¼ cup sliced green onions for fresh contrast and vibrant color.
This dish tastes even better the next day when flavors fully meld. The beef cheek should be so tender it practically falls apart at the touch, with a sauce that clings beautifully to each strand of rice. Save any leftovers—this recipe makes 6 generous servings, and everyone will ask for seconds.
Pro Tips For Making Asian Beef Cheek
- Sear the Connective Side First: That shiny connective tissue side isn’t just for looks—it’s where the magic happens. Hit it hard with a hot pan for 3-4 minutes before flipping, or you’ll end up with tough, chewy meat instead of melt-in-your-mouth texture. I learned this the hard way after serving a batch that still had bite—don’t skip this step, even if it looks weird.
- Salt the Meat Overnight: Beef cheek needs time to tenderize, and salting early makes a real difference. Toss the raw meat with 1-2 teaspoons of kosher salt per pound and let it sit in the fridge for 12-24 hours. The salt breaks down the collagen faster, and the meat stays juicier when cooked—no guessing about seasoning later.
- Baste with Soy-Sesame Mix: Don’t just dump sauce at the end. After searing, mix 2 tablespoons of light soy sauce with 1 teaspoon of sesame oil and spoon it over the beef every 15 minutes while braising or roasting. This keeps the meat moist and builds flavor layer by layer—trust me, it’s worth the extra 2 minutes of effort.
- Check Internal Temp at 160°F: Beef cheek is done when it hits 160°F internally, but it’ll keep getting tender as it rests. Pull it out of the oven or pot when it’s just shy of that mark—155°F—and let it rest for 10 minutes. Overcooking turns it dry; undercooking leaves it tough. A meat thermometer is your best friend here.
Storing and reheating this asian beef cheek
Fridge Storage Tips
Your braised beef cheek will keep beautifully in the fridge for up to 5 days—the flavors actually deepen as the sauce melds further. Store in an airtight container with the sauce, but keep the rice separate to prevent sogginess. I like using glass Pyrex containers because they let me see the rich sauce and make reheating easier. Let the dish cool completely before refrigerating to prevent condensation that can dilute flavors. 🧊
Freezer-Friendly Prep
For long-term storage, freeze the beef cheek in the braising sauce (without rice) for up to 3 months. Portion into quart-sized freezer bags, leaving 1-inch headspace for expansion. When ready to eat, thaw overnight in the fridge—this preserves texture better than microwave defrosting. The sauce may thicken slightly after freezing, so add 1-2 tablespoons water when reheating to restore consistency.
Reheating Perfection
For the best texture, reheat on the stovetop over low heat with the lid slightly ajar. Add 2-3 tablespoons water if the sauce seems too thick, and simmer gently for 10-15 minutes until heated through (165°F internal temperature). The slow reheating prevents the beef from drying out—this is key for maintaining that silky texture. Microwave reheating works in a pinch, but it can make the sauce unevenly hot and the beef slightly rubbery. 🔥
Rice Handling
Never reheat rice with the braised beef—it absorbs too much moisture and becomes mushy. Cook fresh jasmine rice when serving leftovers and assemble plates with the reheated beef and sauce. For extra flavor, add a splash of the reheated braising sauce to the rice before serving. If you're short on time, use microwaveable rice pouches (like Tupperware EasySteam) for quick, fluffy rice that won't compromise your dish.
Sauce Refresh
The braising sauce often thickens after storage, but you can easily revive it. Stir in 1 tablespoon soy sauce and 1 teaspoon sesame oil, then simmer for 2-3 minutes to restore depth. For extra richness, add a pinch of white pepper or a splash of red wine—this mimics the original braising process. If the sauce tastes flat, a small piece of compressed beef bouillon (like Kitchen Bouquet) dissolved in warm water works wonders. 💫
Garnish Like a Pro
Fresh garnishes elevate reheated beef cheek just like they do with the original dish. Slice green onions and scatter them over each serving, or add a sprinkle of toasted sesame seeds for crunch. For a restaurant touch, drizzle with a few drops of chili oil or a squeeze of lime juice—this brightens the rich flavors. Serve with quick-pickled vegetables (like radishes or cucumbers) to cut through the richness and balance the meal.
Nutrition facts
Frequently asked questions
Why does beef cheek need marinating overnight?
The marinade works magic on beef cheek by breaking down its tough connective tissue. The salt and acid (from soy sauce and red wine) tenderize the meat while the ginger and garlic infuse flavor deep into each cube. Skipping this step means your dish will be chewy rather than silky. Think of it as a flavor and texture investment that pays off big time!
Can I substitute beef cheek with another cut?
While beef cheek is ideal for its rich flavor and collagen, you can use beef chuck roast or brisket as substitutes. Cut them into 1-inch cubes and increase braising time to 4-5 hours for similar tenderness. The texture won't be identical, but the technique works. For quick-pickled vegetables to pair, try radishes or cucumbers—they add refreshing contrast to the rich meat.
How do I know when the beef cheek is done?
The beef cheek is perfectly cooked when it's fork-tender but still holds its shape. Press a piece gently—it should feel like butter melting on your fork. The internal temperature should reach 195-205°F (higher than typical meats because collagen breaks down). If it's still slightly firm, return it to the pot for 30 more minutes. The sauce should coat the back of a spoon with a glossy finish.
What if my sauce is too thin or too thick?
For a thinner sauce, add 2-3 tablespoons water or beef broth and simmer for 5 minutes. For a thicker sauce, simmer uncovered for 10-15 minutes to reduce it. If needed, stir in 1 teaspoon cornstarch mixed with 1 tablespoon water for instant thickening. The key is balancing richness without overwhelming the beef's natural flavor.
Can I make this dish in a slow cooker?
Sear the beef cheek first, then transfer it to a 6-quart slow cooker with all marinade ingredients. Cook on low for 8 hours or high for 5 hours. Add the brown sugar and red wine during the last 30 minutes to finish the sauce. The slow cooker's gentle heat mimics the Dutch oven's braising effect perfectly. Just