
Soups & Stews
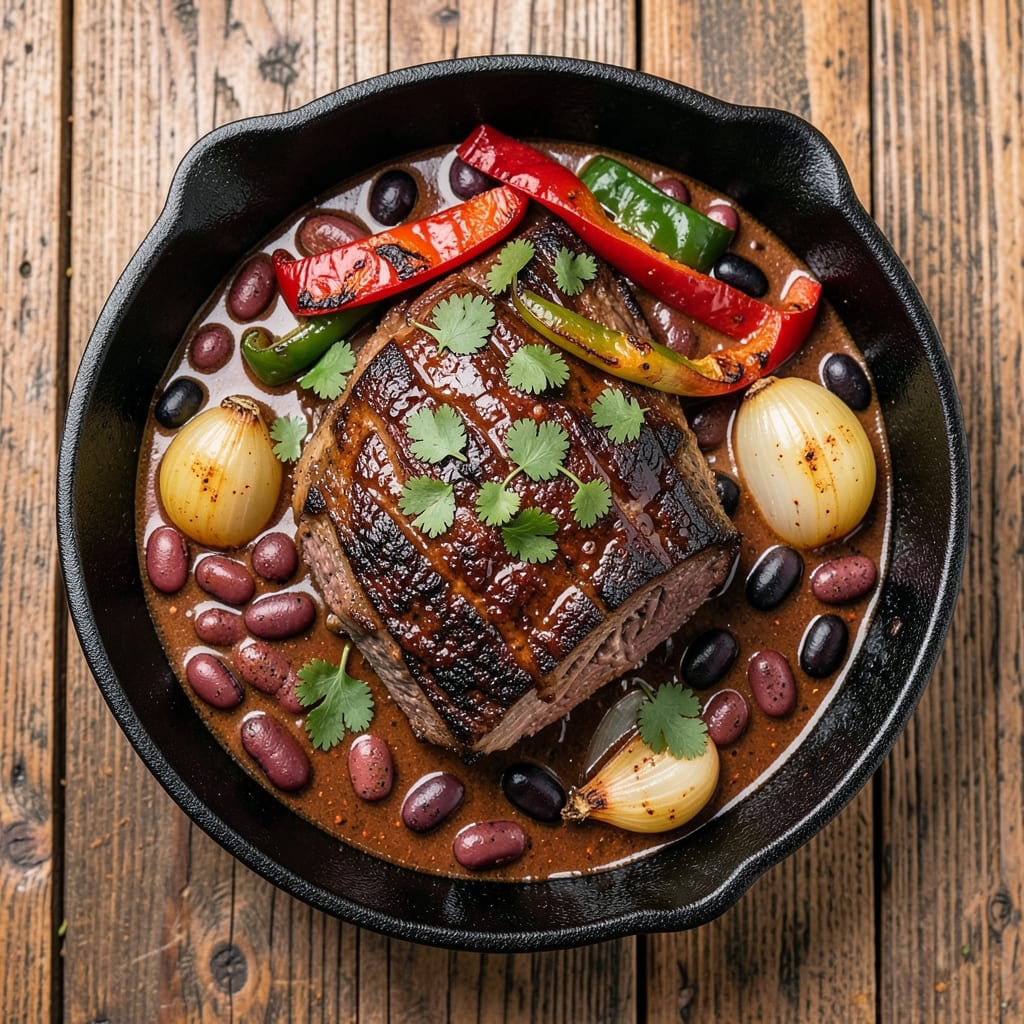
This BBQ beef chili recipe delivers the kind of deep, smoky heat that transforms a simple weeknight dinner into a hearty centerpiece. 🔥 The secret lies in slow-cooked beef that melts into tender chunks, while a blend of chili spices and BBQ seasoning creates layers of flavor that build all night. I've perfected this over years of pitmaster training, balancing the rich, meaty base with just the right kick of heat.
What makes this recipe stand out is the technique—browning the beef first develops deep, caramelized flavors that form the foundation, while slow simmering ensures every ingredient melds together. The beans stay creamy, the tomatoes break down into a rich sauce, and the spices infuse without overpowering. This isn't your average chili; it's a smoky, satisfying meal that feels like a hug in a bowl.
The result is a chili so flavorful it disappears faster than you can say "second bowl." The smoky BBQ notes blend seamlessly with classic chili spices, creating a depth of flavor that keeps getting better as it sits. Serve it with cornbread, tortilla chips, or a dollop of sour cream to balance the heat—every bite delivers that perfect mix of tender beef, hearty beans, and rich, smoky goodness.
Whether you're feeding a crowd or meal prepping for the week, this chili delivers restaurant-quality results with minimal effort. The long cooking time means you can walk away and come back to a pot of chili that's even more delicious than when you started. Let's get cooking!
Ingredients for bbq beef chili
Sixteen ingredients. One smoky, hearty bowl of comfort that gets better overnight.
| Ingredient | Amount | Notes |
|---|---|---|
| Chuck Roast 🥩 | 3 lb | Cut into 1-inch cubes |
| Yellow Onion 🧅 | 2 whole | Large, chopped |
| Bell Pepper 🌶️ | 1 whole | Any color, diced |
| Garlic Cloves 🧄 | 6 cloves | Minced |
| Canned Kidney Beans 🫘 | 2 cans | 15 oz each, drained |
| Canned Black Beans 🫘 | 1 can | 15 oz, drained |
| Diced Tomatoes 🍅 | 2 cans | 28 oz each, fire-roasted |
| Tomato Paste 🍅 | ¼ cup | Squeeze tube preferred |
| Beef Broth 💧 | 3 cups | Low-sodium preferred |
| BBQ Sauce 🍯 | ½ cup | Smoky, not sweet |
| Chili Powder 🌶️ | 2 tbsp | Smoked variety preferred |
| Ground Cumin 🌿 | 1 tbsp | Toasted for depth |
| Paprika 🌶️ | 1 tbsp | Smoked for smokiness |
| Cayenne Pepper 🔥 | ½ tsp | Adjust for heat |
| Salt 🧂 | 1 tsp | Kosher or sea salt |
| Black Pepper 🌶️ | ½ tsp | Freshly ground |
| Olive Oil 🫒 | 2 tbsp | For searing beef |
The chuck roast is non-negotiable here—it's the secret to that melt-in-your-mouth texture. Look for a well-marbled cut at your local butcher or the meat department at Whole Foods or Costco. If you're buying pre-cut, make sure it's still got some fat marbling. The beans? No need for fancy brands—just grab the store brand if it's on sale. Fire-roasted diced tomatoes (like Muir Glen) add that smoky depth without extra work. For the BBQ sauce, I always reach for Stubb's Original—it's got that authentic smokiness without being too sweet.
No chuck roast? Brisket or short ribs work in a pinch, but they'll need more time. Swapping canned beans for dried? Soak overnight and adjust liquid—they'll absorb more. Running low on smoked paprika? Regular paprika plus a pinch of liquid smoke gets you close. The tomato paste can be a squeeze tube from Trader Joe's—it's perfect for single servings and lasts forever. Want to kick up the heat? Add a dash of hot sauce at the end, but trust me, the cayenne builds nicely over time.
This chili tastes even better the next day—honestly, it's a great make-ahead meal. Store in an airtight container in the fridge for up to 5 days, or freeze portions for 3 months. I always double the batch and freeze half for lazy nights. The flavors meld beautifully overnight, so don't rush it. If you're meal prepping, portion into containers with a little extra broth—keeps everything moist when reheated.
Why You'll Love This Recipe
- One-Pot Wonder: I swear by this recipe because it’s literally one pot—no chopping boards, no extra pans, just dump-and-simmer magic. The chuck roast practically melts into tender shreds while you stir in the onions and peppers, and honestly? That’s my kind of cooking.
- Smoky Deep Flavor: Between the slow-cooked beef and that BBQ sauce, this chili tastes like a hug in a bowl. The garlic cloves sizzle into oblivion, and the kidney beans soak up all the smoky goodness—no blandness here, just rich, savory satisfaction.
- Meal Prep MVP: This chili tastes better the next day, which means I make a double batch and freeze half. Whether it’s a lazy Sunday or a weeknight scramble, reheating a portion is my secret to stress-free dinners—no takeout, no excuses.
- Budget-Friendly Powerhouse: Chuck roast on sale? Kidney beans in bulk? This recipe stretches every dollar without skimping on flavor. It’s the kind of dish where you’ll actually want leftovers, and that’s a win in my book.
Step-by-step instructions for BBQ beef chili
This chili builds deep, smoky flavor that gets better as it sits—here's how to make it right.
🔥 Step 1: Sear the Chuck Roast for Maximum Flavor
Heat a large Dutch oven over medium-high heat and add the 2 tablespoons olive oil. Once shimmering, add the 3 lb chuck roast cut into 1-inch cubes in a single layer. Don't crowd the pan—work in batches if needed. Let the beef sear undisturbed for 3-4 minutes until deeply browned on all sides.
This searing step creates the Maillard reaction that builds the chili's deep, meaty foundation. You'll know it's ready when the beef releases easily from the pan and has a rich, caramelized crust. Transfer the seared beef to a plate and set aside.
👨🍳 Step 2: Sauté the Aromatics Until Fragrant
In the same Dutch oven, add the 2 whole yellow onions and 1 whole bell pepper, both chopped. Cook over medium heat for 5-6 minutes until the onions soften and the peppers begin to brown. Add the 6 cloves garlic cloves and cook for another 30 seconds until fragrant.
Here's where the chili starts to develop its complex flavor profile. The onions should be translucent but not browned, and the garlic should smell intensely aromatic. If the vegetables stick, add a splash of beef broth to deglaze the pan and scrape up all those flavorful browned bits.
🥘 Step 3: Build the Chili Base with Spices and Tomatoes
Stir in the 2 tablespoons chili powder, 1 tablespoon ground cumin, 1 tablespoon paprika, and 0.5 teaspoon cayenne pepper. Cook for 30 seconds to toast the spices and release their aromas. Add the 2 cans diced tomatoes and 0.25 cup tomato paste, stirring well to combine.
This is the flavor foundation of your chili. The spices should be evenly distributed, and the mixture should look thick and vibrant. The tomato paste will help thicken the chili as it simmers, while the fire-roasted tomatoes add natural sweetness that balances the heat.
🍳 Step 4: Simmer the Chili Until Tender and Flavorful
Return the seared beef to the Dutch oven. Add the 3 cups beef broth, 0.5 cup BBQ sauce, 1 teaspoon salt, and 0.5 teaspoon black pepper. Bring to a boil, then reduce heat to low and cover partially. Simmer for 1.5 hours, stirring occasionally, until the beef is fork-tender.
The chili should reduce slightly as it cooks, developing a rich, smoky aroma that fills your kitchen. The beef should pull apart easily with a fork, and the flavors should meld beautifully. If the chili gets too thick, add a splash of water or broth to reach your desired consistency.
🥘 Step 5: Finish with Beans and Adjust Seasoning
Stir in the 2 cans kidney beans and 1 can black beans, both drained. Simmer uncovered for another 15-20 minutes to heat through and allow the beans to absorb the chili's flavors. Taste and adjust seasoning—add more salt, cayenne, or BBQ sauce as needed.
This final step ensures the beans are fully integrated into the chili, creating a hearty texture and balanced flavor. The chili should be thick enough to coat the back of a spoon but still spoonable. Let it rest for 10 minutes before serving to allow the flavors to fully develop.
Pro Tips For Making Bbq Beef Chili
- SEAR THE ROAST IN BATCHES: High heat turns that chuck roast into flavor gold, but one big slab in the pan just steams. Cut it into 1.5-inch chunks first, then work in batches—no crowding the pan. The crust forms faster, and you won’t end up with soggy meat that tastes like it was boiled instead of seared.
- SWEAT ONIONS AND PEPPERS LOW: I used to blast these with high heat, and they’d either burn or turn to mush. Instead, keep it at medium-low, stir often, and let them cook for 8-10 minutes until soft but not browned. This builds flavor without bitterness—your chili won’t taste like charred sadness.
- DRAIN AND RINSE THE BEANS: That canned bean brine? It’s just watered-down salt and preservatives. Drain them, then rinse under cold water to cut the metallic tang. Trust me, your chili won’t taste like a science experiment when you skip this step—it’s the difference between "meh" and "damn, that’s good."
- SIMMER LONG, STIR LESS: Low and slow is the rule, but I used to fuss with the pot every 5 minutes, breaking the surface crust each time. Let it bubble gently for 2-3 hours, stirring only twice—once at the start, once at the end. That crust traps flavor, and your chili won’t turn into a thin, sad soup.
Flavor customization for this bbq beef chili
Smoky BBQ Twist
Swap the classic chili powder for a blend of smoked paprika and chipotle powder—I use 1 tbsp each—to deepen the smoky profile. Add 2 tbsp of Stubb's Original BBQ sauce at the start instead of finishing, and let it simmer into the base. The result? A chili that tastes like it's been slow-smoked for hours. 🔥
Spicy Kick Boost
For heat lovers, add 1 tsp of crushed red pepper flakes with the spices and 1 tbsp of hot sauce (like Cholula) at the end. If you want to go extreme, mix 1 tsp of cayenne with 1 tbsp of honey before adding it to the pot—this creates a sweet-spicy balance that’s addictive. Trust me, the heat builds beautifully over time.
Sweet & Tangy Balance
Brighten the chili with ½ cup of apple cider or orange juice instead of some of the beef broth. The acidity cuts through the richness, and the natural sweetness complements the smoky BBQ flavors. I also add 1 tsp of apple cider vinegar at the end for a tangy finish—it’s a game-changer. 💫
Creamy Texture Upgrade
For a velvety texture, stir in ½ cup of coconut milk or sour cream during the last 10 minutes of cooking. The fat from the coconut milk or dairy rounds out the spices, making every bite richer. If you want to keep it dairy-free, use ½ cup of blended white beans (like cannellini) for creaminess without altering the flavor profile.
Herb-Infused Freshness
Finish with 2 tbsp of fresh cilantro or green onions, chopped fine. The bright, fresh notes contrast the deep smoky flavors perfectly. For a coastal twist, I sometimes add 1 tbsp of fresh thyme or rosemary when searing the beef—it adds an earthy depth that pairs surprisingly well with BBQ. ✨
Slow-Cooker Adaptation
For a hands-off version, brown the beef first, then transfer everything to a slow cooker on low for 8 hours or high for 4-5 hours. The long cook time lets the flavors meld even more deeply. Add 1 extra cup of broth to prevent drying out, and stir in the beans during the last 30 minutes to keep them tender. Perfect for busy nights! ⏰
Nutrition facts
Frequently asked questions
Can I use ground beef instead of chuck roast for this recipe?
You can, but the texture will be different. Ground beef will make the chili more tender and saucy, while chuck roast gives you those melt-in-your-mouth chunks. If using ground beef, brown it first and consider adding 1/2 cup of beef broth to compensate for the lack of moisture from the roast. For extra richness, add 1/4 cup of tomato paste to help thicken the sauce.
How do I make this chili less spicy?
Start by reducing the cayenne pepper to 1/4 teaspoon or omit it entirely. For an already-made batch, stir in 1-2 tablespoons of sour cream, plain yogurt, or milk to cool the heat. A splash of apple cider vinegar also helps balance the spices. If it's still too spicy, add more diced tomatoes or a bit of BBQ sauce to dilute the flavor.
Can I make this chili in an Instant Pot?
Sear the beef first, then add all ingredients except beans. Cook on high pressure for 25 minutes, then quick-release. Stir in beans and cook on sauté mode for 5 minutes to heat through. The Instant Pot cuts cooking time significantly while keeping flavors intact. For best results, use 1 extra cup of broth to prevent drying out.
What's the best way to reheat leftover chili?
Reheat gently on the stovetop over low-medium heat, stirring occasionally, until warmed through (5-7 minutes). For even better results, add 2-3 tablespoons of beef broth to prevent drying. Microwave in 1-minute intervals, stirring between each, to avoid a watery texture. The chili tastes best reheated—flavors meld even more overnight!
How do I adjust this recipe for a slow cooker?
Brown the beef first, then add all ingredients (including beans) to your slow cooker. Cook on low for 8 hours or high for 4-5 hours. The long cook time enhances flavors. For extra richness, add 1/2 cup of BBQ sauce during the last 30 minutes of cooking. Stir occasionally to prevent sticking, and add 1/2 cup of broth if it gets too thick.