
Soups & Stews
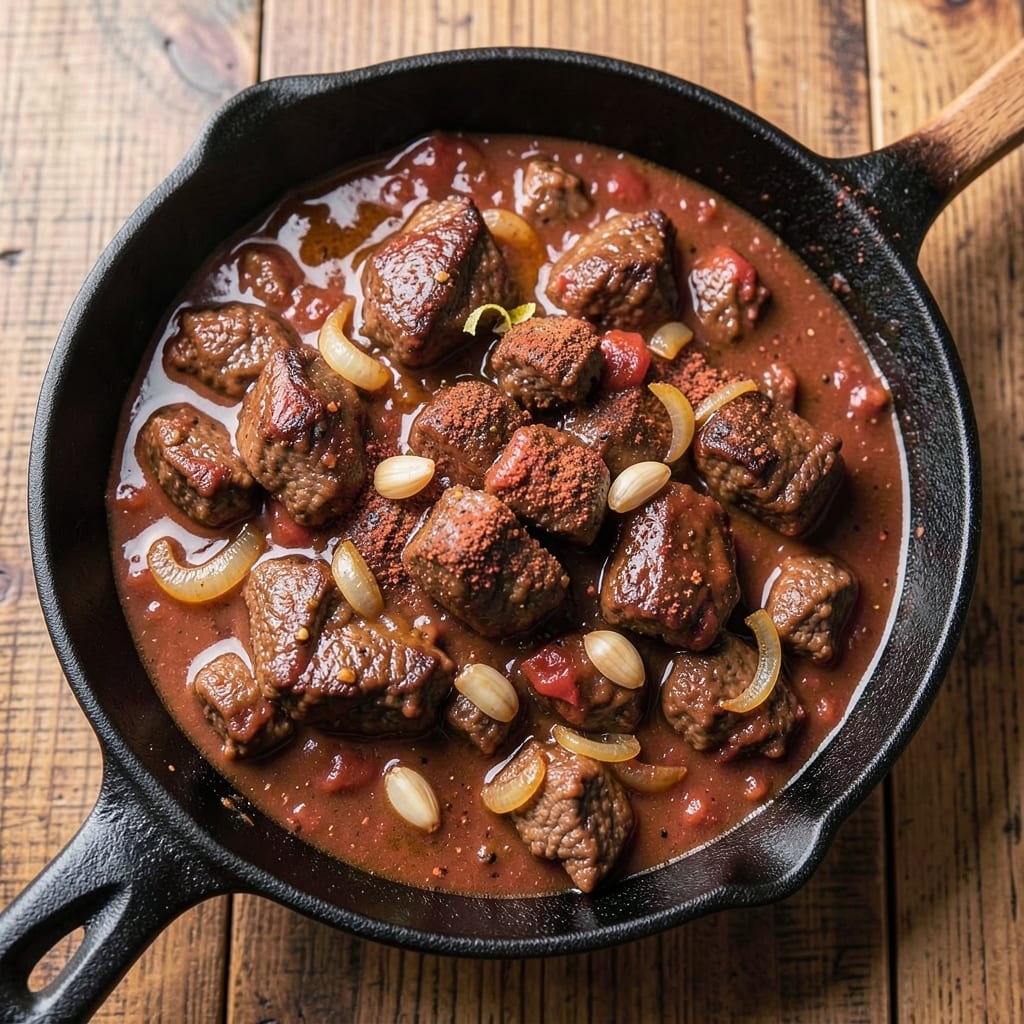
This beanless beef chili recipe delivers all the rich, smoky depth of traditional chili—without a single bean in sight. The secret lies in slow-browning ground beef until deeply caramelized, then building layers of umami through tomatoes, spices, and a touch of cocoa powder. What sets this apart is how the beef’s natural juices and rendered fat create a thick, velvety broth that clings to every bite, while chili powder and cumin develop complex, earthy flavors over time.
Unlike recipes that rely on beans for texture, this version achieves meat-forward satisfaction with tender, bite-sized beef chunks that stay juicy even after hours of simmering. The key technique? Deglazing the pan after browning to capture all those flavorful browned bits, then reducing the sauce until it’s thick enough to coat a spoon. This isn’t just chili—it’s a restaurant-quality stew that pairs perfectly with cornbread or crusty bread to soak up every last drop.
By the time it’s done, you’ll have a deeply aromatic, hearty chili with a perfect balance of smoky, spicy, and slightly sweet notes—no beans needed. The toppings (cheddar cheese, sour cream, green onions) are purely optional, but they elevate the dish to next-level comfort food. What’s more, this recipe comes together in one pot, with minimal prep and no chopping beyond basic ingredients.
Whether you’re avoiding beans for dietary reasons or simply craving a meat-centric chili, this recipe delivers bold flavor without compromise. The slow simmer allows spices to meld naturally, while the beef’s richness carries the dish. Ready to make chili night your new favorite? Let’s get started.
Ingredients for beanless beef chili
Rich, meaty flavors and slow-simmered depth—no beans needed for this bold chili.
| Ingredient | Amount | Notes |
|---|---|---|
| Ground Beef (Chuck Roast) 🥩 | 2 lb | 80% lean, coarse-ground preferred |
| Onion (Yellow) 🧅 | 1 whole | Diced, medium size |
| Garlic Cloves 🧄 | 6 cloves | Fresh, minced |
| Canned Tomato Sauce 🍅 | 28 oz | San Marzano preferred |
| Beef Broth 💧 | 2 cups | Low-sodium preferred |
| Chili Powder 🌶️ | 2 tbsp | Smoked variety for depth |
| Ground Cumin 🌿 | 1 ½ tbsp | Toasted for aroma |
| Dried Oregano 🍃 | 1 tbsp | Mexican oregano preferred |
| Cocoa Powder 🍫 | 1 tbsp | Unsweetened, high-quality |
| Brown Sugar 🍯 | 1 tbsp | Lightly packed |
| Salt 🧂 | 1 ½ tsp | Diamond Crystal preferred |
| Black Pepper 🌶️ | ½ tsp | Freshly ground |
| Bay Leaves 🌿 | 2 whole | Fresh preferred |
| Olive Oil 🫒 | 1 tbsp | Extra-virgin for richness |
The beef is non-negotiable here. Chuck roast breaks down beautifully, delivering that classic chili texture without beans. Costco or local butchers often sell it pre-ground for convenience, but if buying whole, ask for coarse grinding—it renders better. The key is high-heat browning until deeply caramelized, which builds the chili’s signature depth. For tomato sauce, San Marzano cans from Italian markets elevate the dish with their sweeter, more concentrated flavor. If you can’t find them, any high-quality crushed tomato works—just avoid watery brands.
No smoked chili powder? Regular chili powder plus a pinch of smoked paprika gets you close. Fresh cumin seeds toasted in a dry pan (30 seconds) add a whole new dimension, but pre-ground works in a pinch. The cocoa powder might seem unusual, but it’s what gives this chili that mole-like richness—think of it as the secret weapon. Brown sugar balances the heat without overpowering. For a deeper umami punch, add a dash of Worcestershire sauce (check for vegetarian-friendly brands). The bay leaves infuse subtle earthiness, so don’t skip them—just remember to remove them before serving.
This chili tastes even better the next day as flavors meld. Store in an airtight container in the fridge for up to 5 days, or freeze portions for 3 months. For serving, I like to reheat it gently on the stove with a splash of beef broth to restore moisture. The toppings—sharp cheddar, sour cream, and green onions—are purely optional but transform this into a showstopper. If you’re prepping ahead, the chili freezes exceptionally well—just thaw overnight in the fridge before reheating.
Why You'll Love This Recipe
- No-Fuss Simmer: I swear by this recipe because it’s the kind of dish that lets you actually relax. Brown the chuck roast in one pan, dump in the onions and garlic, then let the tomato sauce and broth work their magic while you handle other stuff. Fifteen minutes of active work, and the rest is just waiting—no stirring every five minutes like some chili recipes demand.
- Rich, Deep Base: That chuck roast? It’s the star. When it’s browned just right, it melts into the tomato sauce and beef broth, creating a texture that’s almost like a thick stew but still light enough to eat with a spoon. Honestly, the garlic cloves get toasted in the beef fat first, and that aroma alone makes the whole kitchen smell like a Sunday dinner.
- Game for Any Day: Between us, this chili is my go-to for game days, lazy Sundays, or when I need to feed a crowd without stressing. Double the batch, freeze half, and you’ve got a backup for next month’s potluck. (Yes, even on a Tuesday night when you’re exhausted.)
- Budget That Works: Here’s what sold me—this recipe costs me about half what store-bought chili does, and it tastes nothing like the canned stuff. Chuck roast is cheaper than ground beef, and the rest? Pantry staples. Leftovers? They’re even better the next day, and I’ve reheated this chili for a week without getting tired of it.
Step-by-step instructions for beanless beef chili
Here's the method that delivers deep umami flavor without relying on beans.
Brown the Ground Beef Thoroughly
Heat the 1 tablespoon olive oil in a large Dutch oven over medium-high heat until shimmering. Add the 2 lb ground beef (chuck roast) and break it apart with a wooden spoon, distributing it evenly across the pan. Let the beef cook undisturbed for 5-6 minutes until it forms a thick crust on the bottom.
This crust, called a fond, contains concentrated meat flavors that will dissolve into your chili. Stir occasionally to prevent burning, and aim for 80-85% browning before moving to the next step. The beef should be fully cooked through with no pink remaining. Use a slotted spoon to transfer the browned beef to a plate, leaving the fond in the pot.
Develop the Flavor Base with Aromatics
Reduce the heat to medium and add the diced yellow onion to the Dutch oven. Cook for 5-6 minutes until softened and translucent, stirring occasionally. Add the minced garlic cloves and cook for 30 seconds until fragrant, being careful not to let it burn.
Here's the thing—don't rush this step. The onions should caramelize slightly at the edges, adding sweet depth to your chili. If they stick, add 1-2 tablespoons of beef broth to deglaze. Once the onions are golden and the garlic is cooked through, you're ready for the spices.
Build Complexity with Spices and Cocoa
Increase heat to medium-high and add the 2 tablespoons chili powder, 1.5 tablespoons ground cumin, 1 tablespoon dried oregano, 1 tablespoon cocoa powder, 1 tablespoon brown sugar, 1.5 teaspoons salt, and 0.5 teaspoon black pepper. Stir vigorously for 1-2 minutes until the spices are toasted and aromatic.
The cocoa powder might seem unusual, but it adds a subtle bitterness that balances the sweetness of the brown sugar and enhances the overall depth of flavor. You'll see the spices darken slightly as they toast—this is when they release their maximum flavor potential. Stir constantly to prevent burning, which can make the chili taste bitter.
Simmer the Chili to Perfection
Pour in the 28 oz canned tomato sauce and 2 cups beef broth, scraping up any browned bits from the bottom of the pot. Add the 2 whole bay leaves and return the browned beef to the pot. Bring to a gentle boil, then reduce heat to low and let it simmer uncovered for 1 hour 15 minutes, stirring occasionally.
This long simmer allows all the flavors to meld together. The chili should reduce slightly and develop a thick, rich consistency. You'll know it's ready when the flavors are cohesive and the texture is just thick enough to coat the back of a spoon. Taste and adjust seasoning if needed—add more salt or chili powder to taste.
Rest and Serve with Confidence
Remove the 2 whole bay leaves and let the chili rest for 10 minutes before serving. This resting period allows the flavors to settle and the texture to thicken slightly. The chili should have a deep, complex flavor with layers of smoky, sweet, and slightly bitter notes.
Serve the chili hot, garnished with additional chili powder or chopped fresh cilantro if desired. Each spoonful should deliver rich umami flavor from the beef, balanced by the sweetness of the brown sugar and the depth of the cocoa. The texture should be thick and hearty, perfect for cold weather or game day gatherings.
Pro Tips For Making Beanless Beef Chili
- BROWN THE BEEF LONG: Chuck roast ground for chili needs time to develop flavor—don’t rush it. Cook the beef in batches over medium-high heat for 8-10 minutes total, stirring occasionally, until it’s deep brown and crispy in spots. I used to skip this, and the chili always tasted flat. The crust adds depth the broth can’t match.
- SWEAT THE ONIONS LOW: Yellow onions release moisture like crazy—cook them slow and steady. After browning the beef, reduce heat to medium-low, cover the pan, and let the onions soften for 10 minutes before adding garlic. This keeps them from turning to mush and ensures they caramelize just enough to sweeten the whole dish.
- DEGLAZE WITH BROTH: That browned-on bit (fond) is pure flavor—don’t ignore it. After removing the beef, add ½ cup beef broth to the pan and scrape vigorously with a wooden spoon. Let it simmer for 2 minutes before adding the rest of the broth and tomato sauce. It cuts down on cleanup and boosts the base flavor.
- SIMMER UNTIL THICK: Beanless chili needs time to develop body—don’t walk away. After combining all ingredients, simmer uncovered on low heat for at least 45 minutes, stirring occasionally. The liquid will reduce naturally, and the beef will tenderize. I’ve rushed this and ended up with a watery mess. Patience here makes the difference.
Serving suggestions for this beanless beef chili
Toppings That Elevate
Freshly shredded sharp cheddar cheese (about ¼ cup) melts beautifully into the chili, adding a creamy contrast to the smoky beef. I like to sprinkle it on just before serving so it stays gooey. For a tangy kick, dollop sour cream (about 2 tablespoons) on top—it cuts through the richness like a cool breeze on a hot day. 🧀
Crunchy Textures
Toasted pumpkin seeds (about 2 tablespoons) or crushed tortilla chips add a satisfying crunch that balances the soft beef. For extra heat, sprinkle chopped jalapeños or pickled red onions—their acidity brightens the deep flavors. I always keep a small bowl of these toppings on the table so everyone can customize their bowl.
Herb Finishing
Fresh cilantro or green onions add a bright, herbaceous note that refreshes the palate. I chop about 2 tablespoons of each and scatter them over the top just before serving. For a more complex finish, a drizzle of avocado oil (about 1 teaspoon) adds a silky texture and subtle nutty flavor. 🌿
Bread Pairings
Serve with warm cornbread or crusty sourdough to soak up every last drop of chili. I love making a quick batch of cornbread using 1 cup cornmeal, 1 cup flour, and 1 teaspoon baking powder—it’s the perfect partner for this hearty dish. For a gluten-free option, try jicama sticks or plantain chips for dipping.
Drink Recommendations
A cold Mexican lager like Modelo Especial or Pacifico cleanses the palate between bites. For a non-alcoholic option, sparkling limeade (mix ½ cup lime juice, 1 cup sparkling water, and 1 tablespoon honey) adds a refreshing contrast. I also love a dark beer like Guinness—its roasted malt notes complement the chili’s depth. 🍺
Nutrition facts
Frequently asked questions
Why does this chili taste so rich without beans?
The secret lies in the deep browning of the beef and the cocoa powder. When you cook the ground beef until it forms a dark crust (fond), those caramelized bits dissolve into the sauce, packing in umami flavor. The cocoa powder adds depth similar to chocolate mole, while the long simmer (1 hour 15 minutes) lets all the spices meld together. It's all about building flavor layers through proper technique, not shortcuts.
Can I make this chili in a slow cooker instead? Brown the beef first in a skillet, then transfer everything to your slow cooker. Cook on low for 6-7 hours or high for 3-4 hours. The slow cooker method actually enhances the tenderness of the beef. Just
What's the best way to reheat leftover chili?
Reheat gently on the stove over medium-low heat, stirring occasionally, until warmed through. Add a splash of beef broth (1-2 tablespoons) if the chili seems too thick. Never microwave it directly—this can make the beef rubbery. For best results, reheat only what you need to serve, and keep the rest refrigerated. The chili actually tastes better the next day as flavors continue to develop.
Can I substitute ground turkey or chicken for the beef?
While possible, I don't recommend it for this recipe. Ground beef (especially chuck roast) has the perfect fat content and texture for chili. Ground turkey or chicken will make the chili leaner and less flavorful. If you must substitute, use 93% lean ground beef instead—it's closer in fat content. The cocoa powder and spices work best with beef's rich, meaty flavor profile.
How can I make this chili spicier?
Add ½ teaspoon cayenne pepper or 1-2 diced chipotle peppers in adobo sauce when you add the spices. For heat that develops over time, include 1 teaspoon smoked paprika with the chili powder.