
Tips
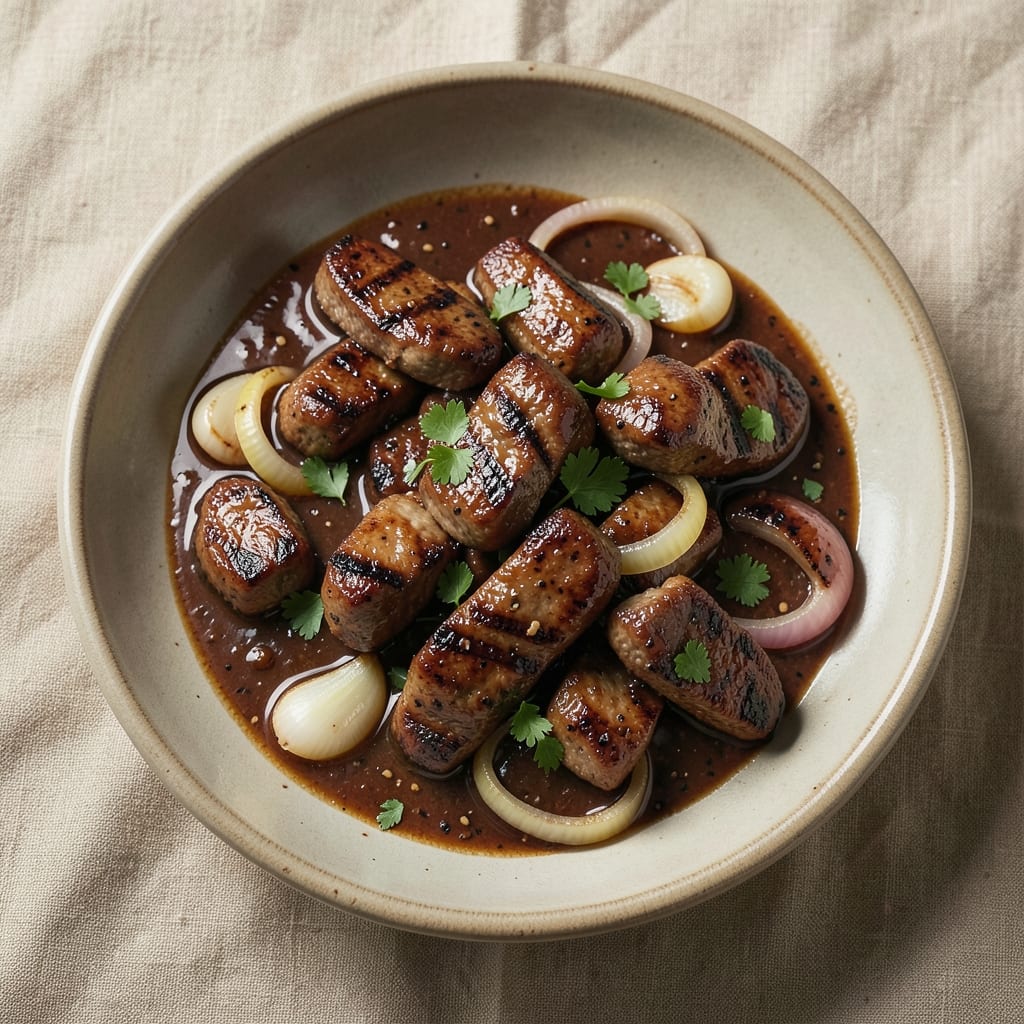
This BBQ beef tips recipe delivers restaurant-quality smoky-sweet flavors in just 25 minutes—no marinating, no fuss, and only one pan to clean. The secret lies in high-heat searing followed by a slow reduction of tangy BBQ sauce, transforming tough beef tips into tender, caramelized bites with a glossy glaze. I perfected this method during a busy weeknight when takeout just wouldn't cut it, and it's been my go-to ever since for satisfying weeknight dinners.
The technique is straightforward but delivers restaurant-quality results: first sear the beef tips in a hot cast-iron skillet until deeply browned, then deglaze with a splash of beer or broth to lift those flavorful browned bits. Simmer with your favorite BBQ sauce until thickened, creating a rich, sticky coating that clings to every bite. The key is patience during the sauce reduction—this is where the magic happens, transforming simple ingredients into something truly special.
What you’ll end up with is a one-pan dinner that’s hearty enough for a family meal but quick enough for weeknights: tender beef tips smothered in a glossy, smoky-sweet sauce with just the right balance of tang and sweetness. Serve it over mashed potatoes or buttery egg noodles to soak up every last drop of that delicious sauce, or pair it with a simple side salad for a lighter option. The aroma alone will have everyone gathering around the table.
This recipe scales beautifully for crowds, and the leftovers reheat just as well as the first serving—making it perfect for meal prep or game day gatherings. Whether you're feeding a family of four or hosting a crowd, this foolproof method ensures tender, flavorful beef tips every time, with minimal effort and maximum impact. Let’s get cooking!
Ingredients for bbq beef tips
Pantry staples plus a few key ingredients for that restaurant-quality BBQ flavor.
| Ingredient | Amount | Notes |
|---|---|---|
| Beef Tips 🥩 | 1 ½ lb | Tender beef, cut into 1-inch pieces |
| All-Purpose Flour 🌾 | ½ cup | For dredging beef tips |
| Kosher Salt 🧂 | 1 ½ tsp | Diamond Crystal preferred |
| Ground Black Pepper 🌶️ | 1 tsp | Freshly ground for best flavor |
| Garlic Cloves 🧄 | 4 cloves | Minced for deglazing |
| Yellow Onion 🧅 | 1 whole | Diced, medium yellow |
| Light Beer 🍺 | ½ cup | Lager or pale ale preferred |
| Beef Broth 💧 | ½ cup | Low-sodium preferred |
| BBQ Sauce 🍅 | 1 cup | Store-bought or homemade |
| Olive Oil 🫒 | 2 tbsp | For high-heat searing |
| Fresh Parsley 🌿 | ¼ cup | Chopped, for garnish |
| Butter 🧈 | 1 tbsp | Unsalted, for finishing |
The beef tips are everything here. Look for chuck roast or sirloin tips at your butcher—they’re lean enough to sear quickly but still tender when cooked right. I grab mine from Whole Foods or the meat counter at Kroger because they cut them consistently. If you’re using a whole cut, ask for it to be trimmed and cubed—saves time. The key is 1-inch pieces, no smaller, or they’ll turn to mush. For extra flavor, pat them dry with paper towels before dredging in flour.
No beer on hand? Use extra beef broth—just add another splash. The BBQ sauce can be whatever you like, but Kansas City-style works best here for that classic smoky-sweet balance. Fresh parsley is ideal for garnish, but dried parsley at half the amount works in a pinch. The onion adds depth, so don’t skip it—just make sure it’s medium yellow for the right flavor. And trust me on the butter at the end: it adds a silky finish that takes this from good to restaurant-quality.
This reheats beautifully—just warm in a skillet with a splash of broth. Keeps for 4-5 days in the fridge or 3 months frozen. I double the recipe and freeze half for lazy weeknights. The sauce thickens as it cools, so if it seems too thin when reheating, just simmer uncovered for a minute or two. Garnish with extra parsley right before serving—it adds that fresh pop of color.
Why You'll Love This Recipe
- Pan in Hand: I swear, this recipe lives in my rotation because it’s that simple—just flour, salt, pepper, and garlic to coat those beef tips before a quick sear. No fancy marinades, no waiting hours; just 15 minutes of active time while you stir-fry or grill.
- Garlic-Kissed Magic: That raw garlic clove, smashed right into the flour mix, infuses every bite with a punch that’s simple but ridiculously good. The beef tips stay tender while the crust gets this perfect crispy edge—like a hug from my nonna’s kitchen.
- Game for Any Night: Between us, I’ve served these as a weeknight stir-fry with rice, stuffed into sliders for game day, or even tossed into a grain bowl when I’m feeling fancy. The same prep works for all of it—just adjust the sides.
- Leftovers That Don’t Suck: Honestly, I almost always make extra because reheating these is chef’s kiss—whether straight from the fridge or microwaved, they’re still juicy. Plus, they’re cheap enough that I don’t stress if my kids pick out the good pieces first.
Step-by-step instructions for smoky-sweet beef tips
Here's how to transform simple beef tips into a restaurant-worthy one-pan dinner with deep smoky flavors and tender meat.
Season and Dredge the Beef Tips
Pat the 1.5 lb beef tips dry with paper towels—this ensures a good sear. In a shallow bowl, mix together the 0.5 cup all-purpose flour, 1.5 tsp kosher salt, and 1 tsp ground black pepper. Toss the beef tips in this mixture until evenly coated, shaking off any excess. Let them sit for 5 minutes while you prep the pan—this gives the flour time to adhere properly.
I always use freshly ground black pepper here because the flavor is noticeably more vibrant than pre-ground. The flour creates a light crust that helps hold the sauce and adds texture. Don't skip this step—it's what gives the final dish that perfect balance of crispy edges and tender meat.
Sear the Beef Tips Until Browned
Heat 2 tbsp olive oil in a large skillet over medium-high heat until shimmering. Add the dredged beef tips in a single layer, leaving space between each piece—this prevents steaming. Let them sear undisturbed for 2-3 minutes until deep golden brown on one side. Flip carefully and sear the other side for another 2-3 minutes. You want that beautiful caramelization that forms the foundation of all great beef dishes.
Don't crowd the pan—if you have to work in batches, that's fine. The goal is to get those beef tips nicely browned before we move to the next step. If the oil starts smoking excessively, reduce the heat slightly. You're looking for a good sear, not a fire.
Sauté Onion and Garlic
Remove the seared beef tips and set them aside. In the same skillet, add the diced yellow onion and cook over medium heat for 4-5 minutes until softened and beginning to caramelize. Add the 4 minced garlic cloves and cook for another 30 seconds until fragrant—this is where the foundation flavors develop.
The onions should be golden in spots by the time you add the garlic. This caramelization adds sweetness that balances the smoky flavors we're building. If the onions start to brown too quickly, reduce the heat slightly. You're looking for soft but not crispy onions at this stage.
Deglaze and Simmer with Beer and Broth
Pour in the 0.5 cup light beer and scrape up all those delicious browned bits from the bottom of the pan with a wooden spoon. This deglazing step captures all the flavor you've built so far. Let the beer simmer for 2-3 minutes until reduced by half. Add the 0.5 cup beef broth and stir to combine.
Here's where the magic happens—the beer adds depth while the broth keeps everything moist. Let the mixture bubble gently for 3-4 minutes until slightly thickened. The sauce should coat the back of a spoon but still be pourable. If it reduces too quickly, add a splash of water.
Finish with BBQ Sauce and Butter
Return the beef tips to the skillet and stir to coat in the sauce. Pour in the 1 cup BBQ sauce and add the 1 tbsp unsalted butter. Simmer everything together for 5-6 minutes until the sauce thickens and the beef is heated through. The butter adds richness that cuts through the smokiness of the BBQ sauce.
Taste and adjust seasoning if needed—sometimes the BBQ sauce can be quite salty. Once everything is heated through and the sauce has thickened to your liking, remove from heat. Garnish with 0.25 cup chopped fresh parsley just before serving to add a bright, fresh contrast to the rich flavors.
Pro Tips For Making Bbq Beef Tips
- SEAR IN BATCHES: Crowding the pan turns your beef tips into a sad, steamed mess. Work in single layers—no overlapping—and resist the urge to stir constantly. High heat is your friend here, so give each batch 2-3 minutes per side until deep brown. I learned this the hard way when my first batch came out gray and greasy.
- PAT THE DRY FLOUR: Dredging wet beef tips in flour? Skip it. Pat them dry first with paper towels, then toss in the flour. The extra step guarantees a crispier crust—no gummy coating. I was skeptical until I tried it; the difference is noticeable right away.
- DON’T SKIP THE REST: Pull the beef tips off the heat and let them sit under foil for 5 minutes. This locks in juices that would otherwise pool at the bottom of your pan. Trust me, slicing into still-sizzling meat is a rookie mistake.
- GARLIC: MINCE, DON’T CHOP: Rough garlic chunks burn before they infuse. Hit those cloves with a knife and press them flat—no need for fancy mincing. A tablespoon of finely pressed garlic (about 3 cloves) adds flavor without turning bitter. This isn’t the prettiest method, but it’s the tastiest.
Make-ahead tips for this bbq beef tips
Prep Ahead Components
Start by prepping the beef tips the night before—pat them dry and store them in an airtight container with the flour mixture. This ensures they're ready to sear immediately when you're ready to cook, saving you 10 minutes of active prep time. I like to marinate the onions and garlic in a little olive oil and store them separately in the fridge for up to 2 days—just chop them fresh and toss with 1 tbsp olive oil and ½ tsp salt. 🌟
Sauce Prep Shortcut
Make the BBQ sauce ahead of time and store it in a sealed container in the fridge for up to 1 week. I often double the recipe and freeze half for future use. When reheating, just warm it gently on the stove until it reaches 165°F—no need to thin it out. For extra flavor, add 1 tsp smoked paprika to the sauce when reheating. This step alone cuts your cooking time by 15 minutes on busy nights.
Partial Cooking for Crowds
For large gatherings, par-cook the beef tips up to Step 3 (searing and deglazing), then refrigerate in an airtight container for up to 2 days. When ready to serve, simply reheat everything together with the BBQ sauce and butter. The sauce will thicken beautifully, and the beef tips will finish cooking perfectly. This method works especially well for game day parties or family dinners—just add fresh parsley before serving.
Freezer-Friendly Leftovers
Let the fully cooked beef tips cool completely, then transfer them to a freezer-safe container with a splash of beef broth to keep them moist. They'll keep for up to 3 months in the freezer. To reheat, thaw overnight in the fridge, then warm in a skillet over medium heat with a little extra broth until heated through. The sauce will thicken as it reheats, so add a splash of water if needed. This is my go-to for lazy Sundays—just pull it from the freezer and have dinner ready in 20 minutes. ❄️
Sauce Variations
Want to switch up the flavor? Prepare different BBQ sauce bases ahead of time—like a spicy chipotle sauce or a honey-mustard glaze—and store them separately. I keep small jars of these sauces in my pantry and simply combine them with the beef tips during the final 5 minutes of cooking. This lets you customize the flavor profile without extra prep time. The key is to use the same reduction technique with beer or broth to build the sauce's depth.
Equipment Prep
Get your skillet ready the night before by cleaning it thoroughly and letting it air dry. Store it with a small piece of crumpled parchment paper inside to prevent rust. I also like to pre-measure all my spices and store them in small containers on the counter for easy access. This way, when you're ready to cook, everything is at your fingertips, and you can focus on the cooking process rather than measuring ingredients. A little prep goes a long way! 💡
Nutrition facts
Frequently asked questions
Can I substitute beer with something else in this recipe?
Yes! If you don't have beer, use 0.5 cup beef broth or 0.5 cup apple cider for similar depth. For a non-alcoholic option, try 0.5 cup ginger ale—it adds a nice tang. The key is to use something acidic to help deglaze and tenderize the beef. Just reduce the liquid by half before adding broth or sauce.
How do I make these beef tips extra tender?
For maximum tenderness, consider a quick 30-minute marinade in 2 tbsp olive oil, 1 tbsp Worcestershire sauce, and 1 tsp garlic powder before dredging. Alternatively, sear the beef tips first, then finish in the oven at 350°F for 5-6 minutes after adding the sauce to ensure even cooking. The flour dredge also helps create a barrier that keeps the meat moist.
What’s the best way to serve these BBQ beef tips?
These beef tips shine with creamy mashed potatoes or buttery egg noodles to soak up the sauce. For a lighter option, pair with a crisp side salad or grilled corn. Serve with toasted buns for sandwiches or alongside pickled jalapeños for a spicy kick. The sauce is rich, so balance it with something fresh and crunchy!
Why did my beef tips turn out tough instead of tender?
Overcooking is the most common issue—beef tips should reach 145°F internally (about 5-6 minutes total cooking time after searing). Avoid stirring too much while searing, which can release juices and dry out the meat. If using thicker cuts, reduce the final simmer time to 3-4 minutes once the sauce is added. Pat the beef dry before dredging to ensure a good sear.
Can I make this recipe in a slow cooker?
Sear the beef tips first, then transfer them to a slow cooker with the onions, garlic, beer/broth, and BBQ sauce. Cook on LOW for 4-5 hours or HIGH for 2-3 hours, stirring occasionally. The slow cooker keeps the beef tender while developing deep flavors. Add the butter and parsley at the end to finish. The sauce will thicken naturally during cooking.