
Main Courses
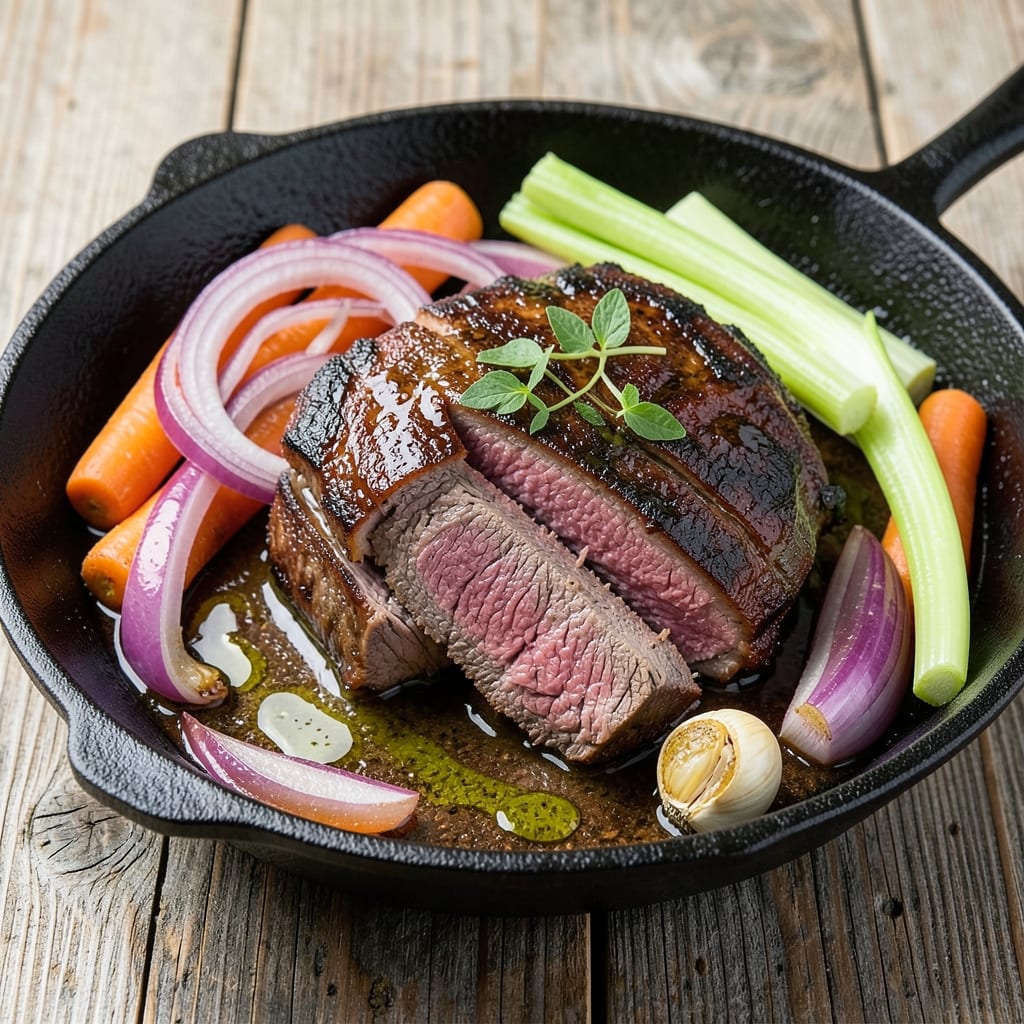
This beef a casa recipe transforms tough cuts into melt-in-your-mouth perfection with a slow-braised technique that builds deep, savory flavors. The secret lies in a rich garlic-herb broth that tenderizes the beef while infusing every bite with aromatic richness—just like Nonna used to make. What starts as a simple sear evolves into a restaurant-quality dish with minimal effort after the initial prep.
The beauty of this recipe is its foolproof nature: no fancy equipment needed, just patience and a few key ingredients that work together to create something extraordinary. You'll begin by searing the beef to lock in juices, then let it simmer for hours until it practically falls apart. The result? Juicy, flavorful beef that pairs beautifully with crusty bread, polenta, or roasted vegetables—each bite delivering layers of garlic, herbs, and slow-cooked tenderness.
By the time you're done, you'll have a dish that feels like a hug from your favorite Italian nonna—warm, comforting, and packed with flavor. The aroma alone will have everyone gathering around the table, and the leftovers? Even better the next day. This is the kind of meal that turns ordinary weeknights into special occasions without the fuss.
Perfect for feeding a crowd or a cozy family dinner, this recipe scales effortlessly while maintaining its rich, hearty character. The garlic-herb richness cuts through the beef's natural richness, balancing every bite with bright, fresh notes. Let's get started on creating a dish that tastes like home.
Ingredients for beef a casa
Pantry staples plus a few fresh herbs—this beef transforms from tough to tender magic.
| Ingredient | Amount | Notes |
|---|---|---|
| Chuck Roast 🥩 | 2 ½ lb | With good marbling for tenderness |
| Yellow Onion 🧅 | 1 whole | Medium size, sliced into half-moons |
| Carrots 🥕 | 4 whole | Medium size, peeled and chopped |
| Celery Stalks 🥬 | 4 whole | Fresh, trimmed and chopped |
| Garlic Cloves 🧄 | 8 cloves | Fresh, peeled and smashed |
| Extra-Virgin Olive Oil 🫒 | ½ cup | For searing and deglazing |
| Dry Red Wine 🍷 | 1 cup | Bold variety like Cabernet Sauvignon |
| Beef Broth 🍲 | 3 cups | Homemade or high-quality store-bought |
| Fresh Rosemary 🌿 | ¼ cup | Chopped, stems removed |
| Fresh Thyme 🌿 | ¼ cup | Leaves only, stems discarded |
| Fresh Parsley 🌿 | ¼ cup | Chopped, for finishing |
| Tomato Paste 🍅 | 2 tbsp | Smooth, not chunky |
| Salt 🧂 | 2 tsp | Kosher or sea salt, divided |
| Ground Black Pepper 🌶️ | 1 tsp | Freshly ground |
| Polenta or Crusty Bread 🍞 | 2 cups | For serving (optional) |
The chuck roast is your star here. Look for a piece with good marbling—that white fat between the muscles is what keeps it juicy. Costco or Whole Foods usually carry high-quality cuts, but any grocery store's butcher section will have something. If you're buying a whole roast, ask for chuck specifically. The wine? Any bold, dry red works here—Cab Sauv, Merlot, whatever's open. The herbs should be fresh if possible, but dried thyme and rosemary at one-third the amount will work in a pinch. Just don't skip them—they're what makes this taste like Nonna's kitchen.
No red wine? Beef broth with a splash of balsamic vinegar gets you close. Fresh thyme is ideal but dried works at one-third the amount. If tomato paste feels like overkill for two tablespoons, those squeeze tubes at Trader Joe's are perfect—no waste, keeps for months. The carrots and celery can be baby carrots or chopped celery sticks if that's what's in the fridge. For the polenta or bread, any crusty loaf works—garlic bread, sourdough, whatever you've got. The key is toasting it lightly before serving so it soaks up that gorgeous braising liquid.
This dish tastes even better the next day—honestly, the flavors meld into something extraordinary. Keeps 4-5 days in the fridge, freezes for 3 months. I portion mine into containers so lunches are sorted for the week. The broth reduces as it cooks, so if you want to make extra, just add a splash of water or broth at the end. Trust me, you'll want leftovers.
Why You'll Love This Recipe
- One-Pot Magic: This recipe lives in one pot—no fancy gadgets, no extra dishes. Just dump everything in, let it simmer, and walk away. The carrots and celery soften into that perfect, melt-in-your-mouth texture while the beef stays tender without falling apart.
- Garlic Bomb Flavor: Between us, the garlic and onions caramelize into something ridiculous—sweet, deep, and impossible to resist. That chuck roast? It soaks up all the flavor like a sponge, turning tough cuts into melt-in-your-mouth bites. (Yes, even on a Tuesday night.)
- Leftovers That Don’t Suck: This dish actually improves the next day. The flavors meld into something even richer, and it reheats like a dream. Pack it for lunch or freeze half—no sad, dry beef here. My kid still asks for it days later, and I’ll take that win.
- Budget Feast for All: A chuck roast stretches to feed a crowd without breaking the bank, and the veggies (onion, carrots, celery) are cheap staples. Honestly, it’s the kind of meal where you can stretch it for two dinners or share with neighbors—and still save money. Win-win.
Step-by-step instructions for slow-braised beef with garlic-herb richness
Here's how to transform a simple chuck roast into melt-in-your-mouth beef with deep, aromatic flavors.
Sear the Chuck Roast for Maximum Flavor
Pat the 2.5 lb chuck roast dry with paper towels—this ensures a proper sear. Heat the 0.5 cup extra-virgin olive oil in a heavy Dutch oven over medium-high heat until shimmering. Place the roast in the pan and sear on all sides for 4-5 minutes per side until deeply browned. You're building flavor here, so don't rush this step.
Once browned, remove the roast and set it aside. The goal is to develop a rich fond at the bottom of the pan—those browned bits are pure flavor. If the oil starts smoking excessively, reduce the heat slightly. This sear creates the foundation for your braised beef's incredible depth of taste.
Build the Aromatic Base with Vegetables and Wine
In the same Dutch oven, add the sliced 1 whole yellow onion, chopped 4 whole carrots, and chopped 4 whole celery stalks. Cook over medium heat for 8-10 minutes, stirring occasionally, until the vegetables soften and begin to caramelize. This process releases their natural sugars, adding sweetness to the braise.
Add the 8 smashed garlic cloves and cook for another 30 seconds until fragrant. Pour in the 1 cup dry red wine and scrape up all those browned bits from the bottom of the pan with a wooden spoon. This deglazing step captures all the flavor you've built. Let the wine simmer for 3-4 minutes until reduced by half—this concentrates the flavors even further.
Create the Herb-Infused Braising Liquid
Stir in the 2 tbsp tomato paste and cook for 1 minute until it darkens slightly. This adds a subtle umami depth to your braise. Add the 3 cups beef broth, 0.25 cup chopped fresh rosemary, 0.25 cup fresh thyme leaves, 1 tsp ground black pepper, and 1 tsp of the 2 tsp salt. Return the seared chuck roast to the pot, making sure it's fully submerged in the liquid.
Bring the mixture to a gentle simmer, then reduce heat to low. Cover the pot and let it cook for 2.5 hours. The key here is patience—the slow cooking breaks down the tough muscle fibers, transforming the chuck roast into tender, fork-tender beef. Check occasionally to ensure there's enough liquid to cover the meat.
Finish with Fresh Herbs and Perfect Timing
After 2.5 hours, check the internal temperature of the beef using a meat thermometer. It should read between 195-205°F—this is the perfect range for tender, pull-apart beef. If it's not quite there, continue cooking for another 30-60 minutes. The beef will continue cooking slightly after you remove it from the heat.
Once tender, remove the beef and transfer it to a cutting board. Skim any excess fat from the braising liquid, then stir in the 0.25 cup chopped fresh parsley. This final herb addition brightens the dish with freshness. Let the beef rest for 10 minutes before slicing against the grain for maximum tenderness.
Pro Tips For Making Beef A Casa
- SEAR THE ROAST UNTIL DARK: I learned this the hard way—rushing the sear means a pale, bland crust that won’t hold up. Chuck roast needs a deep, almost blackened crust on all sides before braising, so don’t skimp on the time or the heat. A hot cast-iron or heavy Dutch oven is your best friend here.
- CHOP VEGETABLES UNIFORMLY: Unevenly cut carrots and celery mean some pieces cook into mush while others stay crunchy. Aim for ½-inch chunks—small enough to tenderize quickly but big enough to hold shape. A sharp knife and steady hand make this easier than it sounds.
- SKIP THE CROWDED POT: Tossing in all the veggies at once? That’s how you end up with soggy onions and al dente carrots. Layer the onions, carrots, and celery in the pot after the roast browns, then nestle them loosely around it—this keeps everything cooking evenly without steaming into oblivion.
- USE A MEAT THERMOMETER: Guessing doneness with a fork leads to dry beef or undercooked meat. Chuck roast should hit 195°F (90°C) internally for tender perfection—no exceptions. If you don’t have one, at least cut into a small corner to check; it’s the only way to guarantee juicy results.
Make-ahead tips for beef a casa
Prep Ahead for Hands-Off Cooking
Start by prepping all your vegetables the night before—slice the 1 whole yellow onion, chop the 4 carrots and 4 celery stalks, and smash the 8 garlic cloves. Store them in a sealed container in the fridge. This saves 20 minutes of prep time the next day. I always do this because chopping fresh veggies mid-cook can feel like a chore after a long day. 🌟
Slow Cooker Adaptation
For a truly hands-off approach, transfer the seared beef and all braising ingredients to a 6-quart slow cooker after the wine reduction. Cook on LOW for 8 hours or HIGH for 5 hours. The slow cooker maintains steady heat, so you won't need to monitor it. Just stir the beef occasionally to keep it submerged. This method is perfect for busy weeknights when you want dinner ready without standing at the stove.
Broth Boost for Leftovers
If you're prepping for leftovers, reduce the beef broth to 2 cups instead of 3 cups to create a thicker, more concentrated sauce. The flavors intensify as it simmers longer, making every bite even more flavorful. Store the beef and sauce separately in airtight containers—the sauce reheats beautifully for quick meals later in the week. I like to freeze the sauce in 1-cup portions for easy grab-and-go lunches. ❄️
Herb Prep Shortcuts
Buy pre-chopped fresh herbs from the grocery store to save time—look for Trader Joe's or Whole Foods pre-packaged rosemary, thyme, and parsley. If using dried herbs, measure out the 0.25 cup amounts ahead of time and store in small jars. This keeps your workspace tidy and ensures you have everything ready when it's time to cook. I keep a stash of dried herbs in my pantry for days when fresh ones aren't available.
Make-Ahead Braising Liquid
Prepare the braising liquid—everything except the beef—up to 3 days ahead and store it in the fridge. When ready to cook, simply sear the beef, add it to the pre-made liquid, and simmer as directed. This is a game-changer for meal prep because you can focus solely on the beef when it's time to cook. The flavors actually improve as the liquid sits, so it's worth the extra effort. 💡
Freezer-Friendly Components
Freeze the cooked beef separately from the braising sauce in quart-sized freezer bags. The beef stays tender when reheated, and the sauce can be used as a base for other dishes like pasta or risotto. Label everything with dates—this beef keeps well for 3 months in the freezer. I often make a double batch so I always have a backup for lazy days. Just thaw overnight in the fridge before reheating. ⏰
Nutrition facts
Frequently asked questions
Can I use a different cut of beef instead of chuck roast?
While chuck roast is ideal for its marbling and affordability, you can substitute with brisket or short ribs (adjust cooking time by 30-60 minutes). Avoid lean cuts like sirloin—they won't become tender. For short ribs, sear first, then braise for 2 hours instead of 2.5 hours. The key is choosing a cut with good fat content for that melt-in-your-mouth texture.
What if I don't have red wine? Can I still make this?
Yes! Replace the 1 cup red wine with 1 cup beef broth plus 1 tbsp balsamic vinegar for depth. For extra richness, add 1 tbsp soy sauce or 1 tsp Worcestershire sauce. The dish will still be flavorful—just slightly less complex. The wine adds acidity that helps tenderize the beef, so these substitutes mimic that effect.
How do I know when the beef is fully tender?
Use a meat thermometer to check the internal temperature—it should reach 195-205°F. The beef will feel tender when pierced with a fork, but the thermometer is foolproof. If it's not quite there after 2.5 hours, add ½ cup hot water and cook another 30 minutes. Pro tip: The beef continues cooking as it rests, so don't overcook it in the pot. A gentle pull should separate the fibers easily.
Can I make this recipe in an Instant Pot?
Yes! Sear the beef as directed, then transfer everything to the Instant Pot. Cook on HIGH PRESSURE for 60 minutes, then let the pressure release naturally for 15 minutes. The Instant Pot speeds up the process while keeping the beef tender. Just check the internal temp afterward—it might need 10-15 minutes more on the stovetop if it's not quite done. The sauce will be thinner, so reduce it on the stove if you prefer a thicker consistency.
What's the best way to reheat leftovers?
Reheat in a skillet with a splash of beef broth or water over medium-low heat until warmed through (5-7 minutes). Avoid microwaving—it makes the beef tough. For extra flavor, add a pinch of fresh herbs or a splash of red wine while reheating. Leftovers taste even better the next day as the flavors meld further. Store in airtight containers for up to 5 days.