
Main Courses
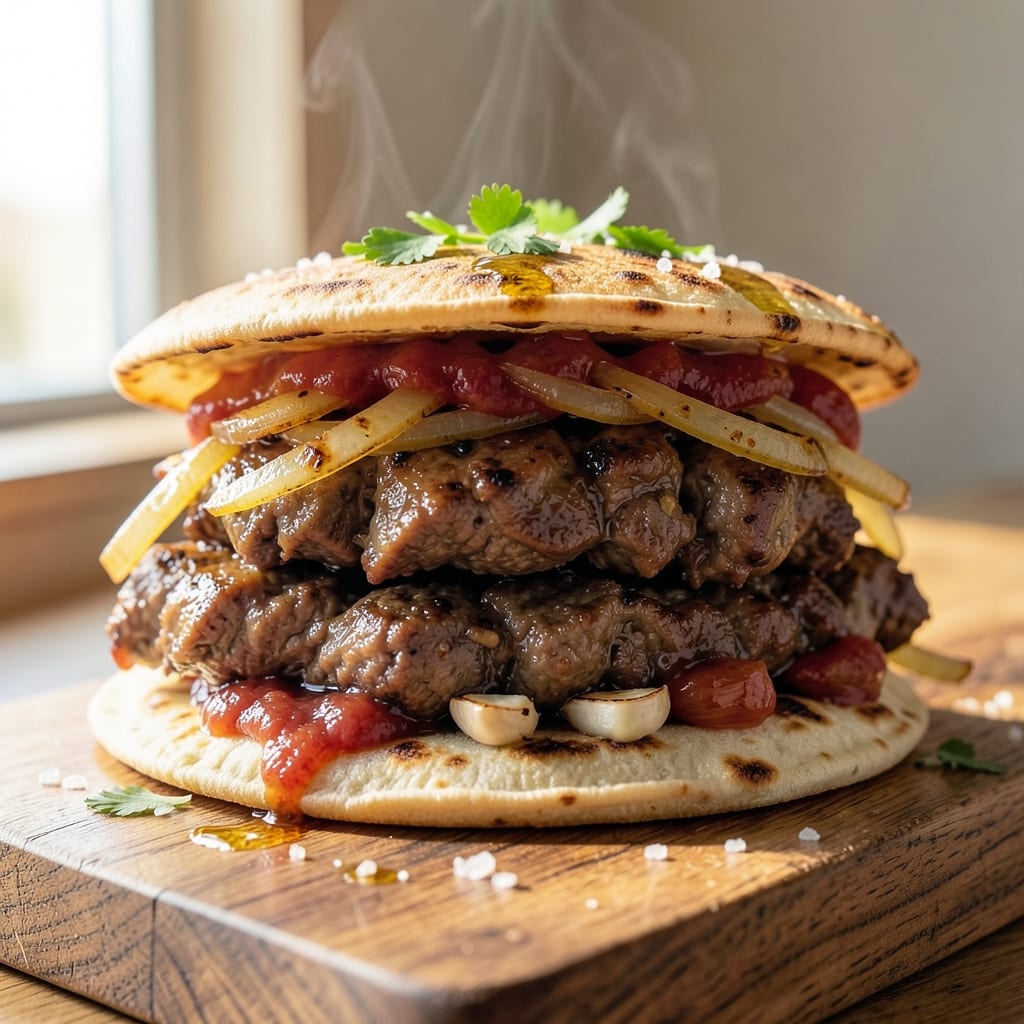
This chunky beef Mexican sandwich delivers the perfect balance of crispy tortilla crunch and tender, spiced beef filling that'll have you reaching for seconds. 🔥 I developed this recipe after years of perfecting slow-cooked beef techniques that transform tough cuts into melt-in-your-mouth bites, all nestled between perfectly toasted tortillas.
The secret to achieving that crispy texture lies in the tortillas—lightly brushing them with oil before toasting creates that satisfying crunch, while the slow-cooked beef stays juicy and packed with smoky, spiced flavor. This isn't your average sandwich; it's a hearty, flavorful meal that brings restaurant-quality taste to your kitchen.
What you'll end up with is a sandwich that's rich with layers: tender beef, melted cheese, crisp toppings, and a tortilla that holds up to every bite. The combination of textures and flavors makes this more than just a sandwich—it's a complete meal that feels indulgent yet simple to prepare.
Pair it with a side of chips or a fresh salsa for the full experience, or enjoy it as-is for a satisfying solo meal. Here's how to make it happen—step by step.
Ingredients for chunky beef mexican sandwich
Crispy tortillas, smoky beef, and melty cheese—this sandwich delivers restaurant-quality layers in every bite.
| Ingredient | Amount | Notes |
|---|---|---|
| Chuck Roast 🥩 | 1 ½ lb | Cut into 1-inch chunks for even cooking |
| Flour Tortillas 🌯 | 4 whole | Medium-sized, 10-inch diameter |
| Extra-Virgin Olive Oil 🫒 | ¼ cup | For brushing tortillas and searing beef |
| Yellow Onion 🧅 | 1 whole | Diced into 1/4-inch pieces |
| Garlic Cloves 🧄 | 4 cloves | Minced finely for deep flavor |
| Tomato Paste 🍅 | 2 tbsp | High-quality for rich base |
| Beef Broth 🥫 | 1 cup | Low-sodium preferred |
| Lime Juice 🍋 | 2 tbsp | Freshly squeezed for brightness |
| Chili Powder 🌶️ | 1 ½ tbsp | Medium heat for balanced flavor |
| Ground Cumin 🌿 | 1 tbsp | Toasted for deeper aroma |
| Smoked Paprika 🌶️ | 1 tbsp | For smoky depth |
| Cayenne Pepper 🔥 | ½ tsp | Adjust for heat preference |
| Salt 🧂 | 1 ½ tsp | Diamond Crystal preferred |
| Black Pepper 🌶️ | ½ tsp | Freshly ground for best flavor |
| Shredded Monterey Jack Cheese 🧀 | 1 ½ cups | For melty, gooey goodness |
| Fresh Cilantro 🌿 | ¼ cup | Chopped for fresh finish |
The chuck roast is your secret weapon here—it breaks down beautifully when slow-cooked, giving you that tender, chunky texture the sandwich craves. Grab the pre-cut chunks from the meat section at Costco or your local butcher if you want to save time, but if you're buying a whole roast, ask for it to be cut into 1-inch pieces. The yellow onion should be sweet, not bitter, so check the root end for freshness. For the tortillas, Mission brand or La Tortilla Factory are my go-tos—they toast up perfectly without tearing. Pro tip: keep them covered with a damp towel until ready to use so they stay pliable.
No chili powder? Substitute with 1 tbsp smoked paprika plus 1/2 tsp cayenne for a similar punch. Running low on lime juice? Lemon juice works in a pinch, though it's not quite the same. The tomato paste can be swapped for 1/4 cup crushed tomatoes if you're out, but it'll be slightly waterier. For extra smokiness, add 1/2 tsp liquid smoke to the beef mixture. The cilantro is optional but adds that fresh finish—if you hate it, skip it. For the cheese, Oaxaca or pepper jack work beautifully too, just adjust the amount based on meltiness. And if you're prepping ahead, make the beef mixture a day in advance—it tastes even better after flavors meld.
The beef mixture keeps 3-4 days in the fridge, so make extra for next-day lunches. Tortillas can be toasted ahead and stored in an airtight container for 1 day, but they're best fresh. For storage, portion the beef into single-serving containers with a layer of cheese on top—just microwave for 30 seconds when ready to assemble. The cheese gets crispy on the edges when reheated, which is actually a bonus. If you're freezing, only freeze the beef mixture (not the tortillas)—it reheats beautifully and keeps for 3 months. For the cilantro, store stems-up in a jar with water like flowers for up to 1 week of freshness.
Why You'll Love This Recipe
- One-Pan Magic: The chuck roast just falls apart after slow-cooking—no fancy knives or hours of prep. You brown it, add onions and garlic, let it simmer, then shred. That’s it. (Yes, even on a Tuesday night.)
- Deep, Caramelized Layers: The olive oil sears the onions until they’re sweet and jammy, while the garlic cloves sizzle into the beef. Every bite has that rich, umami punch from the slow-cooked meat—it’s the kind of flavor that lingers.
- Lunchbox Hero: Pack these sandwiches cold or warm, and they’re a hit at picnics, tailgates, or even school lunches. (My kid swaps them for PB&J without complaint.) The tortillas hold up, and the beef stays juicy—no soggy mess here.
- Budget Stretch: A single chuck roast feeds six, and the rest reheats perfectly for days. Honestly, I’ve had these for breakfast, lunch, and dinner without getting tired of them—proof that simple ingredients can go a long way.
Step-by-step instructions for crispy beef Mexican sandwiches
Here's how to transform simple ingredients into sandwiches with perfect texture and bold flavors.
🔥 Step 1: Sear and Spice the Chuck Roast
Heat a large Dutch oven over medium-high heat and add 2 tablespoons of the extra-virgin olive oil. Working in batches if needed, add the 1.5 lb chuck roast cut into 1-inch chunks and sear until deeply browned on all sides—about 4-5 minutes per batch. This step builds deep flavor through the Maillard reaction.
Remove the beef and set aside. In the same pot, add the 1 whole yellow onion diced into ¼-inch pieces and cook for 3-4 minutes until softened. Add the 4 cloves garlic minced finely and cook for 30 seconds until fragrant. This aromatic base forms the flavor foundation for your filling.
🍳 Step 2: Build the Spiced Beef Filling
Return the browned beef to the pot and stir in the 2 tbsp tomato paste, 1.5 tbsp chili powder, 1 tbsp ground cumin, 1 tbsp smoked paprika, 0.5 tsp cayenne pepper, 1.5 tsp salt, and 0.5 tsp black pepper. Cook for 1 minute to toast the spices and coat the beef evenly.
Pour in the 1 cup beef broth and 2 tbsp lime juice, scraping up any browned bits from the bottom. Bring to a simmer, then reduce heat to low and cover. Let it cook for 1 hour until the beef is fork-tender and the sauce has thickened slightly. Here's where the magic happens—the spices meld together and the beef becomes melt-in-your-mouth tender.
🥘 Step 3: Prepare the Crispy Tortillas
While the beef simmers, brush each of the 4 whole flour tortillas with 1 tablespoon of the remaining extra-virgin olive oil on both sides. Heat a clean skillet over medium-high heat and cook each tortilla for 1-2 minutes per side until golden brown and crispy—this is where you get that perfect crunch. Stack them on a plate covered with a clean kitchen towel to keep them warm and pliable.
Here's the thing—don't skip this step. The crispy tortillas are what make these sandwiches special. If they're not perfectly browned, your sandwiches will lack that satisfying crunch. I like to press down gently with a spatula during the first minute to prevent curling.
🍽️ Step 4: Assemble the Sandwiches
Divide the beef mixture evenly among the tortillas, spreading it out to cover about ¾ of each tortilla. Sprinkle ½ cup of the shredded Monterey Jack cheese over each beef layer. Fold the tortillas in half and press gently to melt the cheese slightly. The cheese should start to soften and create that gooey texture we all love.
Transfer the assembled sandwiches to a baking sheet and broil for 2-3 minutes until the cheese is fully melted and bubbly. Watch carefully—the cheese melts quickly, and you don't want it to burn. The broiler gives you that perfect golden finish on top while keeping the tortillas crispy.
🌿 Step 5: Garnish and Serve
Remove from the broiler and let cool for 1 minute. Garnish each sandwich with 1 tablespoon of the fresh chopped cilantro. The bright, fresh cilantro cuts through the richness of the beef and cheese, balancing the flavors perfectly. Serve immediately while the tortillas are still crispy and the cheese is gooey.
Here's the moment you've been waiting for—take that first bite. You should get crispy tortilla, tender beef with smoky spices, melty cheese, and that bright cilantro finish all in one perfect sandwich. The combination of textures and flavors makes this sandwich truly special.
Pro Tips For Making Chunky Beef Mexican Sandwich
- Sear the Chuck Roast: I learned this the hard way—skipping the sear means bland, gray beef. Heat your pan until it’s smoking, then sear the chuck roast on all sides for 3-4 minutes per side before slow cooking. The crust locks in flavor and keeps the meat juicy when it shreds later.
- Char the Onions Low and Slow: Cut your onions into thick wedges (no need to peel) and cook them in a dry skillet over medium-low heat for 20-25 minutes. They’ll turn deep brown and caramelized, adding sweetness that store-bought onion powder can’t match. Stir occasionally—burnt onions ruin the whole sandwich.
- Shred Early, Shred Often: Pull the chuck roast off the heat at 195°F (it’ll climb to 203°F while resting). Use two forks to shred it immediately—don’t wait for it to cool. The meat stays tender and separates cleanly, so you get those perfect, bite-sized chunks for the sandwich. (Yes, even if you’re impatient like me.)
- Toast the Tortillas Just Before Assembly: Warm your flour tortillas in a dry skillet over medium heat for 20 seconds per side—just until they’re pliable and slightly crisp. Cold tortillas make soggy sandwiches, and this step takes 30 seconds but makes a real difference. Keep them wrapped in a towel to stay soft while you layer.
Wine and beer pairings for these flavors
Mexican Lager Magic
For this bold, spice-forward sandwich, I always reach for a Mexican lager—it's the perfect match for the smoky, chili-infused beef. Modelo Especial or Pacifico are my go-tos because their crisp, clean finish cuts through the richness without overpowering the flavors. The subtle citrus notes in these beers actually complement the lime in the beef mixture beautifully. 🍺
If you prefer a local option, look for a Mexican-style lager from your neighborhood brewery—many craft brewers now offer these styles with unique twists. I once tried a local version from a Texas brewery that had a hint of agave, which elevated the whole experience. Serve it ice-cold to fully appreciate how it refreshes your palate between each spicy bite.
Spicy Margarita Pairing
When I want something more adventurous, I make a spicy margarita with tequila reposado, lime juice, and a touch of chili powder—just ½ teaspoon mixed into the salt for the rim. The heat mirrors the cayenne in the beef while keeping the drink vibrant and refreshing. Patron Silver or Espolón work perfectly for this style. 🍹
For a non-alcoholic option, try a spicy limeade—mix 1 cup lime juice, 2 tablespoons agave syrup, ½ teaspoon chili powder, and sparkling water. The effervescence cleanses your palate between bites, making each flavor pop. I often serve this at my Sunday dinners when I want to keep things lively but alcohol-free.
Red Wine Surprise
Don't overlook Malbec as a wine pairing—its dark fruit notes and subtle smokiness harmonize with the beef's spices. A 2019 Argentine Malbec from Mendoza pairs beautifully, especially if you let it breathe for 10-15 minutes before serving. The tannins in the wine also complement the cheese's richness. 🍷
For a lighter option, Grenache offers bright red fruit flavors that contrast nicely with the smoky paprika. Look for a Spanish Garnacha—it's often more affordable and delivers that perfect balance. I keep a bottle of Bodegas Muga on hand for these occasions, and it never disappoints.
Beer and Wine Service Tips
When serving beer, I always recommend chilled glasses—never serve Mexican lagers at room temperature. The cold temperature enhances the beer's crispness and makes it the ideal palate cleanser. For wine, use standard red wine glasses to concentrate the aromas, helping you appreciate the wine's depth alongside the sandwich's complex flavors. 🥂
Pro tip: If you're hosting, set up a DIY margarita station with lime wedges, chili powder, and a pitcher of pre-mixed margarita. Guests can customize their drinks to their heat preference, making it interactive and fun. For beer lovers, offer a flight of Mexican lagers to compare different styles—it's a great way to explore new flavors while enjoying the sandwich.
Nutrition facts
Frequently asked questions
Can I use ground beef instead of chuck roast for this recipe?
You can, but the texture will be different. Ground beef will give you a more finely textured filling, while chuck roast creates that chunky, tender bite that makes these sandwiches special. If you prefer ground beef, use 80/20 lean-to-fat ratio and brown it thoroughly for maximum flavor. The cooking time will also be shorter—about 10 minutes instead of 1 hour.
How do I keep the tortillas crispy when assembling?
Toast them just before assembling and keep them warm in a 200°F oven on a wire rack while you prepare the beef. The oven maintains warmth without steaming the tortillas. If they start to soften, quickly toast them again for 30 seconds before adding fillings. Pro tip: Brush them with a tiny bit of oil right before serving for extra crunch.
What's the best way to reheat leftovers?
Wrap sandwiches in foil and reheat in a 350°F oven for 5-7 minutes to restore crispiness. For microwave reheating, place on a plate and cover with a damp paper towel for 20-30 seconds—this prevents sogginess. The beef stays tender, but tortillas may lose some crunch. The cheese will melt beautifully either way!
Can I make this sandwich gluten-free?
Use gluten-free flour tortillas (like Mission or La Tortilla Factory brands) and ensure your spices are certified gluten-free. The beef mixture itself is naturally gluten-free. For extra security, check all spice blends for hidden additives. The flavor and texture will be just as satisfying—just watch for slightly different tortilla behavior during toasting.
Why does my beef turn out dry?
Overcooking is the most common cause. The beef should be fork-tender but still juicy after 1 hour of simmering. If it's dry, you likely reduced the liquid too much. Next time, add ¼ cup more beef broth during cooking. Also, avoid lifting the lid frequently—steam is what keeps the beef moist. For extra moisture, add 1 tablespoon of tomato paste at the end of cooking.