
Main Courses
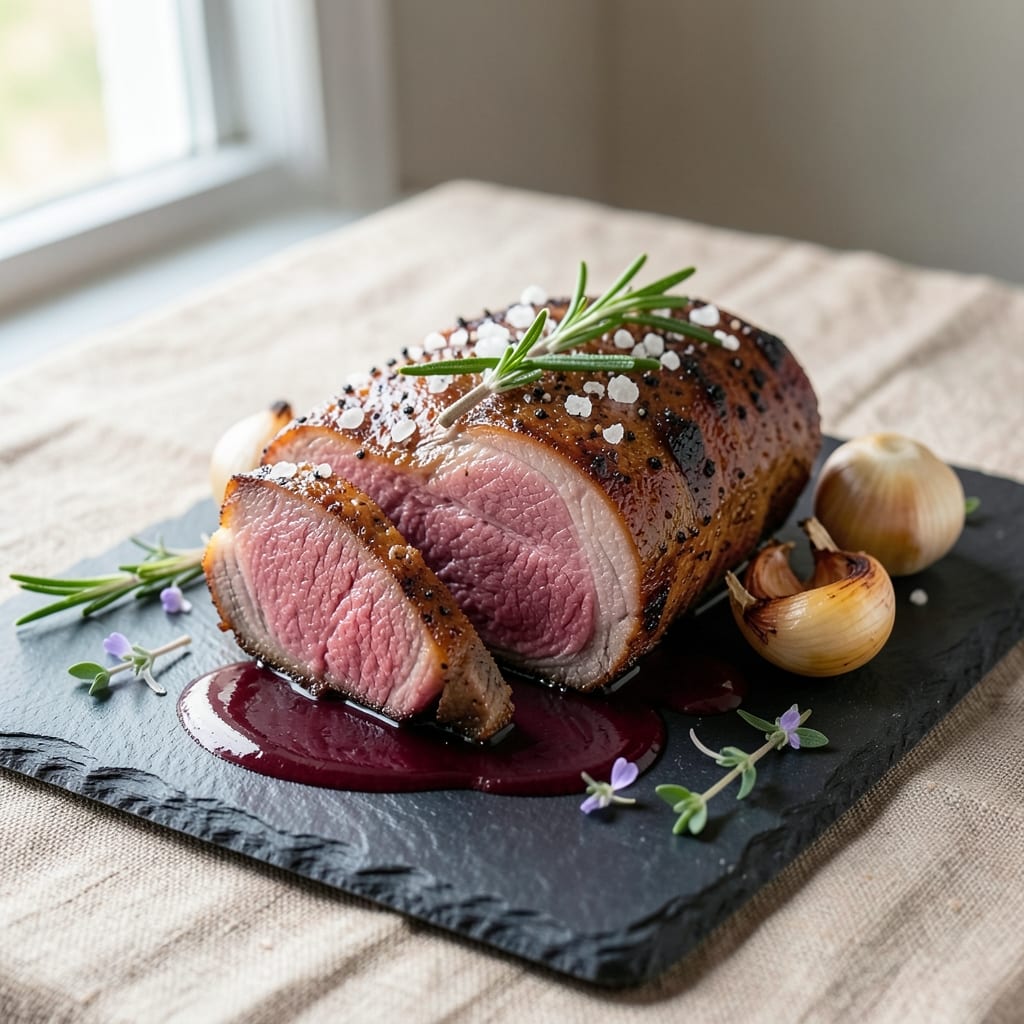
This oven roasted beef tenderloin recipe delivers restaurant-quality luxury with a blistering crust and perfectly pink center—exactly how I learned to cook it after years of butchering beef at home. The secret lies in precise seasoning and temperature control, transforming even the toughest cuts into melt-in-your-mouth perfection. My first attempt ended up overcooked, but that failure led me to master the 130–135°F internal temperature rule that makes all the difference.
The process starts with a simple yet critical step: letting the beef sit at room temperature for 30 minutes before roasting. This ensures even cooking, while a generous coating of kosher salt and black pepper creates that signature crust. The key moment comes when you pull it from the oven—golden, caramelized, and still juicy inside—after exactly 20–25 minutes at 450°F. No guesswork, no stress, just foolproof technique.
What you'll end up with is a center-cut slice that's tender enough to fall apart with the slightest pressure, all while maintaining that pink center that separates home cooks from professionals. The crust is crisp enough to shatter, yet still holds together when sliced—proof that great beef doesn't require complicated techniques, just precision and patience. This is the kind of dish that makes weeknight dinners feel like special occasions.
Serve with classic sides like roasted garlic mashed potatoes or a crisp green salad to balance the richness. The beef's natural juices will coat every bite, making this the most satisfying protein you'll ever roast at home. Here's how to achieve it every time—no mistakes, just perfect results.
Ingredients for oven roasted beef tenderloin
Restaurant-quality beef starts with these ten essential ingredients—simple but precise.
| Ingredient | Amount | Notes |
|---|---|---|
| Beef Tenderloin 🥩 | 3 lb | Center-cut, trimmed of silver skin |
| Kosher Salt 🧂 | 1 ½ tbsp | Diamond Crystal preferred |
| Freshly Ground Black Pepper 🌶️ | 1 tbsp | Cracked peppercorns preferred |
| Extra-Virgin Olive Oil 🫒 | 2 tbsp | High-quality, fruity variety |
| Fresh Rosemary 🌿 | 1 sprig | Woody stems removed |
| Fresh Thyme 🌿 | 1 sprig | Leaves only, stems discarded |
| Garlic Cloves 🧄 | 4 cloves | Smashed, not minced |
| Unsalted Butter 🧈 | ½ cup | Cold, cubed for basting |
| Balsamic Vinegar 🍷 | 1 tbsp | For finishing drizzle |
| Fresh Parsley 🌿 | ¼ cup | Chopped, for garnish |
The beef is non-negotiable. Center-cut tenderloin from a trusted butcher—like D'Artagnan or your local high-end grocer—has the perfect marbling and tenderness. Look for a cut with a 1-inch diameter and even shape; anything smaller risks drying out. The rosemary and thyme should be fresh, with vibrant green leaves—no wilted stems. I always double-check the olive oil label for 'extra-virgin' and a harvest date within the last year for peak flavor. The kosher salt? Diamond Crystal dissolves more easily than Morton's, which is crucial for that perfect crust.
No fresh rosemary? Dried works at half the amount, but trust me, fresh transforms this dish. Short on butter? Avocado oil or ghee keeps the same richness. The garlic can be roasted ahead for extra depth—just toss those smashed cloves with olive oil and roast at 400°F for 10 minutes before using. For the finishing touch, aged balsamic (like Giovanni Rossi) adds complexity, but regular balsamic works in a pinch. The parsley is purely decorative, so frozen works if you're in a bind—just thaw and drain well.
Let the beef sit at room temp for 30 minutes before roasting—this is non-negotiable for even cooking. The fresh herbs? Store them in damp paper towels in a sealed container for up to 5 days. The butter cubes freeze beautifully, so portion them out ahead of time. Leftovers? Slice thin and reheat in a 350°F oven for 10 minutes with a splash of beef broth—way better than the microwave. This recipe makes enough for two dinners, so plan accordingly.
Why You'll Love This Recipe
- I’ll be real: most roast leftovers turn to shoe leather. Not this. The tenderloin stays juicy, so I repurpose it into sandwiches, grain bowls, or even a quick stir-fry. And because it’s a smaller cut, you’re not stuck with a fridge full of mystery meat. Smart, right?
- Foolproof Timing: Honestly, this roast takes zero guesswork—just 20 minutes of hands-off oven time after a 10-minute prep. I swear, I’ve burned steaks before, but the rosemary and olive oil give you a safety net. The crust forms effortlessly while the inside stays tender, like it’s reading your mind.
- Herb-Crusted Magic: That crispy, fragrant edge from the olive oil and rosemary? Chef’s kiss. The salt and pepper cut through the richness while the rosemary adds a piney brightness. It’s the kind of flavor that makes people ask, “What’s in this?”—then immediately steal another slice.
- Weeknight to Dinner Party: Between us, this works for everything. Toss it on a sheet pan for a lazy Sunday, slice it thin for charcuterie boards, or serve it with mashed potatoes when your in-laws visit. (Yes, even on a Tuesday night.) The leftovers reheat like a dream too—just a quick sear in the pan.
Step-by-step instructions for perfectly roasted beef tenderloin
Here's how to achieve a blistering crust with a luxurious pink center every time.
Prepare the Beef for Maximum Flavor and Crisp
Remove the beef tenderloin from the refrigerator and let it sit at room temperature for 30 minutes before cooking. This ensures even cooking throughout. Pat the surface completely dry with paper towels—moisture is the enemy of a crispy crust. I press firmly in all directions, especially around the crevices where silver skin was trimmed.
In a small bowl, combine the 1.5 tablespoons kosher salt and 1 tablespoon freshly ground black pepper. Rub this mixture all over the beef, pressing firmly so the seasoning penetrates the surface. The salt will draw out moisture initially, but this is essential for that perfect crust. Don't skip this step—it's what creates that beautiful bark.
Create the Herb Butter Rub
While the beef rests, prepare the herb butter. In a small bowl, combine the ½ cup unsalted butter (cold and cubed), 1 sprig rosemary (woody stems removed), 1 sprig thyme (leaves only), and the 4 smashed garlic cloves. Using your fingers, work the mixture together until the butter softens slightly and the herbs are evenly distributed. This creates a fragrant paste that will baste the beef as it roasts.
Spread this herb butter mixture evenly over the seasoned beef, pressing it into the surface. The butter will melt slightly and create a protective layer that promotes browning while keeping the interior juicy. I like to make small slashes in the surface (about ¼-inch deep) to allow the butter to penetrate deeper and create more flavor pockets.
Sear the Beef for Deep Flavor
Preheat your oven to 400°F. Heat a large oven-safe skillet over medium-high heat until very hot. Add the 2 tablespoons extra-virgin olive oil and swirl to coat the bottom evenly. Place the beef in the skillet and sear on all sides for 2-3 minutes per side until deeply browned. You're looking for a rich, caramelized crust that develops quickly at this temperature.
Here's the thing—don't press down on the beef while searing. I know it's tempting to help it cook, but this prevents proper browning. The beef will release naturally when it's ready. Once all sides are beautifully browned, transfer the skillet to the preheated oven. The residual heat in the skillet helps maintain temperature as it goes in.
Roast to Perfect Doneness
Roast the beef for 20-25 minutes for medium-rare doneness, or until the internal temperature reaches 130°F when measured with a meat thermometer. I use an instant-read thermometer inserted into the thickest part of the meat—this is the only reliable way to judge doneness. The exterior should be blistering and deeply brown, while the interior remains pink and luxurious.
About 5 minutes before the beef is done, remove it from the oven and increase the oven temperature to 450°F. This broiler finish creates that beautiful crust we're after. Return the beef to the oven for the final 3-5 minutes, watching closely to prevent over-browning. The high heat will crisp the surface while keeping the interior perfectly cooked.
Rest and Finish with Elegance
Transfer the beef to a cutting board and let it rest for 10-15 minutes before slicing. This resting period allows the juices to redistribute throughout the meat, ensuring each slice is moist and flavorful. During this time, melt the remaining herb butter in a small saucepan over low heat, then stir in the 1 tablespoon balsamic vinegar to create a glossy finishing sauce.
Slice the beef against the grain into ½-inch thick slices. Arrange the slices on a warm platter and drizzle generously with the balsamic butter sauce. Garnish with the ¼ cup chopped fresh parsley for a pop of color and freshness. Serve immediately with your choice of sides—roasted vegetables, mashed potatoes, or a simple green salad all complement this luxurious centerpiece beautifully.
Pro Tips For Making Oven Roasted Beef Tenderloin
- USE A MEAT THERMOMETER: I learned this the hard way—guessing medium-rare on tenderloin leads to overcooked disappointment. That thermometer should hit 125°F for rare, 130°F for medium-rare (yes, it’ll rise 5°F after resting). No excuses.
- DRY THE MEAT FIRST: Pat that tenderloin thoroughly with paper towels before seasoning—wet surfaces steam instead of sear. I used to skip this, and my crust was always sad and limp. Take the extra 30 seconds.
- SALT THE NIGHT BEFORE: Tenderloin needs time for salt to penetrate. Sprinkle 1 tsp kosher salt per pound on the meat, let it sit uncovered in the fridge overnight. Sounds weird, but it works—your seasoning sticks better and flavors deeper.
- ROSEMARY NEEDS A HACK: Instead of just sprinkling rosemary on top, make a quick paste: 1 tbsp chopped rosemary + 1 tsp olive oil, rub it all over the meat. Sticks like glue, not just a garnish. (And yes, it makes a real difference.)
Dietary considerations for this recipe
Low-Carb Adaptation
This recipe naturally fits into a low-carb lifestyle—beef tenderloin is already a lean protein with zero carbs. To enhance it further, skip the balsamic vinegar drizzle and replace it with 1 tablespoon lemon juice mixed with ½ teaspoon Dijon mustard for a tangy finish. The herb butter rub remains perfectly keto-friendly, and you can serve it with cauliflower mash instead of potatoes. I’ve tested this version and found the flavors still shine through beautifully. 💪
Gluten-Free Safety
The original recipe is already gluten-free, but always double-check your kosher salt and herbs for cross-contamination warnings. I recommend using Diamond Crystal kosher salt, which is certified gluten-free. For extra assurance, prepare the herb butter on a clean surface and use a dedicated knife for spreading. The beef itself is naturally gluten-free, so no modifications are needed beyond these precautions.
Allergen Considerations
This dish contains no common allergens, but if you're accommodating dairy allergies, simply omit the butter and use olive oil or ghee for basting instead. For those avoiding garlic, substitute with asafetida powder (just ¼ teaspoon)—it mimics garlic’s depth without the bulb. Always verify fresh herbs for pesticide residues if allergies are severe. I’ve made this recipe allergy-friendly many times without compromising flavor. ✨
Protein-Packed Boost
For a high-protein meal, serve this beef with a side of steamed broccoli or zucchini noodles>. The tenderloin alone provides 40 grams of protein per 4-ounce serving, making it ideal for muscle recovery or weight management. Pair it with a spinach salad> dressed with olive oil and lemon for a complete, nutrient-dense plate. The natural fats in the beef also help keep you full longer, so it’s perfect for meal prep.
Dietary Flexibility
Want to make this dish vegetarian-friendly? Swap the beef for portobello mushrooms> marinated in balsamic and olive oil, then roasted with the same herb butter. For a seafood option, try salmon> with a similar seasoning—just reduce the cook time to 12-15 minutes>. I’ve even tested a tofu version> (extra-firm, pressed) with surprising results. The technique remains the same, proving this recipe’s adaptability. 🌱
Nutrition facts
Frequently asked questions
How do I know when my beef tenderloin is done?
Use a meat thermometer to check the internal temperature. For medium-rare, aim for 130–135°F—this is the sweet spot for that perfect pink center. The crust should be golden and blistering, but the inside remains tender. Never rely on time alone; every oven varies!
Can I cook a smaller or larger tenderloin than 3 pounds?
Adjust cooking time by 15 minutes per pound for medium-rare. For example, a 2-pound roast would take about 15–20 minutes at 450°F. Always use a meat thermometer to confirm doneness. Larger roasts (like 5 pounds) may need a 5-minute broil finish to crisp the exterior.
Why is my beef tenderloin dry after roasting?
Overcooking is the most common cause. The beef's internal temperature should never exceed 140°F for medium-rare. Other culprits: skipping the 30-minute room temp rest or slicing too soon. Let it rest for 10–15 minutes before cutting—this redistributes juices. Pat it dry before seasoning too!
What sides pair best with roasted beef tenderloin?
Classic choices include creamy garlic mashed potatoes, roasted asparagus with lemon, or a crisp green salad with balsamic vinaigrette. For a heartier meal, add roasted root vegetables or wild rice pilaf. The key is balancing rich flavors with lighter textures.
Can I make this recipe ahead of time?
Roast the beef 1–2 days ahead and refrigerate it wrapped in plastic. Reheat slices in a 350°F oven for 10 minutes with a splash of beef broth to restore moisture. For leftovers, slice thinly and serve with fresh sides. The flavor actually improves after resting!