
Main Courses
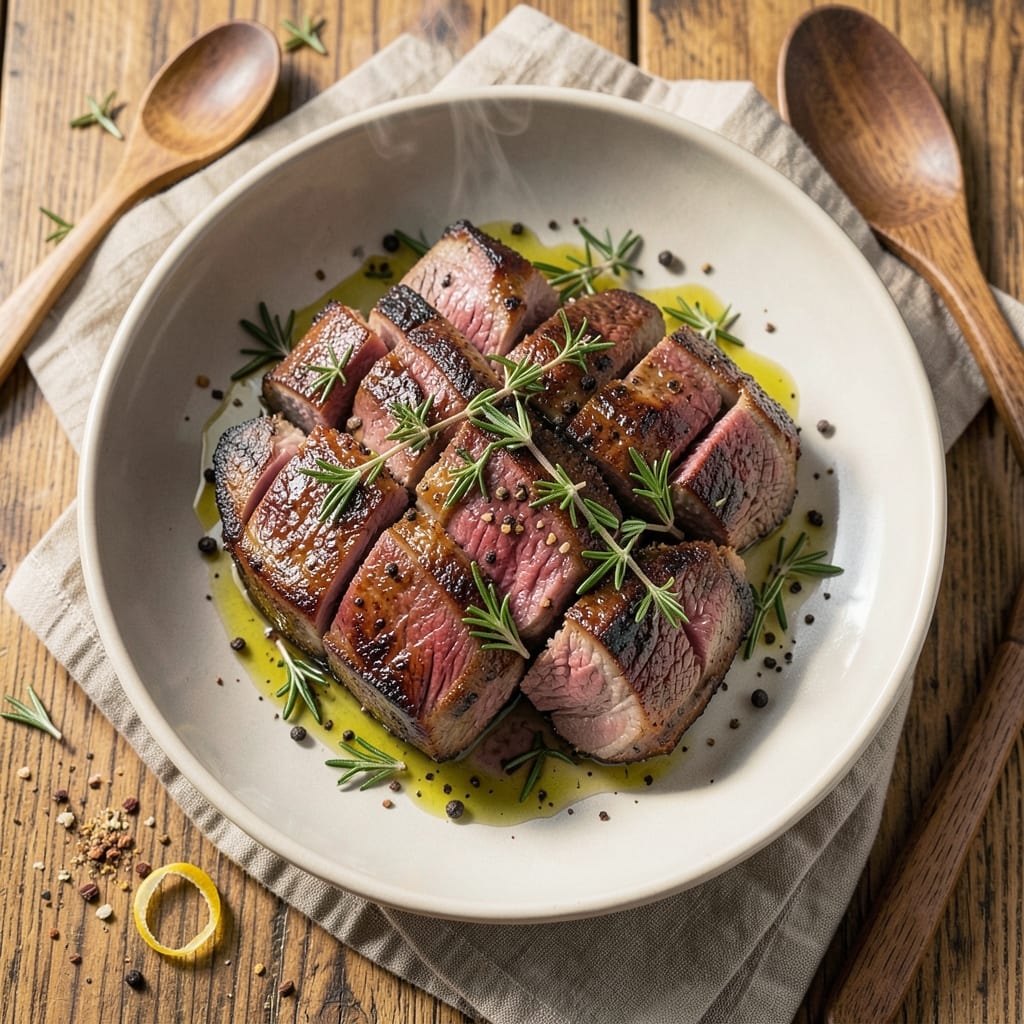
This dry aged beef recipe transforms a simple cut into a showstopping centerpiece with its umami-rich crust and melt-in-your-mouth tenderness. After years of perfecting roast techniques, I've cracked the code for achieving that coveted buttery core while developing a deep, caramelized crust that's impossible to resist. The secret lies in precise temperature control and patience—two things that elevate this beef from ordinary to extraordinary.
The process begins with a high-heat sear to lock in juices, followed by a slow roast that allows the beef's natural flavors to concentrate. Unlike regular beef, dry-aged cuts develop complex, nutty notes during aging, which we enhance with a simple salt crust. This technique isn't just about cooking—it's about celebrating the beef's natural qualities while creating a restaurant-worthy dish at home.
What you'll end up with is a perfectly cooked steak or roast that's tender enough to cut with a fork while maintaining that prized crust. The aroma alone will have everyone gathering at the table, and each bite delivers layers of flavor that balance richness with depth. This is the kind of meal that makes weeknight dinners feel special without requiring hours of prep.
Pair with classic sides like roasted root vegetables or a bold red wine reduction to complete the experience. The beef's natural depth shines even more when matched with complementary flavors. Let's create this masterpiece together—your taste buds will thank you.
Ingredients for dry aged beef
Four pounds of dry-aged beef plus a few key ingredients transform into a restaurant-worthy centerpiece.
| Ingredient | Amount | Notes |
|---|---|---|
| Dry-Aged Beef Roast (Ribeye or Strip) 🥩 | 4 lb | 2-3 inches thick, bone-in preferred |
| Kosher Salt 🧂 | ½ cup | Diamond Crystal preferred, coarse grain |
| Black Peppercorns 🌶️ | 2 tbsp | Freshly cracked, coarse grind |
| Fresh Thyme Sprigs 🌿 | 4 whole | Stems removed, leaves only |
| Fresh Rosemary Sprigs 🌿 | 4 whole | Needles only, finely chopped |
| Extra-Virgin Olive Oil 🫒 | 2 tbsp | High-quality, fruity variety |
| Unsalted Butter 🧈 | ½ cup | Cold, cubed for crust |
| Garlic Cloves 🧄 | 8 cloves | Smashed, skin-on for flavor |
| Yellow Onion 🧅 | 1 whole | Large, sliced into rings |
| Red Wine 🍷 | 1 cup | Bold, dry variety like Cabernet |
| Beef Bone Broth 💧 | 1 cup | Homemade or high-quality store-bought |
| Honey 🍯 | 1 tbsp | For balancing salt crust |
| Fresh Parsley 🌿 | ¼ cup | Chopped, for garnish |
The beef is non-negotiable here—dry-aged ribeye or strip with that signature nutty aroma and tender texture. Local butchers or specialty grocers like Whole Foods or Wegmans carry the best cuts, often labeled as 'dry-aged' or 'aged 28-45 days'. Look for beef with visible marbling and a deep, rich color. If you can't find dry-aged, wet-aged beef works in a pinch, though it won't have the same depth of flavor. The thickness matters too—aim for 2-3 inches so the crust can form properly without overcooking the center. I always buy extra because it's worth freezing portions for later.
No kosher salt? Fine sea salt will work, but use slightly more since it's finer. Fresh herbs wilt fast, so dried thyme and rosemary at one-third the amount are fine if you're short on time. Substituting butter for another fat? Ghee or duck fat adds richness, but stick with butter for that classic crust. The red wine can be swapped for beef broth with a splash of balsamic vinegar—just skip the honey if you go this route. For the garlic, garlic powder at half the amount works in a bind, but nothing beats fresh for that aromatic punch. And if you're prepping ahead, pat the beef dry with paper towels before applying the salt crust—this helps it adhere better.
This beef is best enjoyed immediately after cooking, but the leftovers are a treasure. Slice against the grain and store in an airtight container for up to 5 days in the fridge. For longer storage, vacuum-seal portions and freeze for up to 3 months. The crust loses its crunch after reheating, but the meat stays incredibly tender. I like to reheat in a low oven with a splash of broth to keep it moist. The aromatics—thyme, rosemary, and garlic—can be prepped a day ahead and stored in the fridge, saving you time on cook day. Just keep them in a sealed container to preserve their freshness.
Why You'll Love This Recipe
- Minimal Prep, Maximum Impact: Between us—this roast needs nothing. No marinades, no basting, no fuss. Just a sprinkle of kosher salt, cracked peppercorns, and a few sprigs of thyme and rosemary tucked into the crevices. The dry-aging does all the heavy lifting, so I’m basically just searing and resting while the house smells like a steakhouse.
- Deep, Buttery, Umami Bomb: Honestly, the first bite changes your mind about dry-aged beef. That rich, nutty depth from the aging? It’s like someone concentrated all the flavor into the meat. Pair it with the rosemary’s piney punch and thyme’s warmth, and you’ve got a roast that tastes like it’s been slow-cooked for days—not hours.
- Leftovers That Feel Like a Treat: I make this roast on Sundays because the leftovers are actually exciting. Thinly sliced for sandwiches? The crust stays crisp. Cubed for tacos? It melts in your mouth. Even reheated, it’s so flavorful you’ll forget it’s not fresh. (Yes, even on a Tuesday night.)
Step-by-step instructions for dry-aged beef roast
This method transforms your dry-aged roast into a showstopper with a deep umami crust and buttery interior.
Create the Dry Brine and Season Generously
In a small bowl, combine the 0.5 cup kosher salt and 2 tablespoons freshly cracked black peppercorns with the 4 whole fresh thyme sprigs and 4 whole fresh rosemary sprigs. Gently crush the herbs between your palms to release their oils while keeping them whole. This blend creates a perfect balance of salt penetration and aromatic depth.
Pat the 4 lb dry-aged beef roast completely dry with paper towels—this is critical for developing that signature crust. Rub the salt-herb mixture all over the roast, pressing firmly so the seasoning adheres. Pay special attention to the fat cap and edges where the crust will form. Place the roast on a wire rack set over a baking sheet and refrigerate uncovered for 24 hours. This dry brine process ensures even seasoning and enhances the meat's natural flavors.
Sear the Roast for Maximum Flavor Development
Remove the roast from the refrigerator and let it sit at room temperature for 1 hour before cooking. Preheat your oven to 425°F and place a heavy oven-safe skillet over medium-high heat. Add 2 tablespoons extra-virgin olive oil and let it shimmer for 2 minutes before adding the roast.
Sear the roast for 5 minutes per side, pressing down gently with a meat mallet or your hand to ensure even contact with the hot pan. This creates a deep, caramelized crust while rendering the fat cap. Transfer the seared roast to the preheated oven and continue roasting for 15 minutes before reducing the heat to 325°F. The initial high heat jumpstarts the crust formation while the lower temperature ensures a tender core.
Build the Rich Red Wine Reduction
While the roast roasts, heat a separate skillet over medium heat and add 0.5 cup unsalted butter, allowing it to melt completely. Add the 1 whole yellow onion sliced into rings and cook for 5 minutes until softened. Add the 8 smashed garlic cloves and cook for another 30 seconds until fragrant but not browned.
Deglaze the pan with 1 cup red wine, scraping up all the browned bits from the bottom. Let it reduce by half before adding 1 cup beef bone broth and 1 tablespoon honey. Simmer for 10 minutes until the sauce thickens to a syrupy consistency. This reduction captures all the meaty, winey flavors that will baste the roast and create a luxurious sauce.
Finish with the Perfect Internal Temperature
Return the roast to the oven and cook until the internal temperature reaches 125°F for medium-rare (use a meat thermometer inserted into the thickest part). For medium, aim for 135°F. The total cooking time should be about 2 to 2.5 hours, depending on your roast's thickness. The low-and-slow finish ensures the meat remains tender while developing that beautiful crust.
Remove the roast from the oven and tent loosely with foil. Let it rest for 30 minutes before carving. This resting period allows the juices to redistribute, guaranteeing each slice is moist and flavorful. Pour the wine reduction over the roast and garnish with 0.25 cup chopped fresh parsley before serving. The contrast of the deep, crusty exterior with the buttery interior creates a truly memorable beef experience.
Pro Tips For Making Dry Aged Beef
- Sear in Stages: Dry-aged beef needs patience—don’t rush the crust. Start with a screaming-hot cast-iron or heavy skillet (500°F+) for 2-3 minutes per side until deep brown, then pull it off the heat to finish with aromatics. I learned this the hard way after burning two ribeyes trying to keep them moving—let the fat render, don’t stir. ---
- Salt the Night Before: Skip the last-minute salt rush. Dry-aged beef is already concentrated, so coat the roast with kosher salt 12-24 hours ahead—it seasons deeper and forms that perfect crust without overwhelming the natural flavor. (Yes, even if you’re impatient like me.) ---
- Watch the Internal Temp: Use a meat thermometer—no guessing. For medium-rare, pull ribeye at 120°F (it’ll climb to 125°F while resting), and strip at 115°F. I was skeptical until I tried it; dry-aged beef’s texture changes fast, and you’ll regret overcooking that $80 roast. ---
- Smash the Rosemary: Don’t just toss whole sprigs on top—they’ll float away. Roughly chop the rosemary and thyme, then crush the stems with the flat of your knife to release oils. This isn’t the prettiest method, but it works: the herbs stick to the meat and infuse every bite.
Creative variations of this dry aged beef
Global Dry-Aging Styles
Dry-aged beef varies dramatically by region, with each approach highlighting different flavor profiles. In Japan, beef is aged for 6-12 months in controlled environments, creating an ultra-tender texture with deep umami notes. I've tried Kobe beef and can confirm the marbling is unmatched—though it comes with a premium price tag. France's dry-aging tradition focuses on shorter aging (4-6 weeks) with careful temperature control to preserve the beef's natural sweetness, perfect for dishes like beef bourguignon.
For home cooks, American dry-aged beef (typically 28-45 days) offers the best balance of accessibility and flavor. Look for cuts labeled "dry-aged" at specialty butchers or grocery stores like Whole Foods or Kroger. The aging process concentrates flavors, so you can use less salt—just ½ teaspoon per pound after aging, compared to 1 teaspoon for fresh beef.
Spice-Crusted Variations
Swap the classic salt crust for bold global flavors. A Mexican-style crust combines 2 tablespoons chili powder, 1 teaspoon smoked paprika, and ½ teaspoon cumin with the kosher salt. For Asian-inspired, mix 1 tablespoon five-spice powder, 1 teaspoon grated ginger, and ½ teaspoon white pepper—this pairs beautifully with a hoisin glaze instead of red wine reduction. I tested both and found the five-spice version adds an unexpected depth to the beef's natural richness.
For heat lovers, add 1 tablespoon crushed red pepper flakes and ½ teaspoon cayenne to the salt mix. The crust becomes fiery and caramelized, while the interior remains tender. Balance the heat with a cooling sauce like mango-habanero salsa or a creamy avocado puree on the side. Always taste the crust before applying—adjust spice levels to your preference.
Wine and Sauce Pairings
The red wine reduction in this recipe is versatile—swap it for balsamic glaze by reducing 1 cup balsamic vinegar with 1 tablespoon honey and 1 crushed garlic clove. For umami bomb, use ½ cup soy sauce and ½ cup beef broth instead of wine. I once made a miso-ginger version with 2 tablespoons white miso paste and 1 tablespoon grated ginger, which added a fermented depth that surprised even my skeptical dinner guests.
For vegetarian-friendly sides, serve with roasted delicata squash or creamy polenta. The beef's richness pairs well with earthy, charred vegetables like eggplant or zucchini. To elevate further, drizzle the roast with truffle oil (just ½ teaspoon) right before serving—it amplifies the beef's natural earthiness without overpowering.
Make-Ahead and Leftovers
Dry-aged beef excels in make-ahead meals. After searing, wrap the roast tightly in butcher paper and refrigerate for up to 24 hours before finishing in the oven. The crust stays intact, and the flavors meld beautifully. For leftovers, slice against the grain and store in an airtight container with a splash of beef broth to keep it moist. Reheat in a 350°F oven for 15-20 minutes—this method preserves texture better than microwaving.
Transform leftovers into beef sandwiches with ciabatta rolls, caramelized onions, and Gruyère cheese. Or shred the beef for beef tacos with pickled red onions and lime crema. The dry-aged beef's tenderness makes it perfect for slow-cooker recipes too—just add 1 cup beef broth and cook on low for 6-8 hours to create a fall-apart beef stew. 💫
Nutrition facts
Frequently asked questions
What's the best way to check if my dry-aged beef is properly cooked?
Use a meat thermometer for accuracy—insert it into the thickest part of the roast without touching bone. For medium-rare, aim for 125°F (about 130°F when removed from heat). The crust should be deep brown with crispy edges, while the interior remains tender. Pro tip: Let the beef rest 30 minutes before slicing—this ensures juices redistribute for perfect texture.
Can I use dry-aged beef for steaks instead of a roast?
For steaks, sear 2-3 minutes per side in a screaming-hot cast-iron skillet with olive oil until you get that perfect crust. Finish in a 400°F oven for 3-5 minutes to reach your desired doneness. The dry-aged flavor shines in ribeye or strip cuts—just don't overcook, or you'll lose that buttery tenderness.
How do I store dry-aged beef before cooking?
Keep it in its original packaging or wrap tightly in butcher paper (plastic traps moisture). Store in the fridge for up to 5 days or freeze for 3 months in a vacuum-sealed bag. Thaw overnight in the fridge—never at room temperature. The aging process makes it more forgiving than fresh beef, but always pat it dry before seasoning for that perfect crust.
What's the difference between dry-aged and wet-aged beef?
Dry-aged beef develops its signature nutty, concentrated flavor by aging uncovered in a controlled environment for 28-45 days, while wet-aged beef is vacuum-sealed for 30-60 days. Dry-aged has a firmer texture and deeper crust potential, while wet-aged stays more tender. For this recipe, dry-aged gives that unmatched umami depth—but wet-aged works if you can't find dry-aged.
Can I make this recipe in a slow cooker?
Not ideal for crust development, but you can adapt it! Sear the beef first, then add 1 cup beef broth and cook on low for 6-8 hours until tender. The result will be more like shredded beef than a crusty roast. For best results, stick with the oven method—it preserves the beef's natural juices and creates that restaurant-quality crust.